
← All integrations

Email service provider
Newsletter Glue Integration
The all-in-one newsletter sending engine for WordPress. Build and send directly newsletters with Newsletter Glue without a third-party email service provider.
What you can achieve with this integration
- Connect to WordPress via API key.
- Collect new subscribers with our built-in form that connects to your Newsletter Glue account.
- Build your newsletters in WordPress, send them out using Newsletter Glue.
- Send a campaign to your specific subscriber’s segments.
- Add your own merge tags that are already on Newsletter Glue.
How to integrate Newsletter Glue Email Service Provider with WordPress using Newsletter Glue plugin
Prerequisites
- Newsletter Glue plugin and license
- Fill out the approval form to enable sending
- WordPress site with Newsletter Glue plugin already installed
Integrate during Newsletter Glue onboarding
Step 1: Go through onboarding to get your API key
After activating the Newsletter Glue plugin, you’ll be taken to our onboarding wizard.
Enter your license key to activate your license. Then, connect your email service provider.
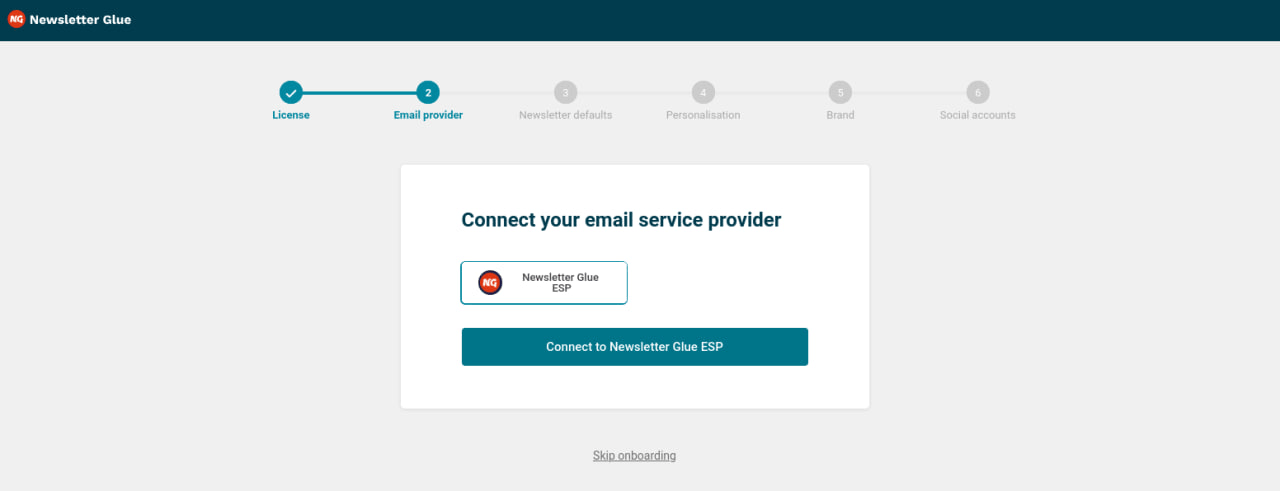
- Select Newsletter Glue ESP from the Email service provider options.
- Click on Connect to Newsletter Glue ESP.
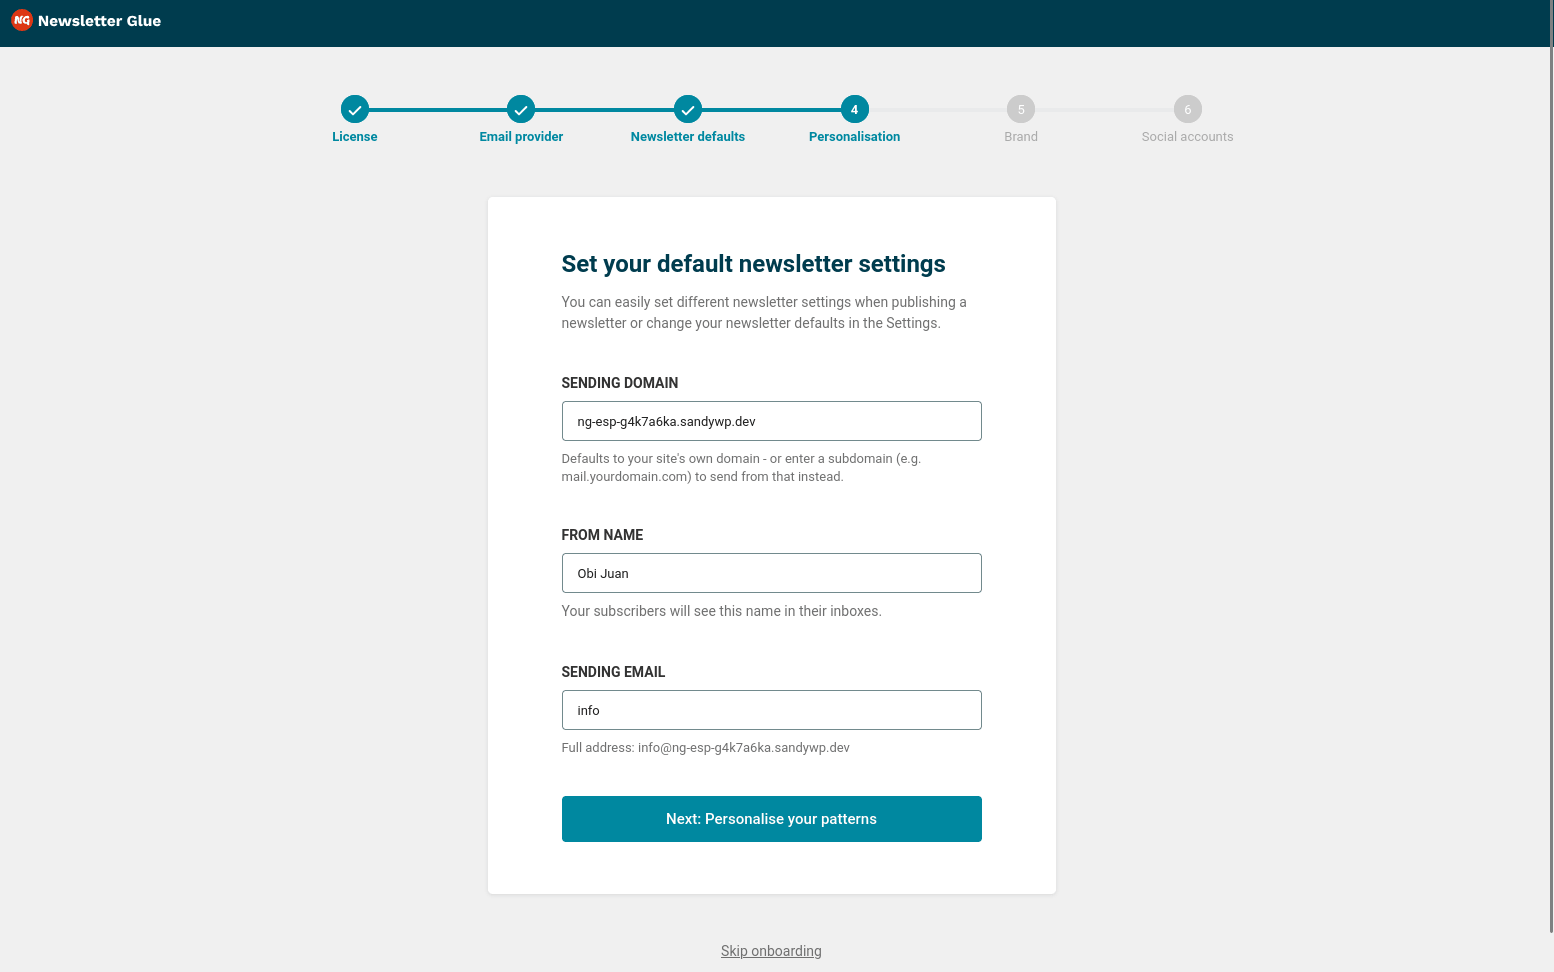
- Set your Sending domain, From Name, and Sending Email.
- Select Next: Personalise your patterns.
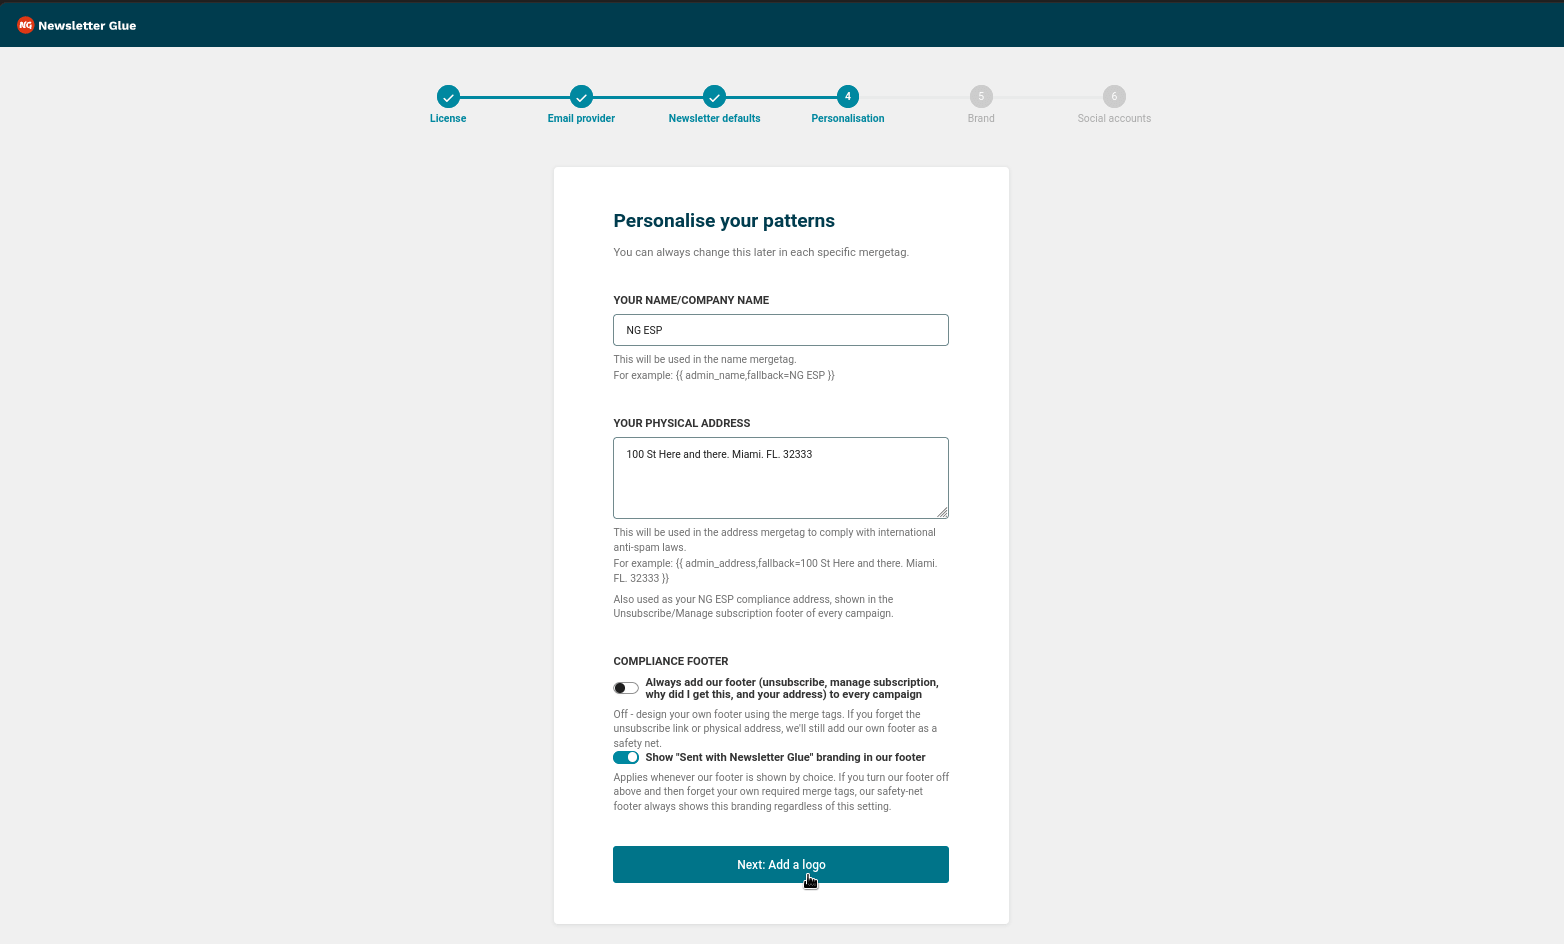
- Set Your Name/Company Name, Your Physical Address, and Compliance Footer settings.
- Click on Next: Add a logo.
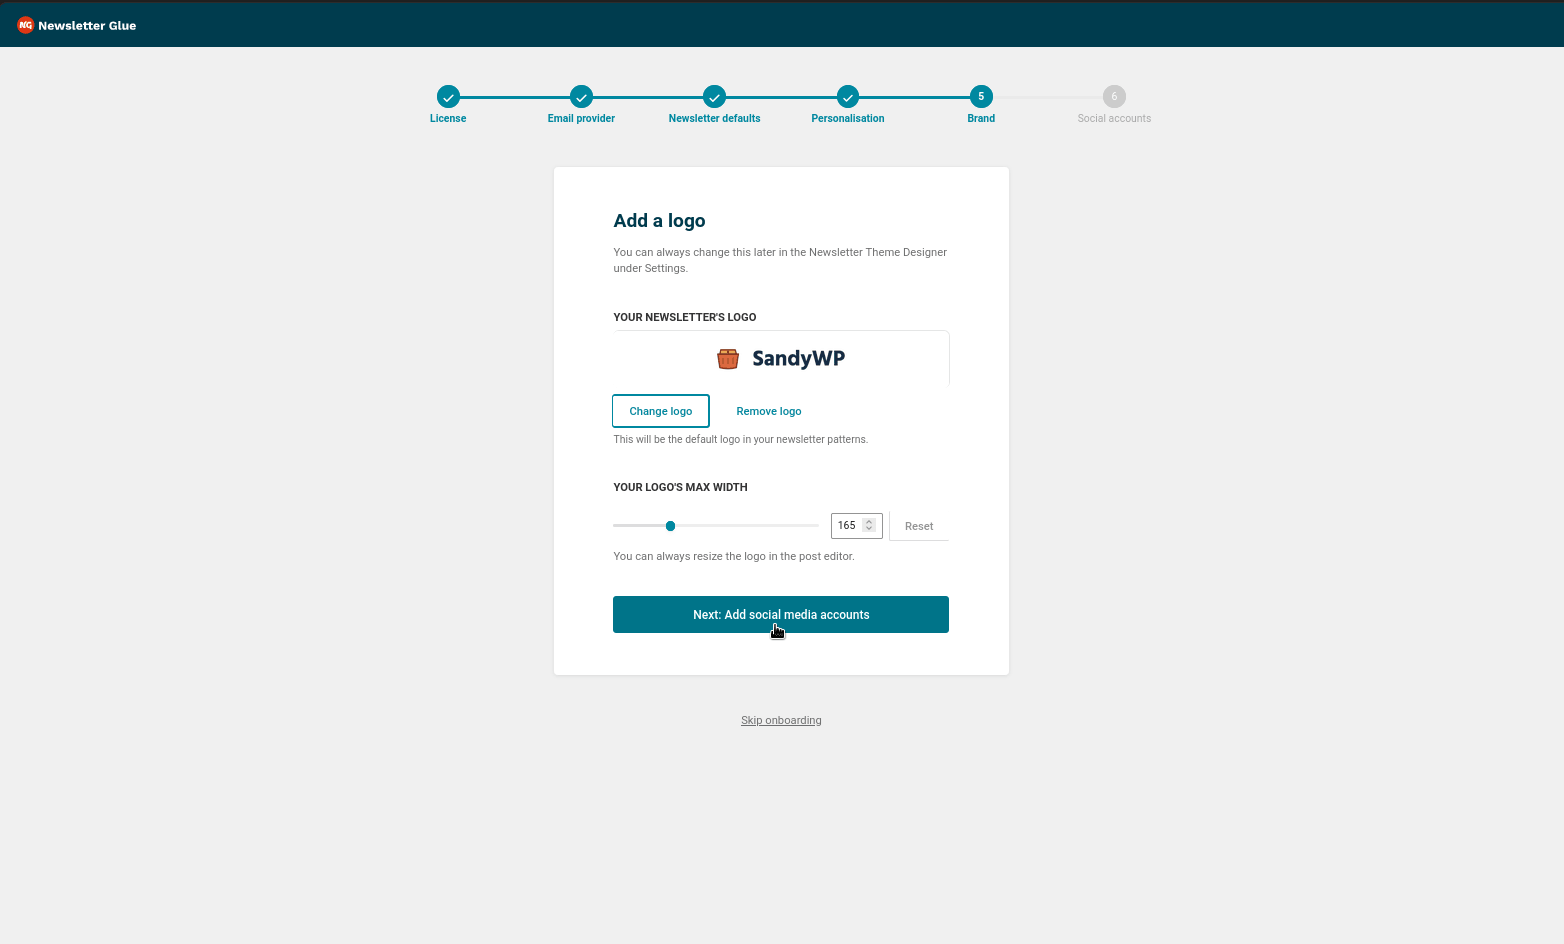
- Set your logo
- Select Next: Add social media accounts.
- Add optional social media accounts.
- Select Complete onboarding and head to demo post.
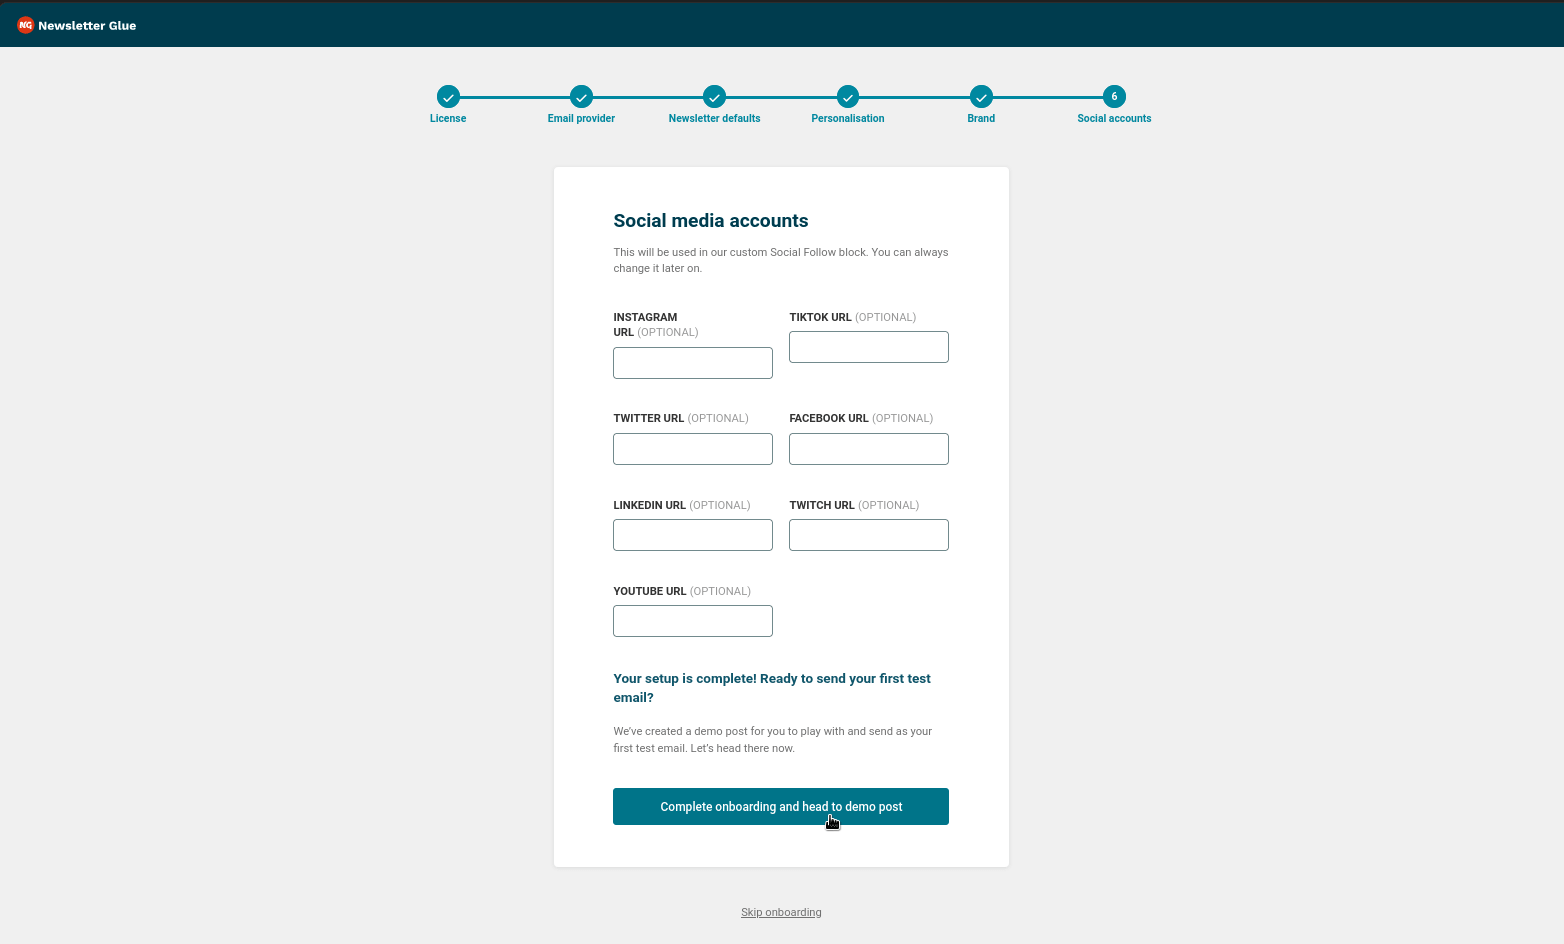
- After the onboarding wizard finishes, you’ll be taken to a first demo campaign. Go back to the WP Admin.
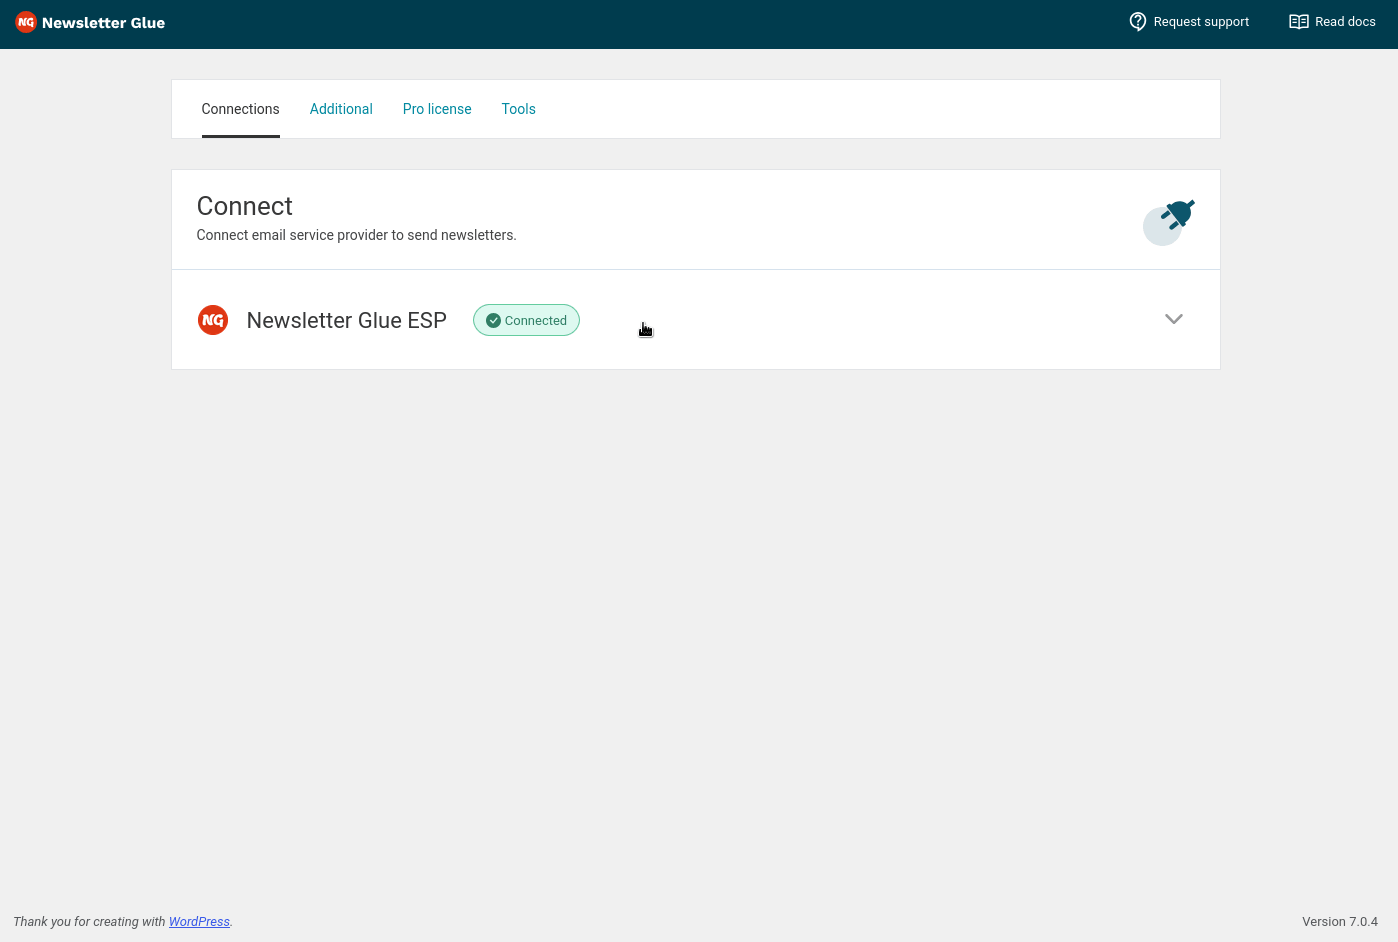
- In the admin, go to Newsletters > Settings > Connections. You’ll see Newsletter Glue ESP with the status Connected.
- Click the connection UI to expand the information.
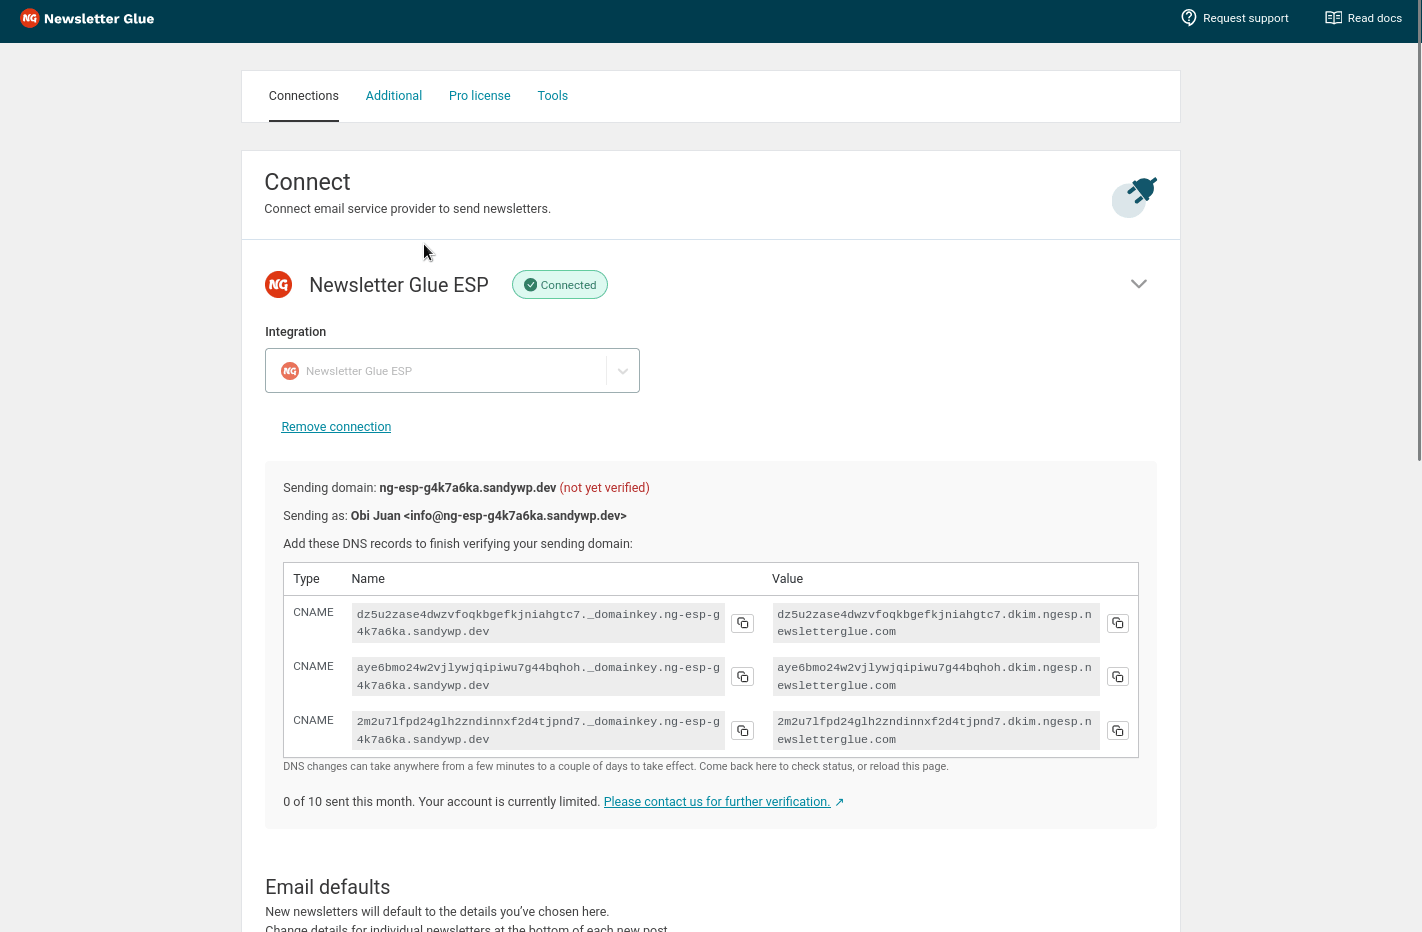
- You’ll see that your domain is not yet verified. You need to verify your domain to send emails. To verify your domain, copy the DNS records on the screen and add them to your domain registrar’s DNS configuration OR to your Cloudflare account.
- The domain verification is automated and may take up to 72 hours for the DNS records propagation.
- Lastly, please contact us for further verification to enable sending.
Integrate from Settings → Connections
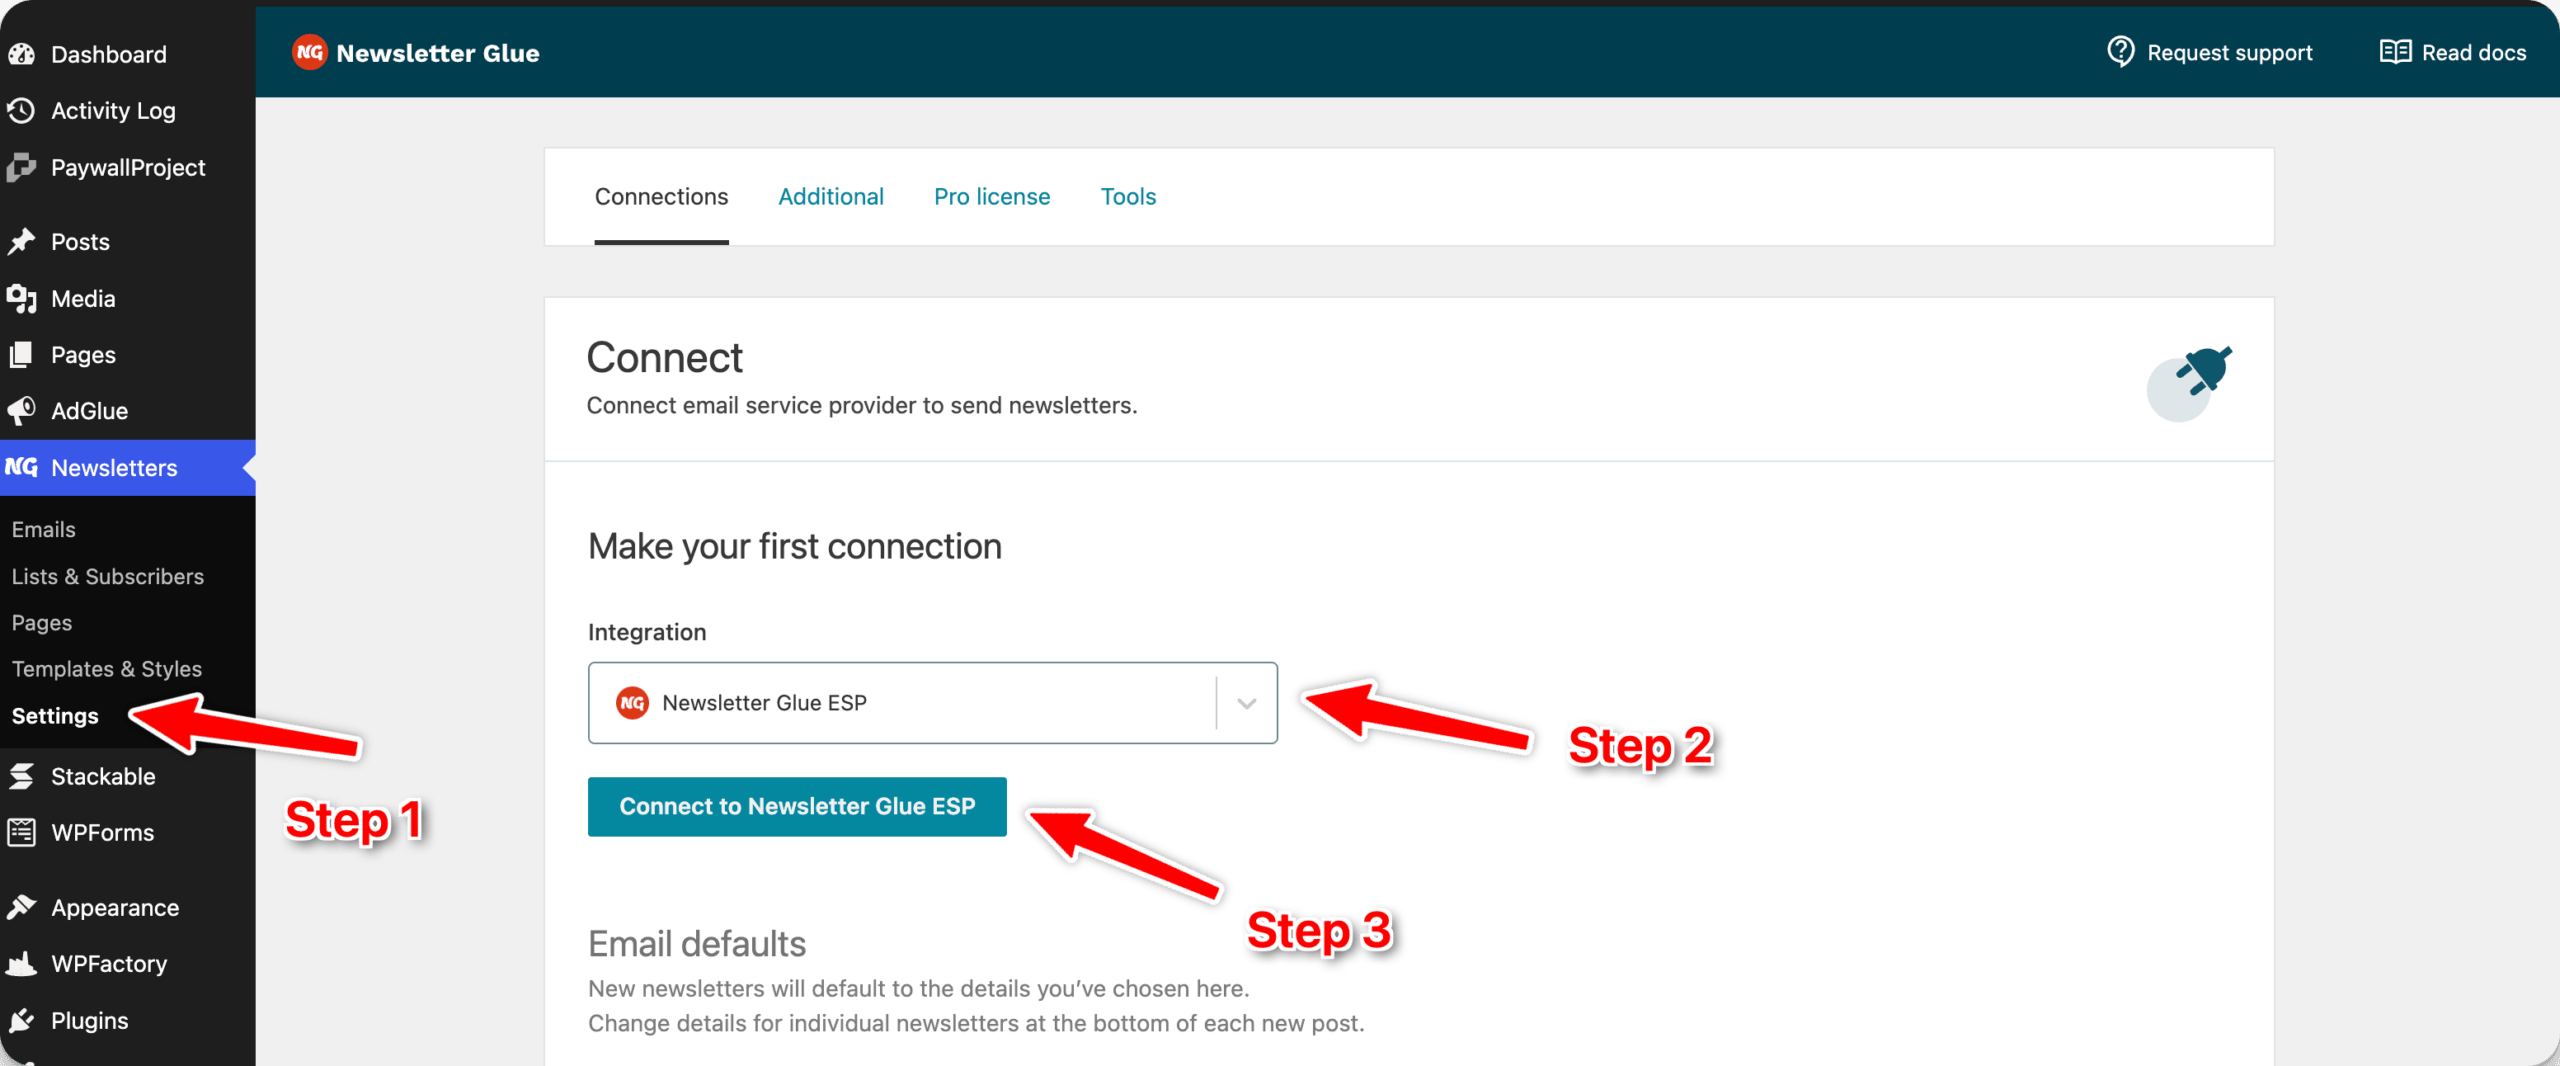
Step 1: Login to your WordPress admin and head to Newsletter Glue settings
- Login to your WordPress admin and head to Newsletters > Settings
- Then, select Newsletter Glue ESP from the Integration dropdown options
- And click on Connect to Newsletter Glue ESP.
Step 2: Enter your sending identity details and connect
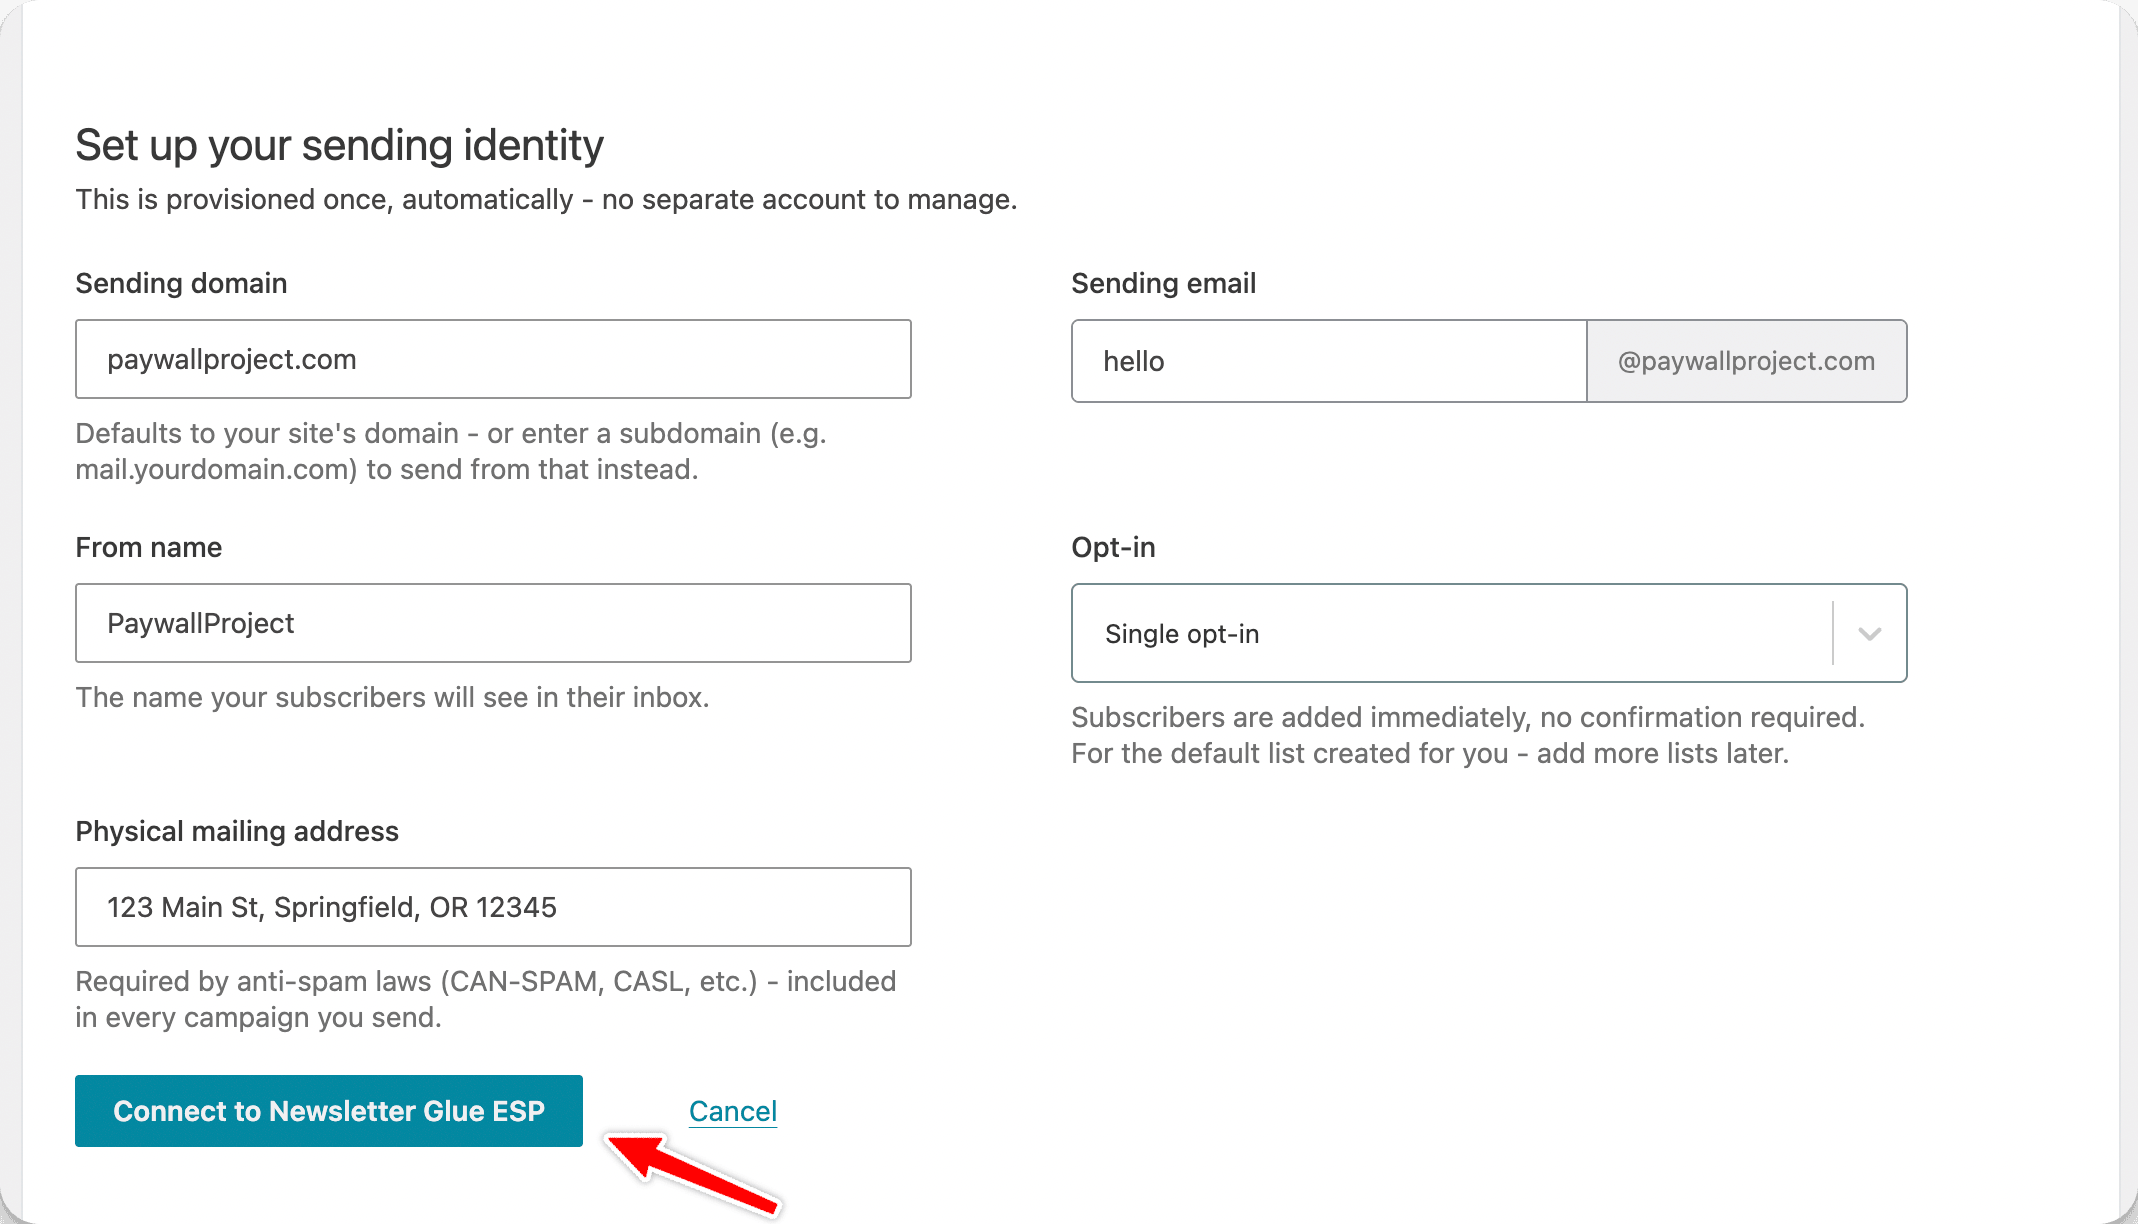
- Enter your Sending domain, Sending email, From name, Opt-in, and Physical mailing address.
- Select Connect to Newsletter Glue ESP.
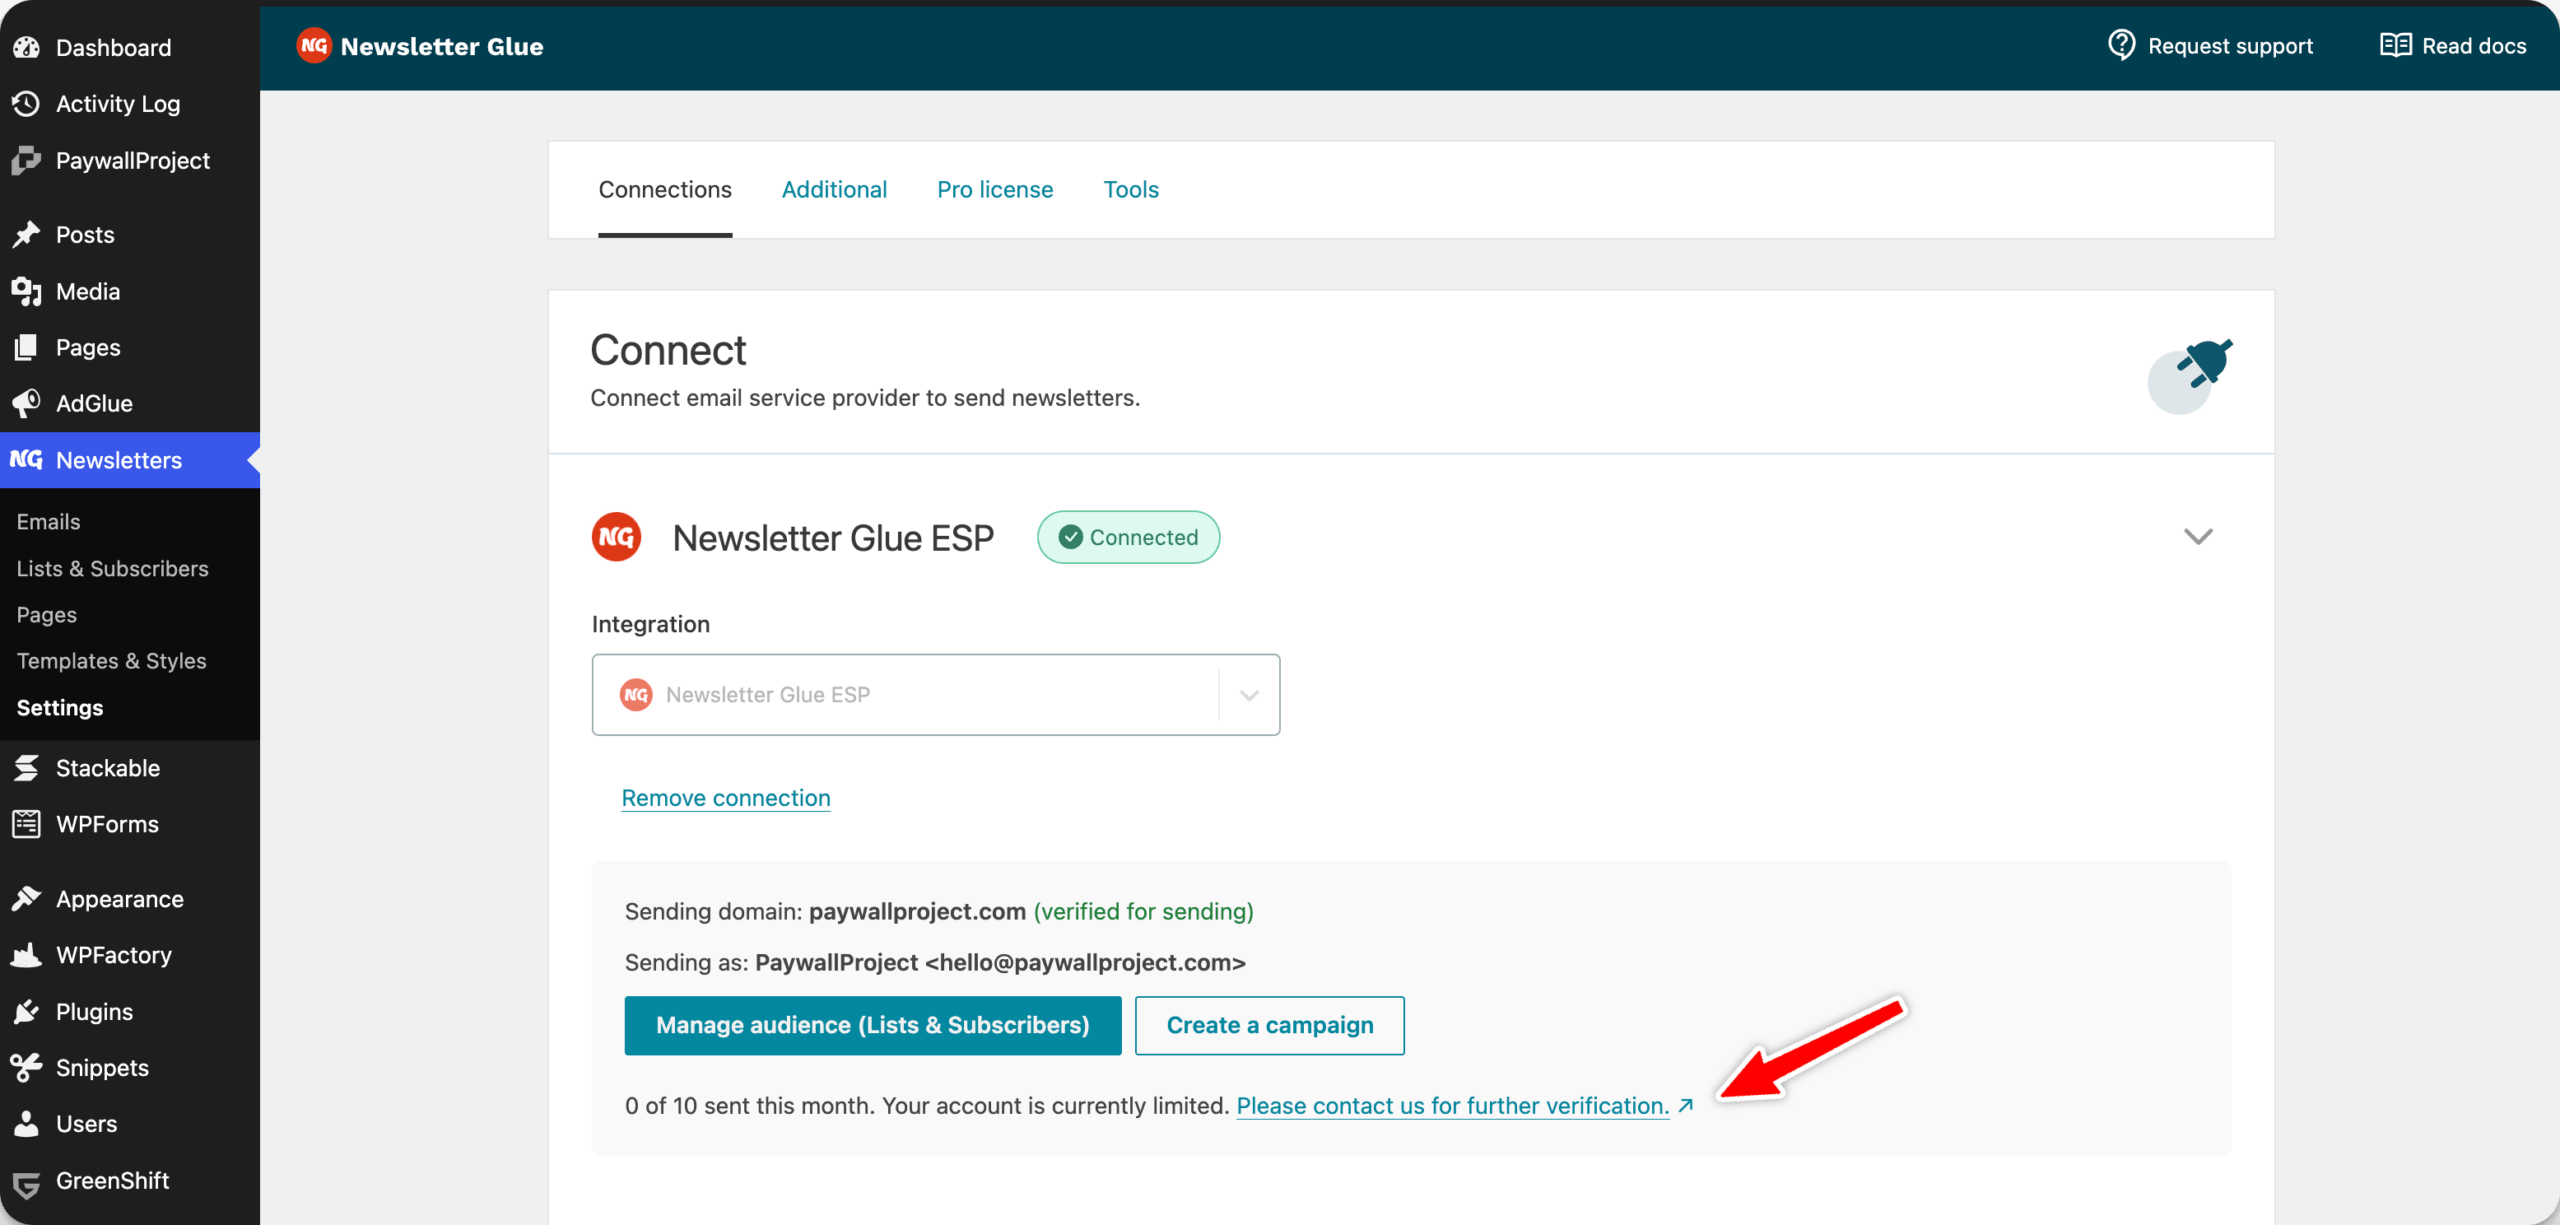
- You’ll see that your domain is not yet verified. You need to verify your domain to send emails. To verify your domain, copy the DNS records on the screen and add them to your domain registrar’s DNS configuration OR to your Cloudflare account.
- The domain verification is automated and may take up to 72 hours for the DNS records propagation.
- To remove the initial account sending restrictions, please reach out to support. We manually vet all senders to protect our infrastructure which ensures your newsletters land in inboxes.
Email Sending Rules
- You can send campaigns to lists or segments, but not both together.
- You may select multiple lists at a time, or multiple segments, but not a mix of both.
- If you select both lists and segments together, the campaign will be sent only to the segments.
Ready for a faster, smoother publishing experience?
Write and grow your newsletter in WordPress. Connect via API. No migration needed.
14-day money back guarantee