
This felt like a loooong time coming. You can now create newsletter templates in WordPress with Newsletter Glue!
Watch this video tour of our new templates features or read the rest of this post.
What are newsletter templates?
Newsletter templates in the Newsletter Glue world are pre-built newsletter layouts.
Importantly, you can make any template an active template. Your active template will automatically load every time you create a new newsletter. No more manually adding patterns into every newsletter.
You can customise any of the default templates we’ve designed for you, or build your own from scratch.
Let’s dive into the details…
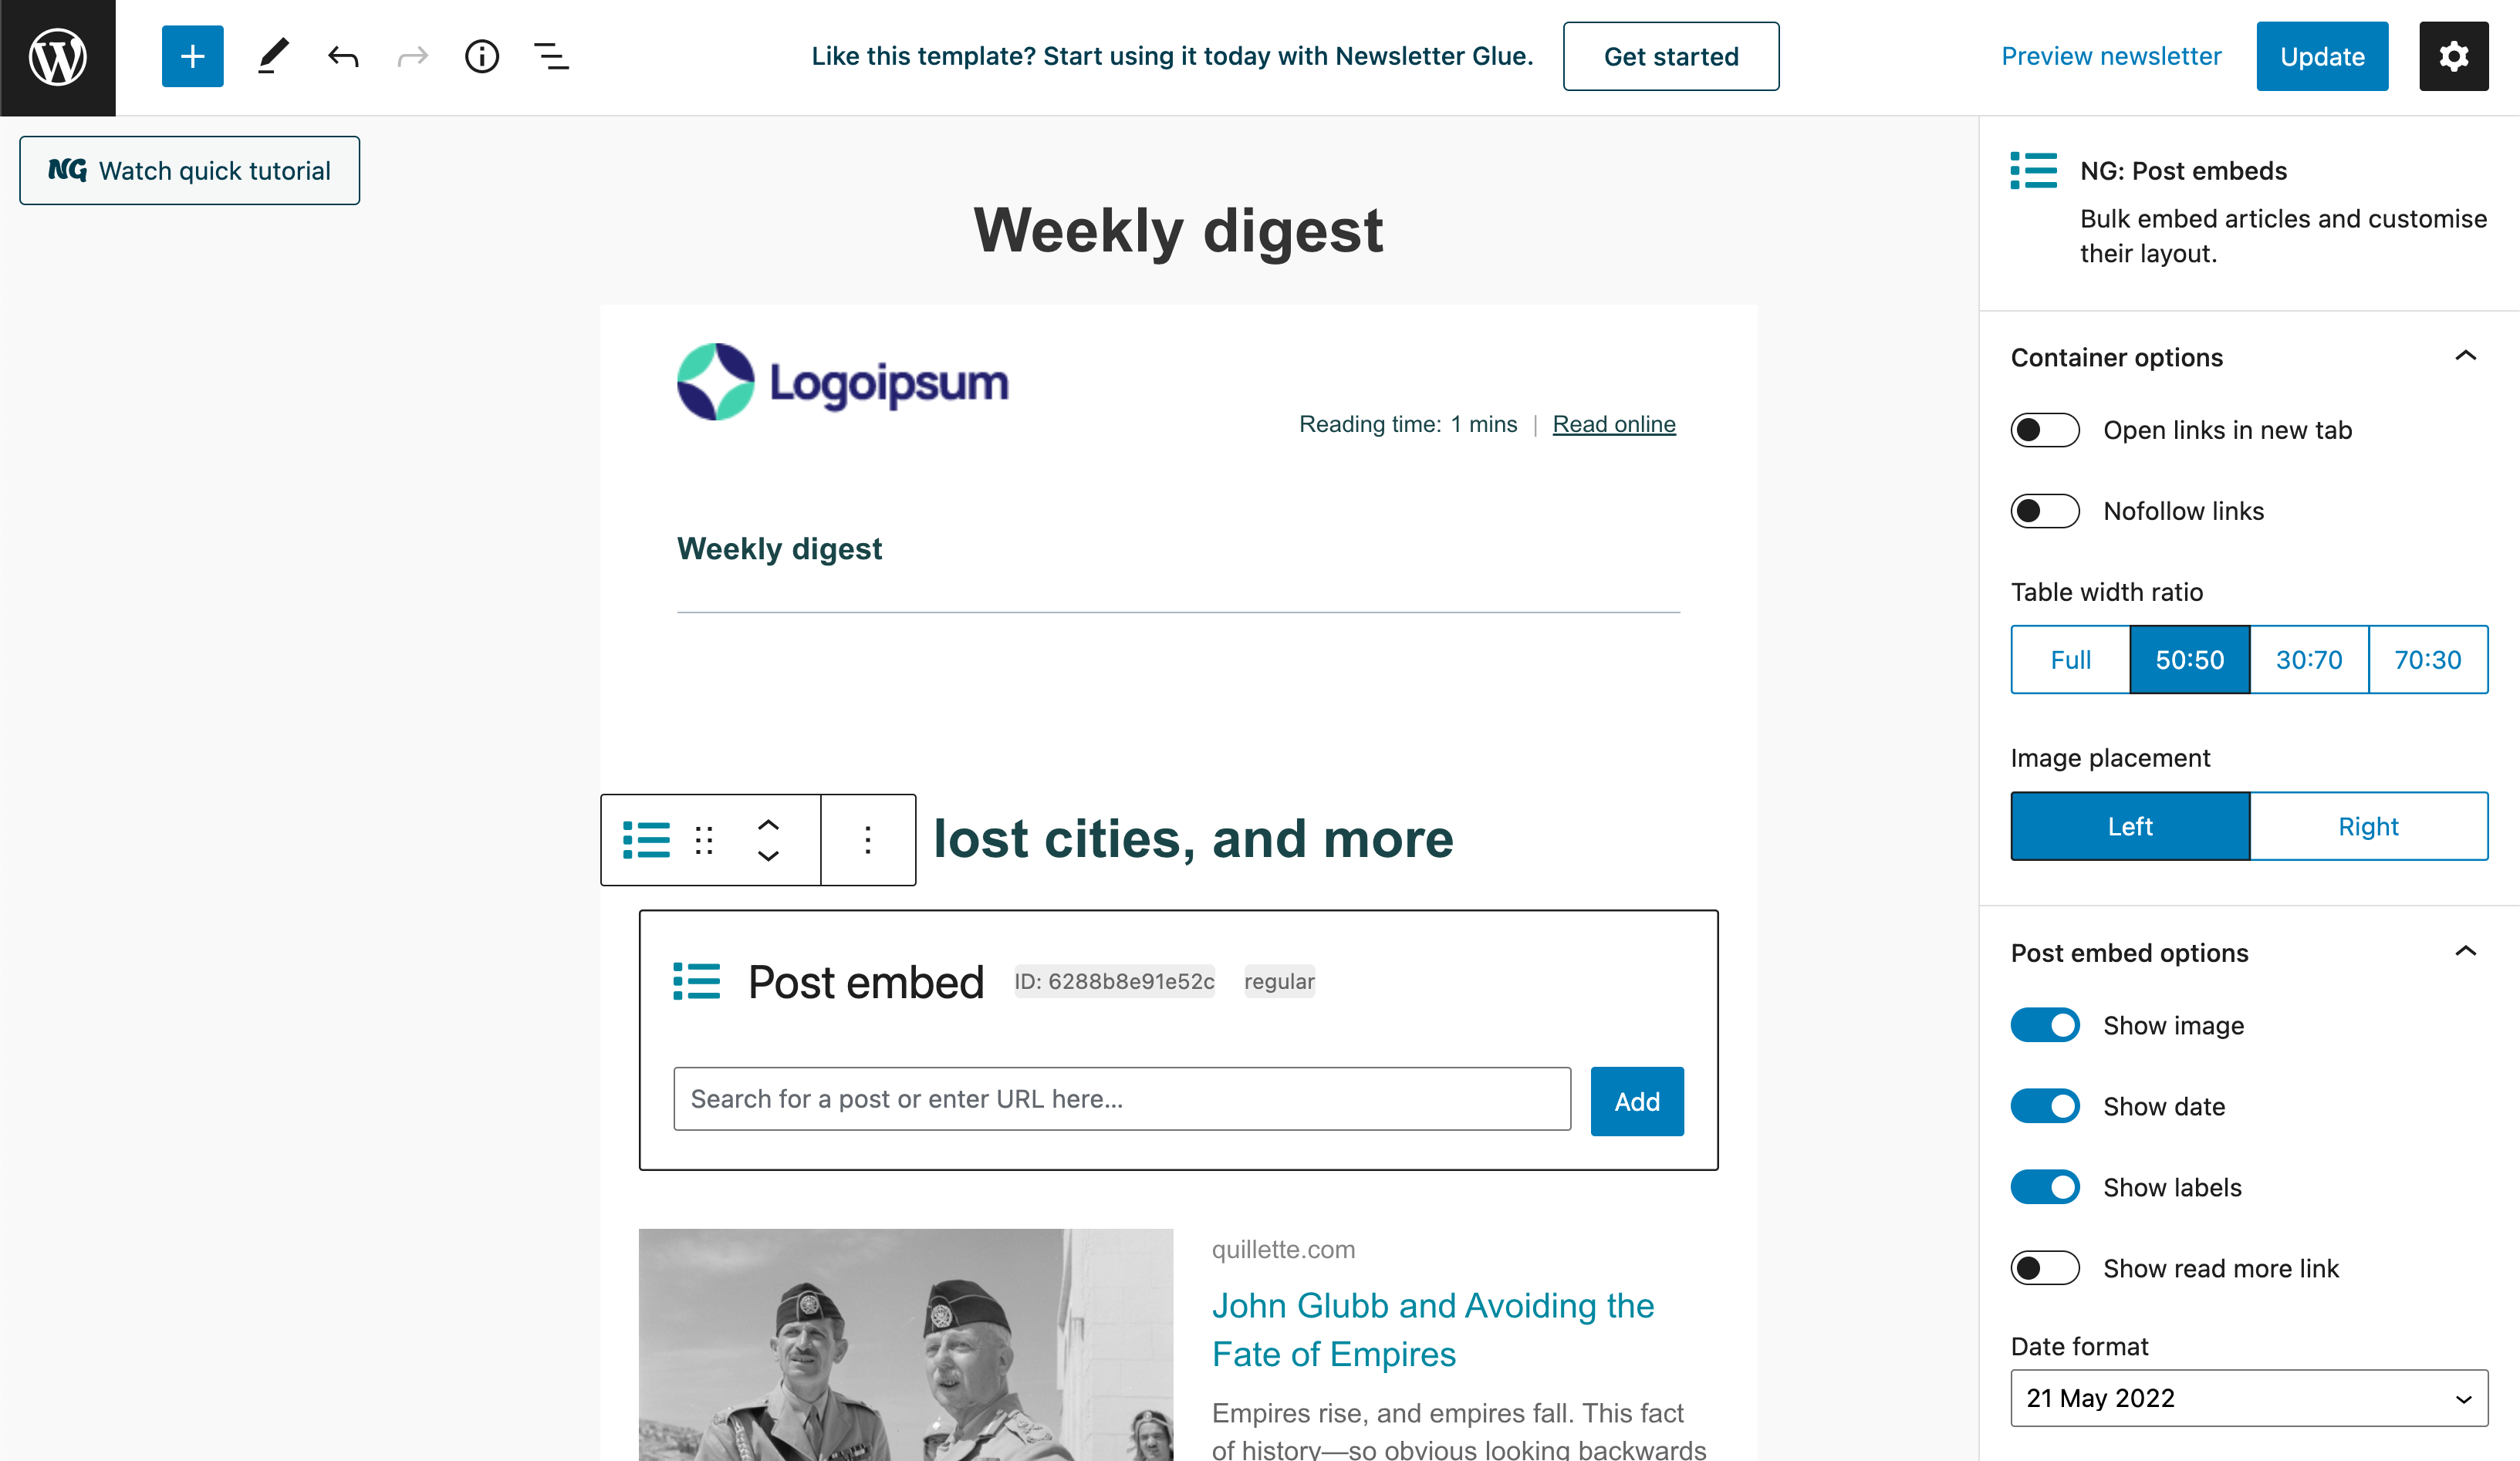
Where to find the newsletter templates
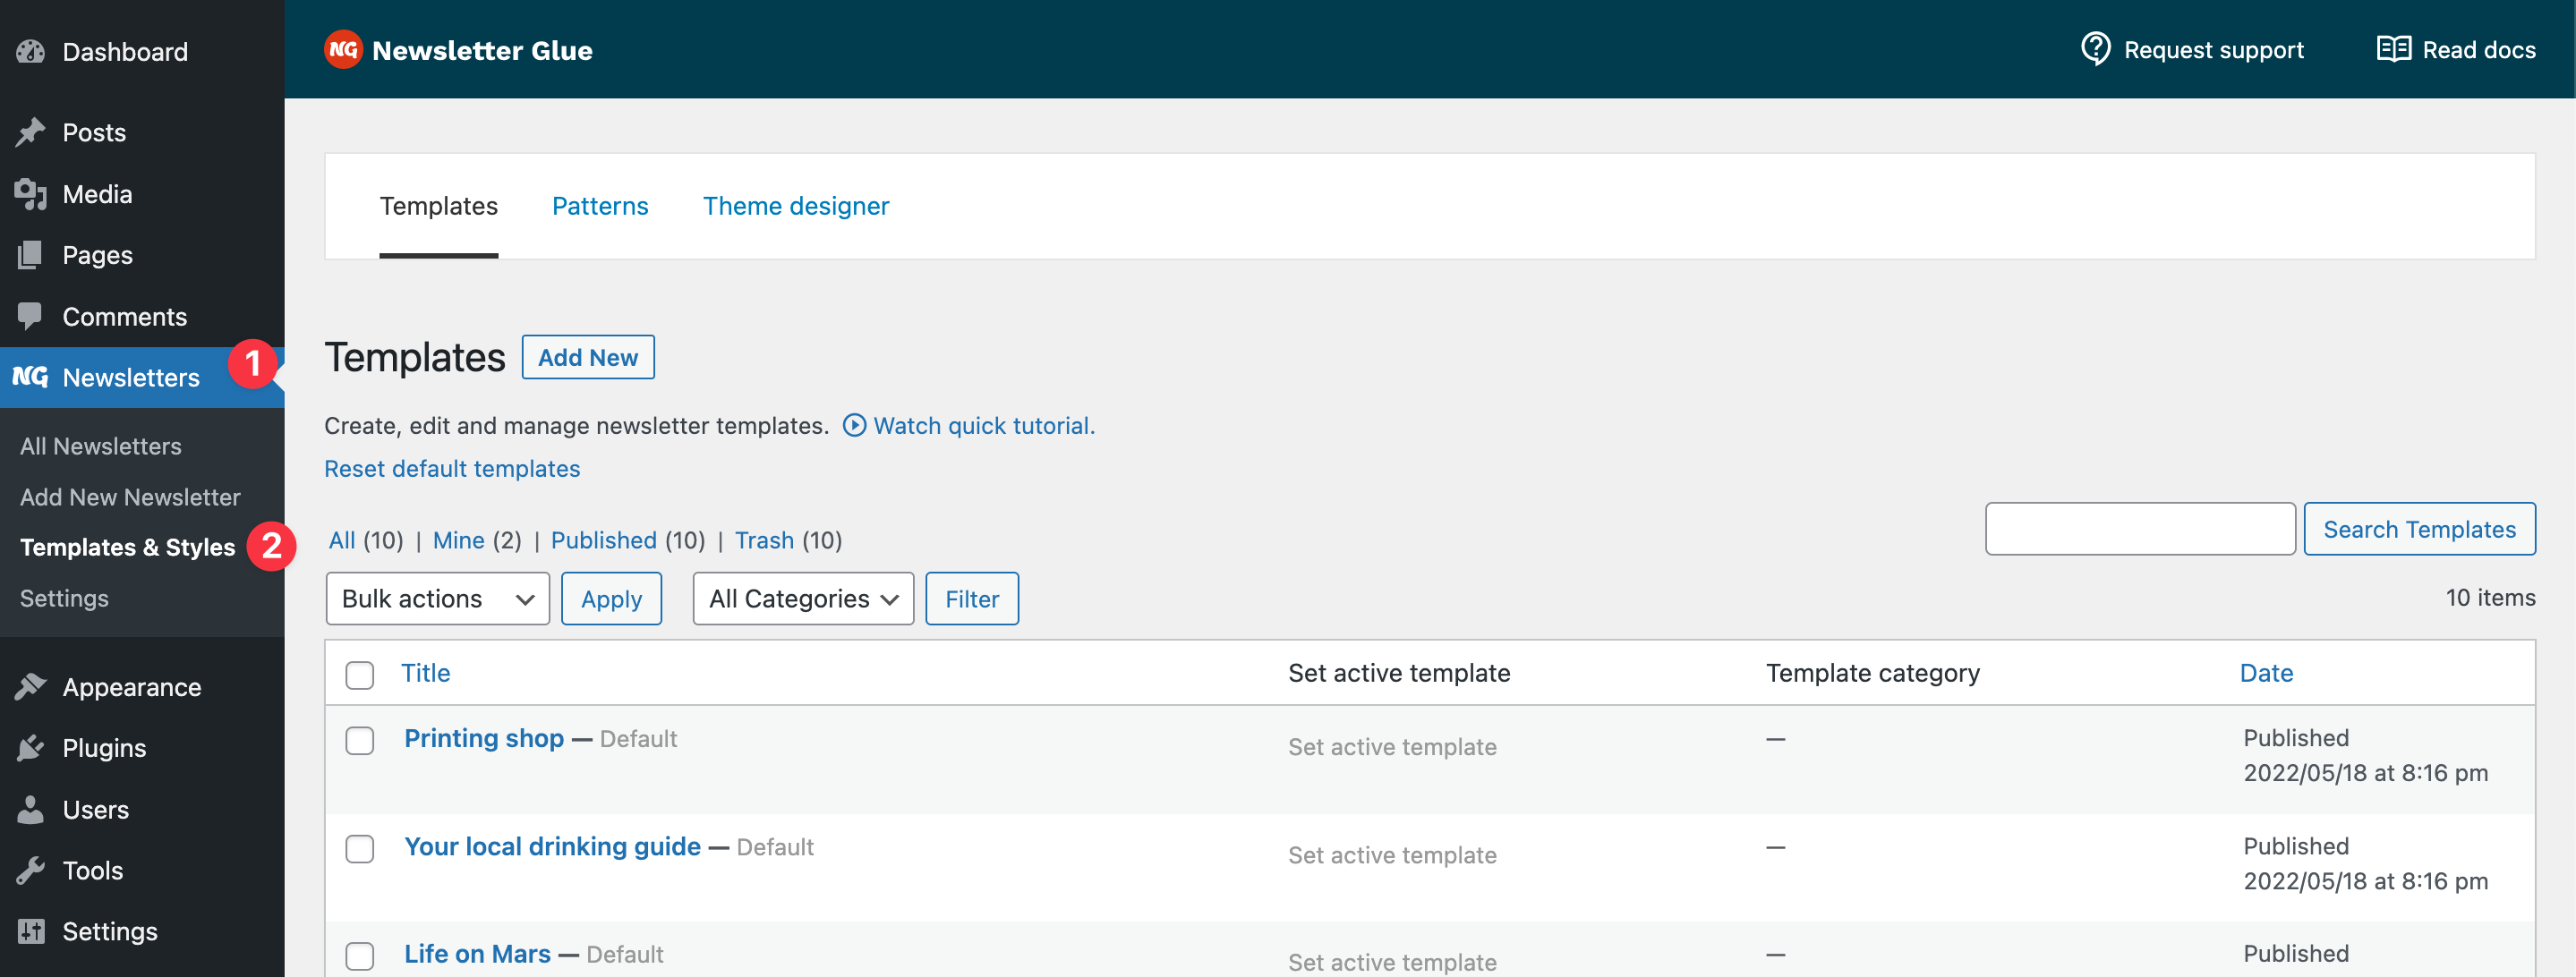
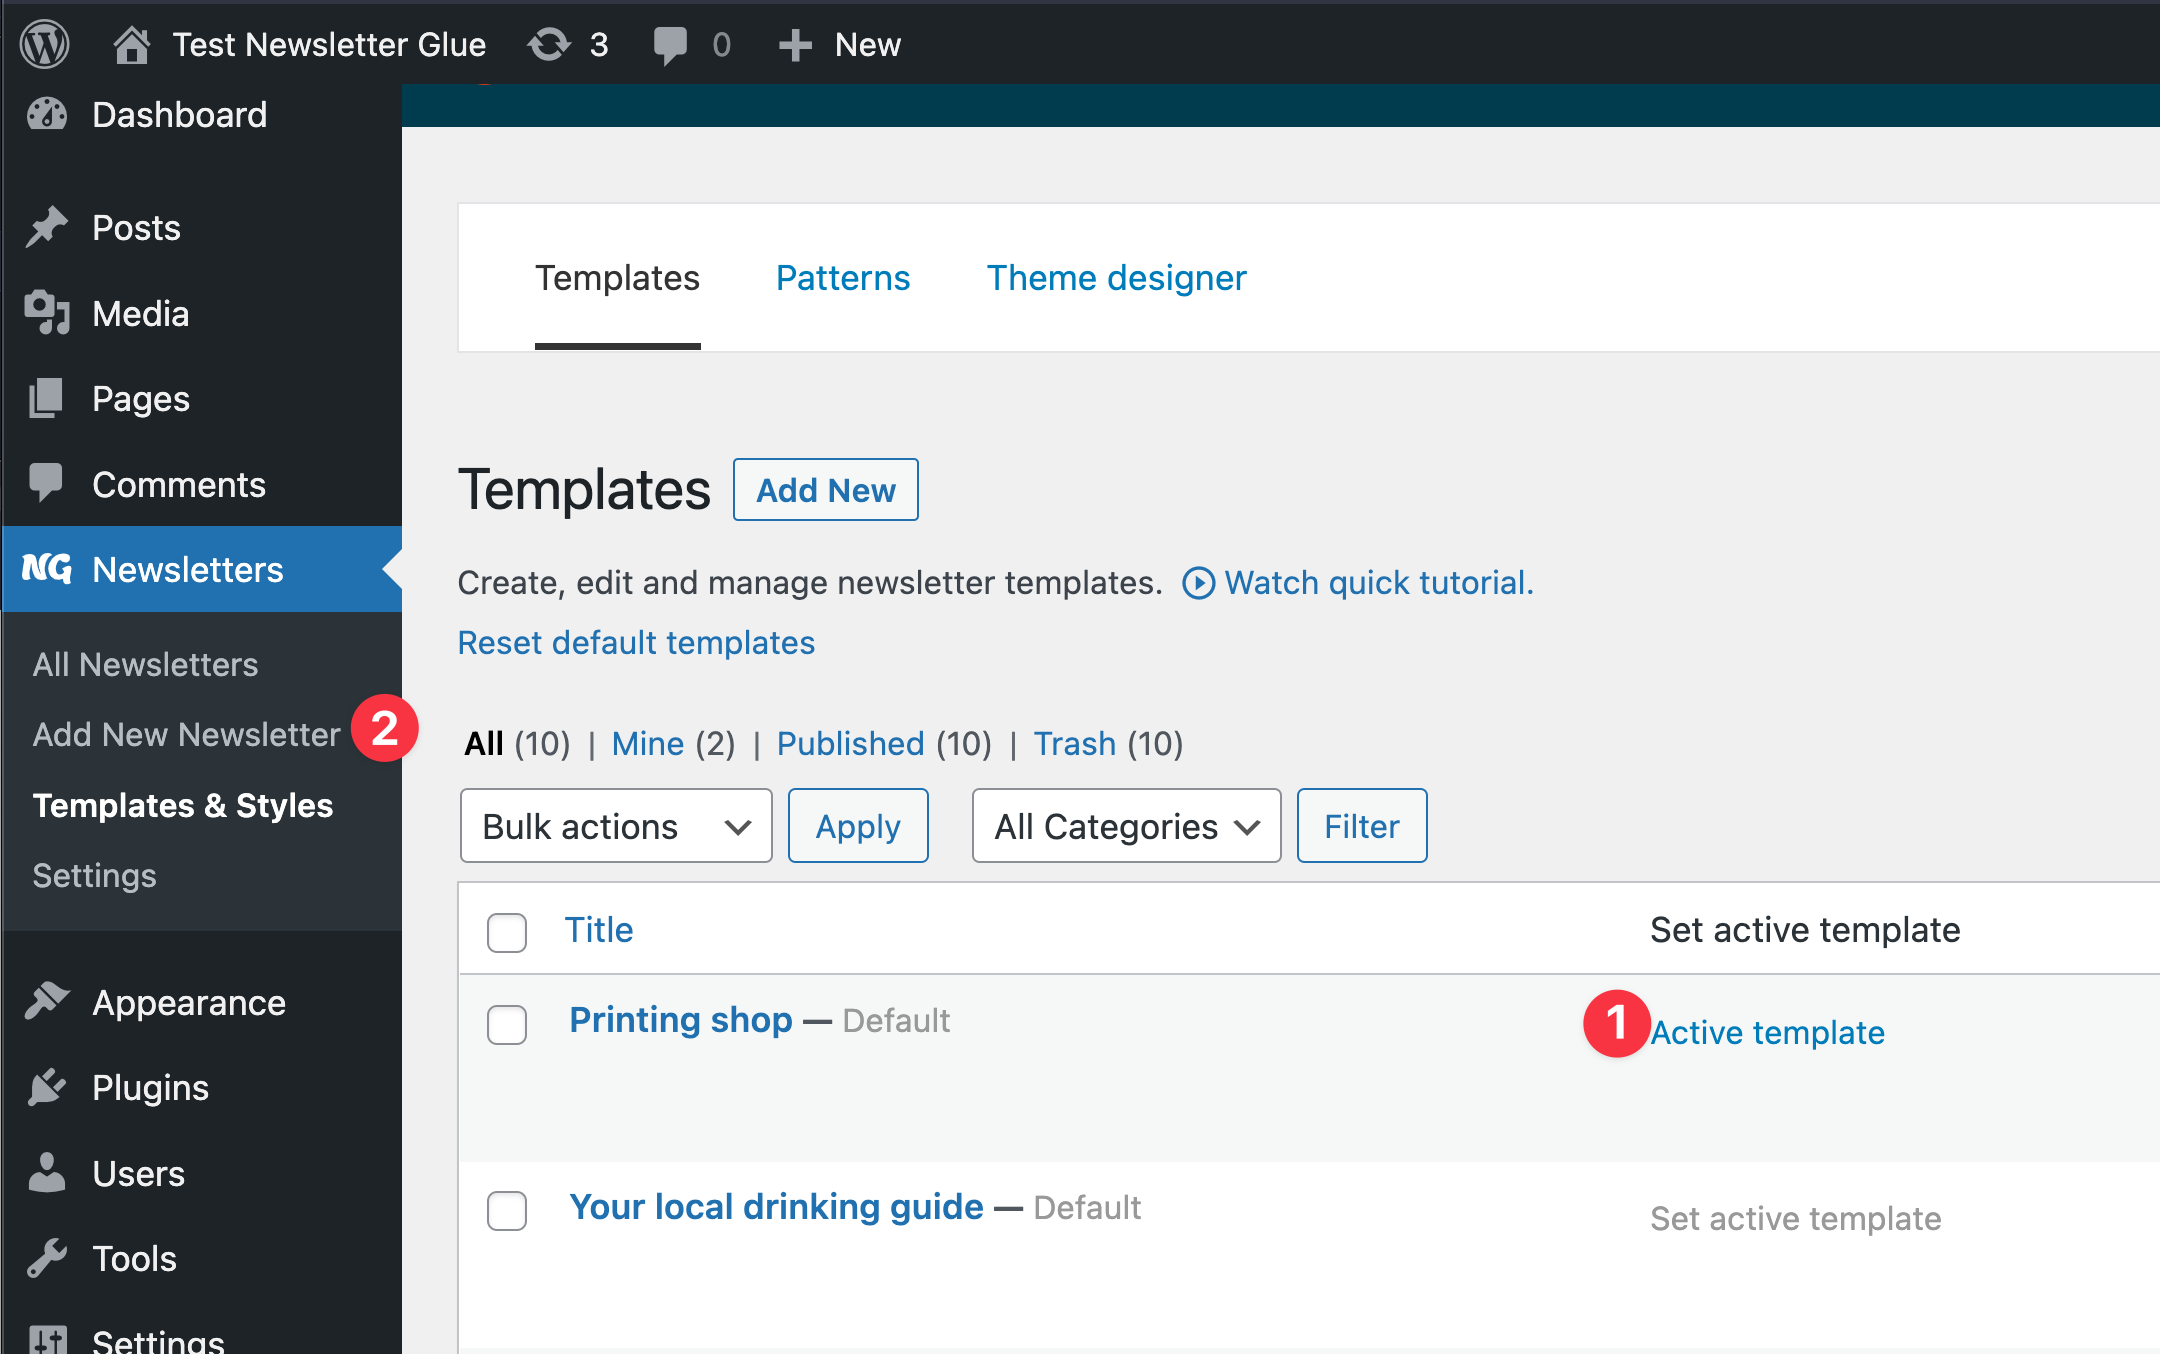
To start, you’ll need the Newsletter Glue plugin of course! Once you’re set up, head to Newsletters > Templates & Styles. Here, you’ll see 10 default templates we’ve built for you.
How to preview email templates
There are 2 ways to check out the design of each template.
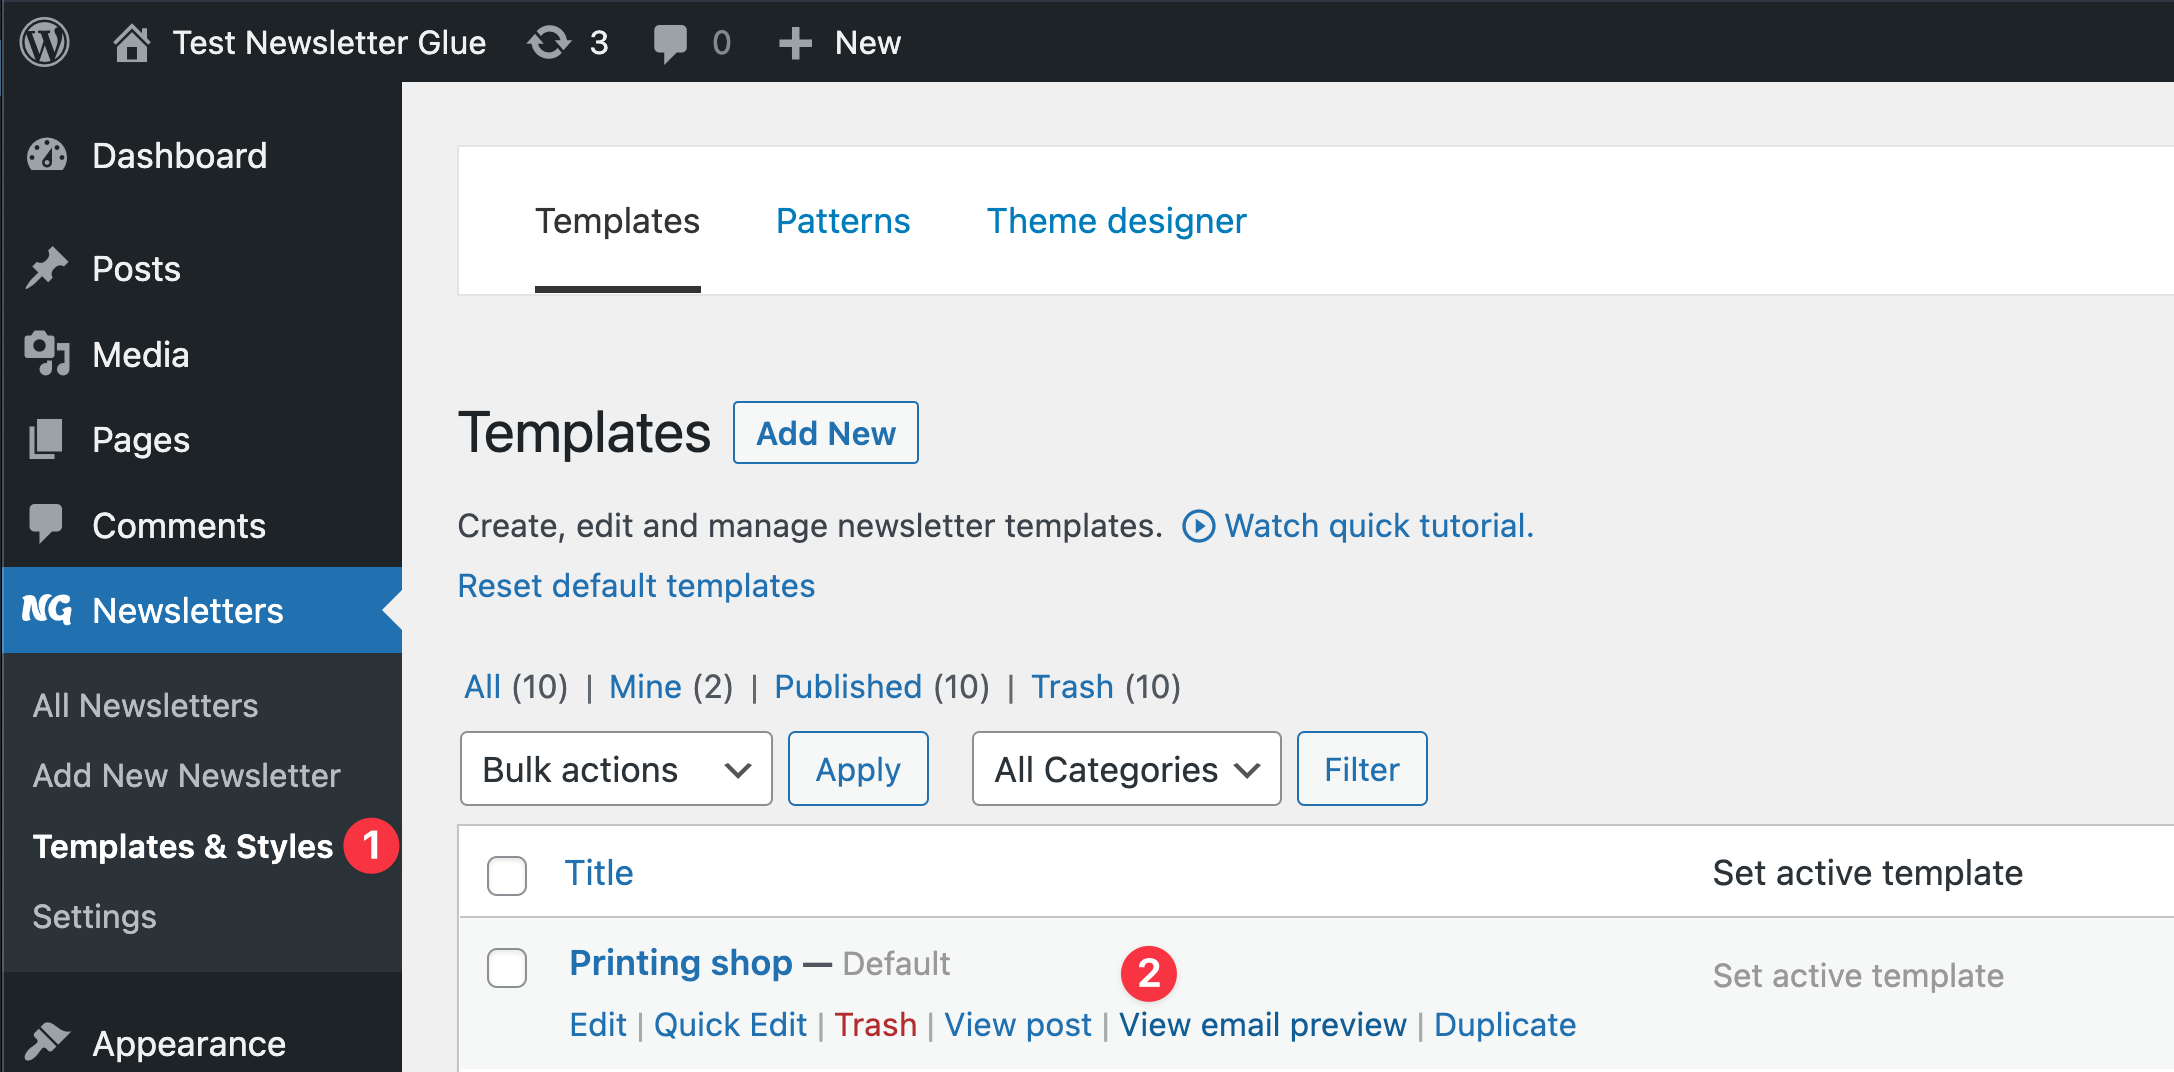
1. Inside Templates & Styles
The first is inside Templates & Styles. Hover over any template, and click on View email preview.
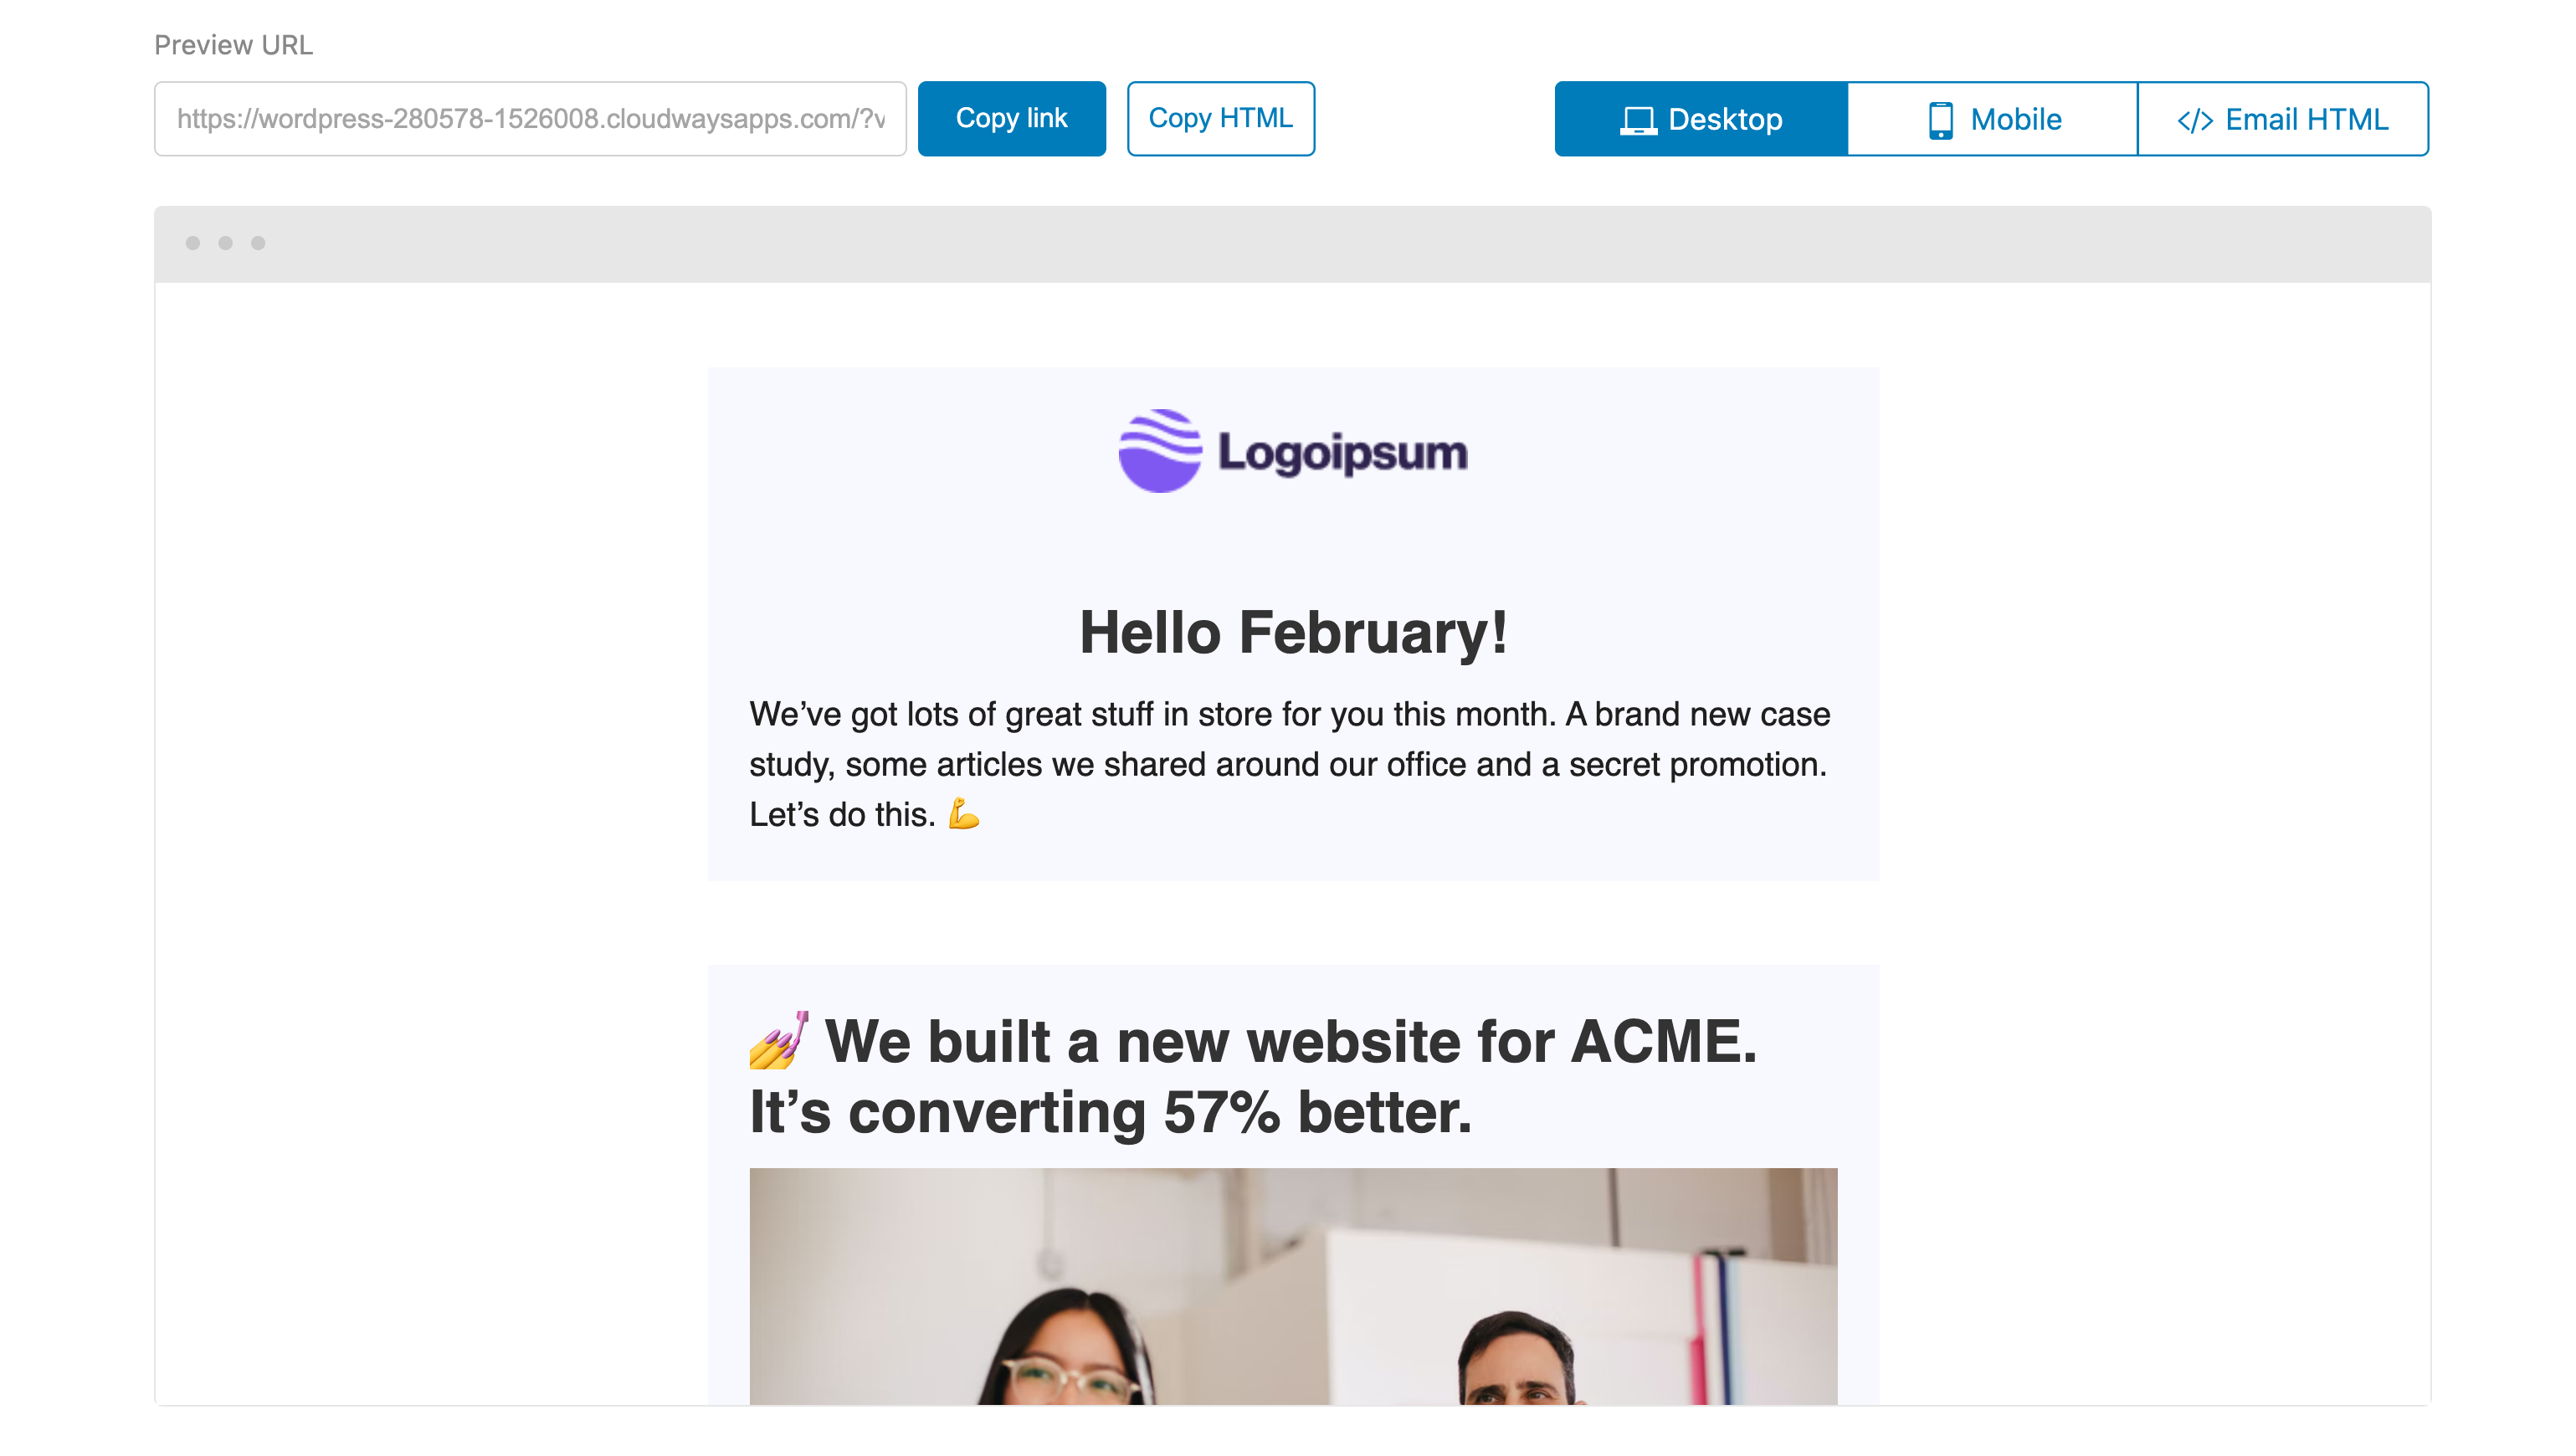
This opens up our email preview, which allows you to view the full template in desktop, mobile and email html.
2. Inside Newsletters
The second way is to go to All newsletters and click on Select template.
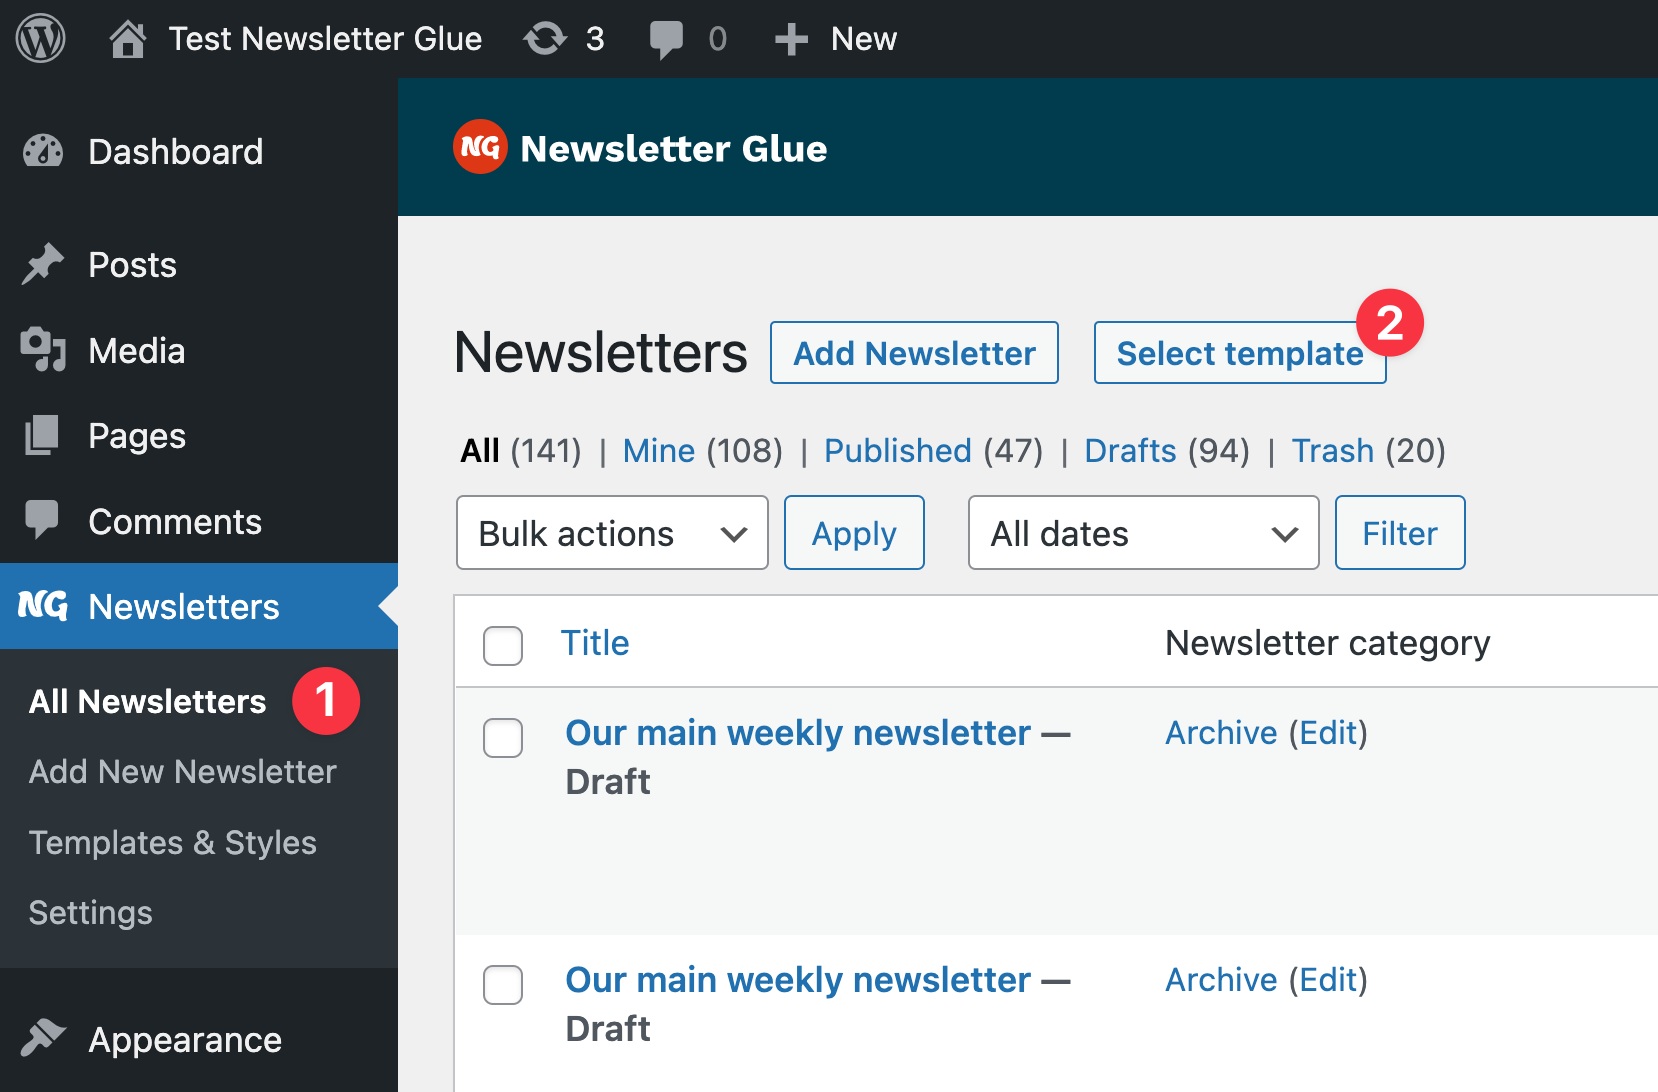
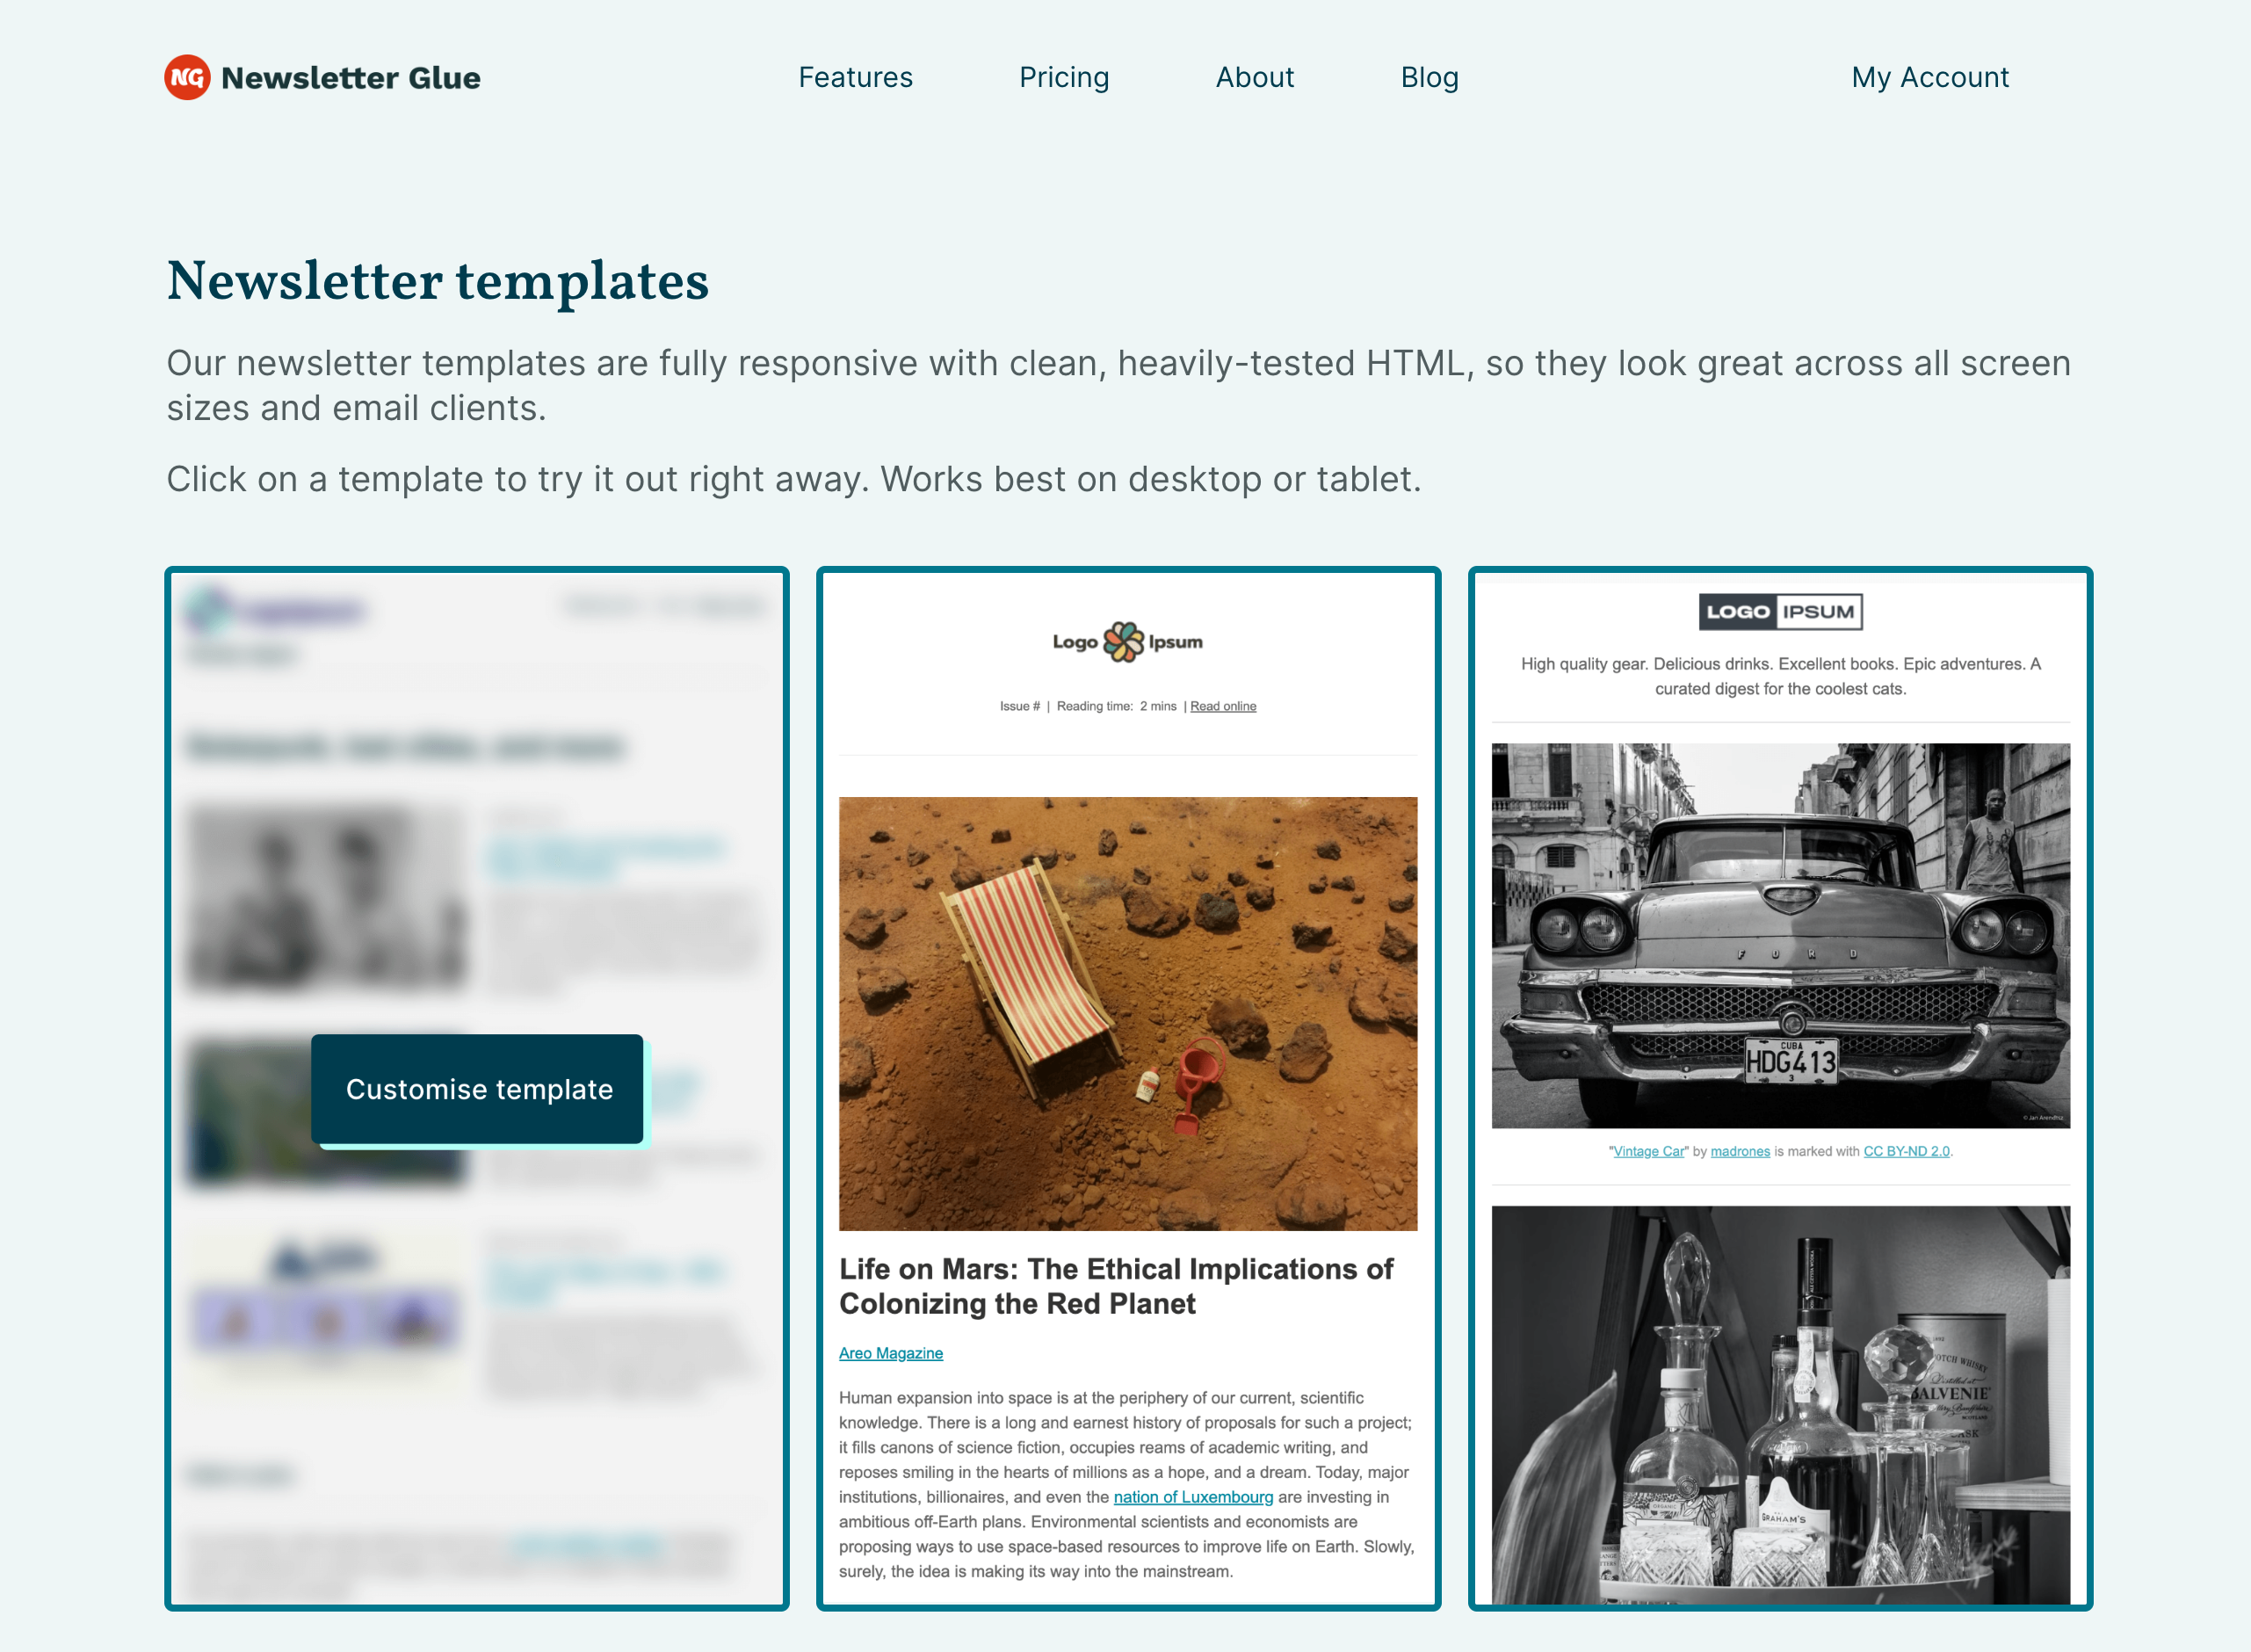
This opens up a modal template library, which lets you browse through all of our templates and select one to start building your newsletter.

How to edit a newsletter template in WordPress
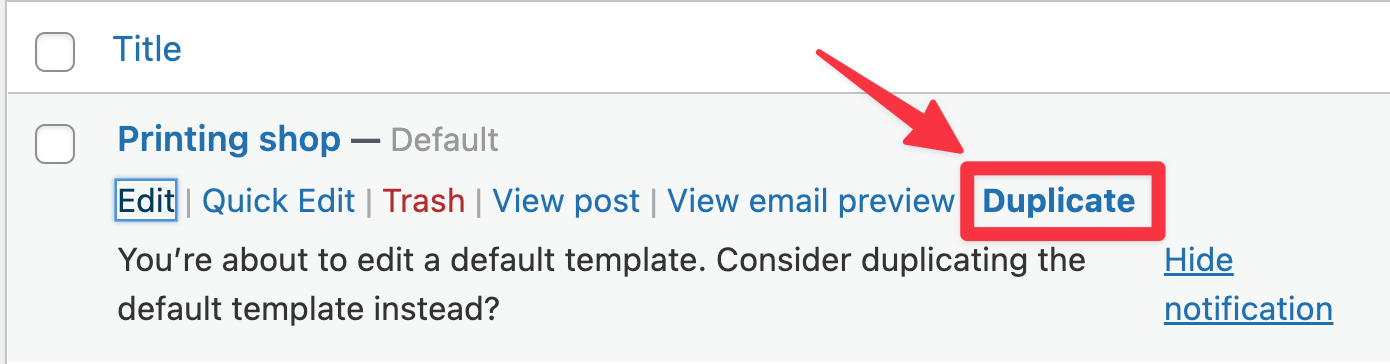
To edit a newsletter, hover over the newsletter you want to customise and click Edit.
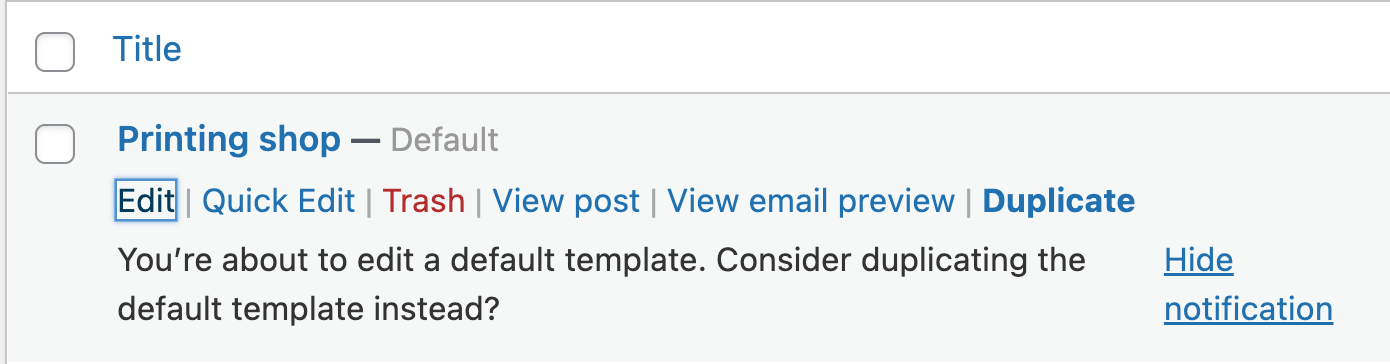
If you’re clicking on a default template (one we’ve pre-built for you), the first time you click Edit, you’ll see a notification asking if you want to edit the default template or duplicate it instead.
We recommend duplicating the template rather than editing the default so that you’ll always have the default on hand as a reference.
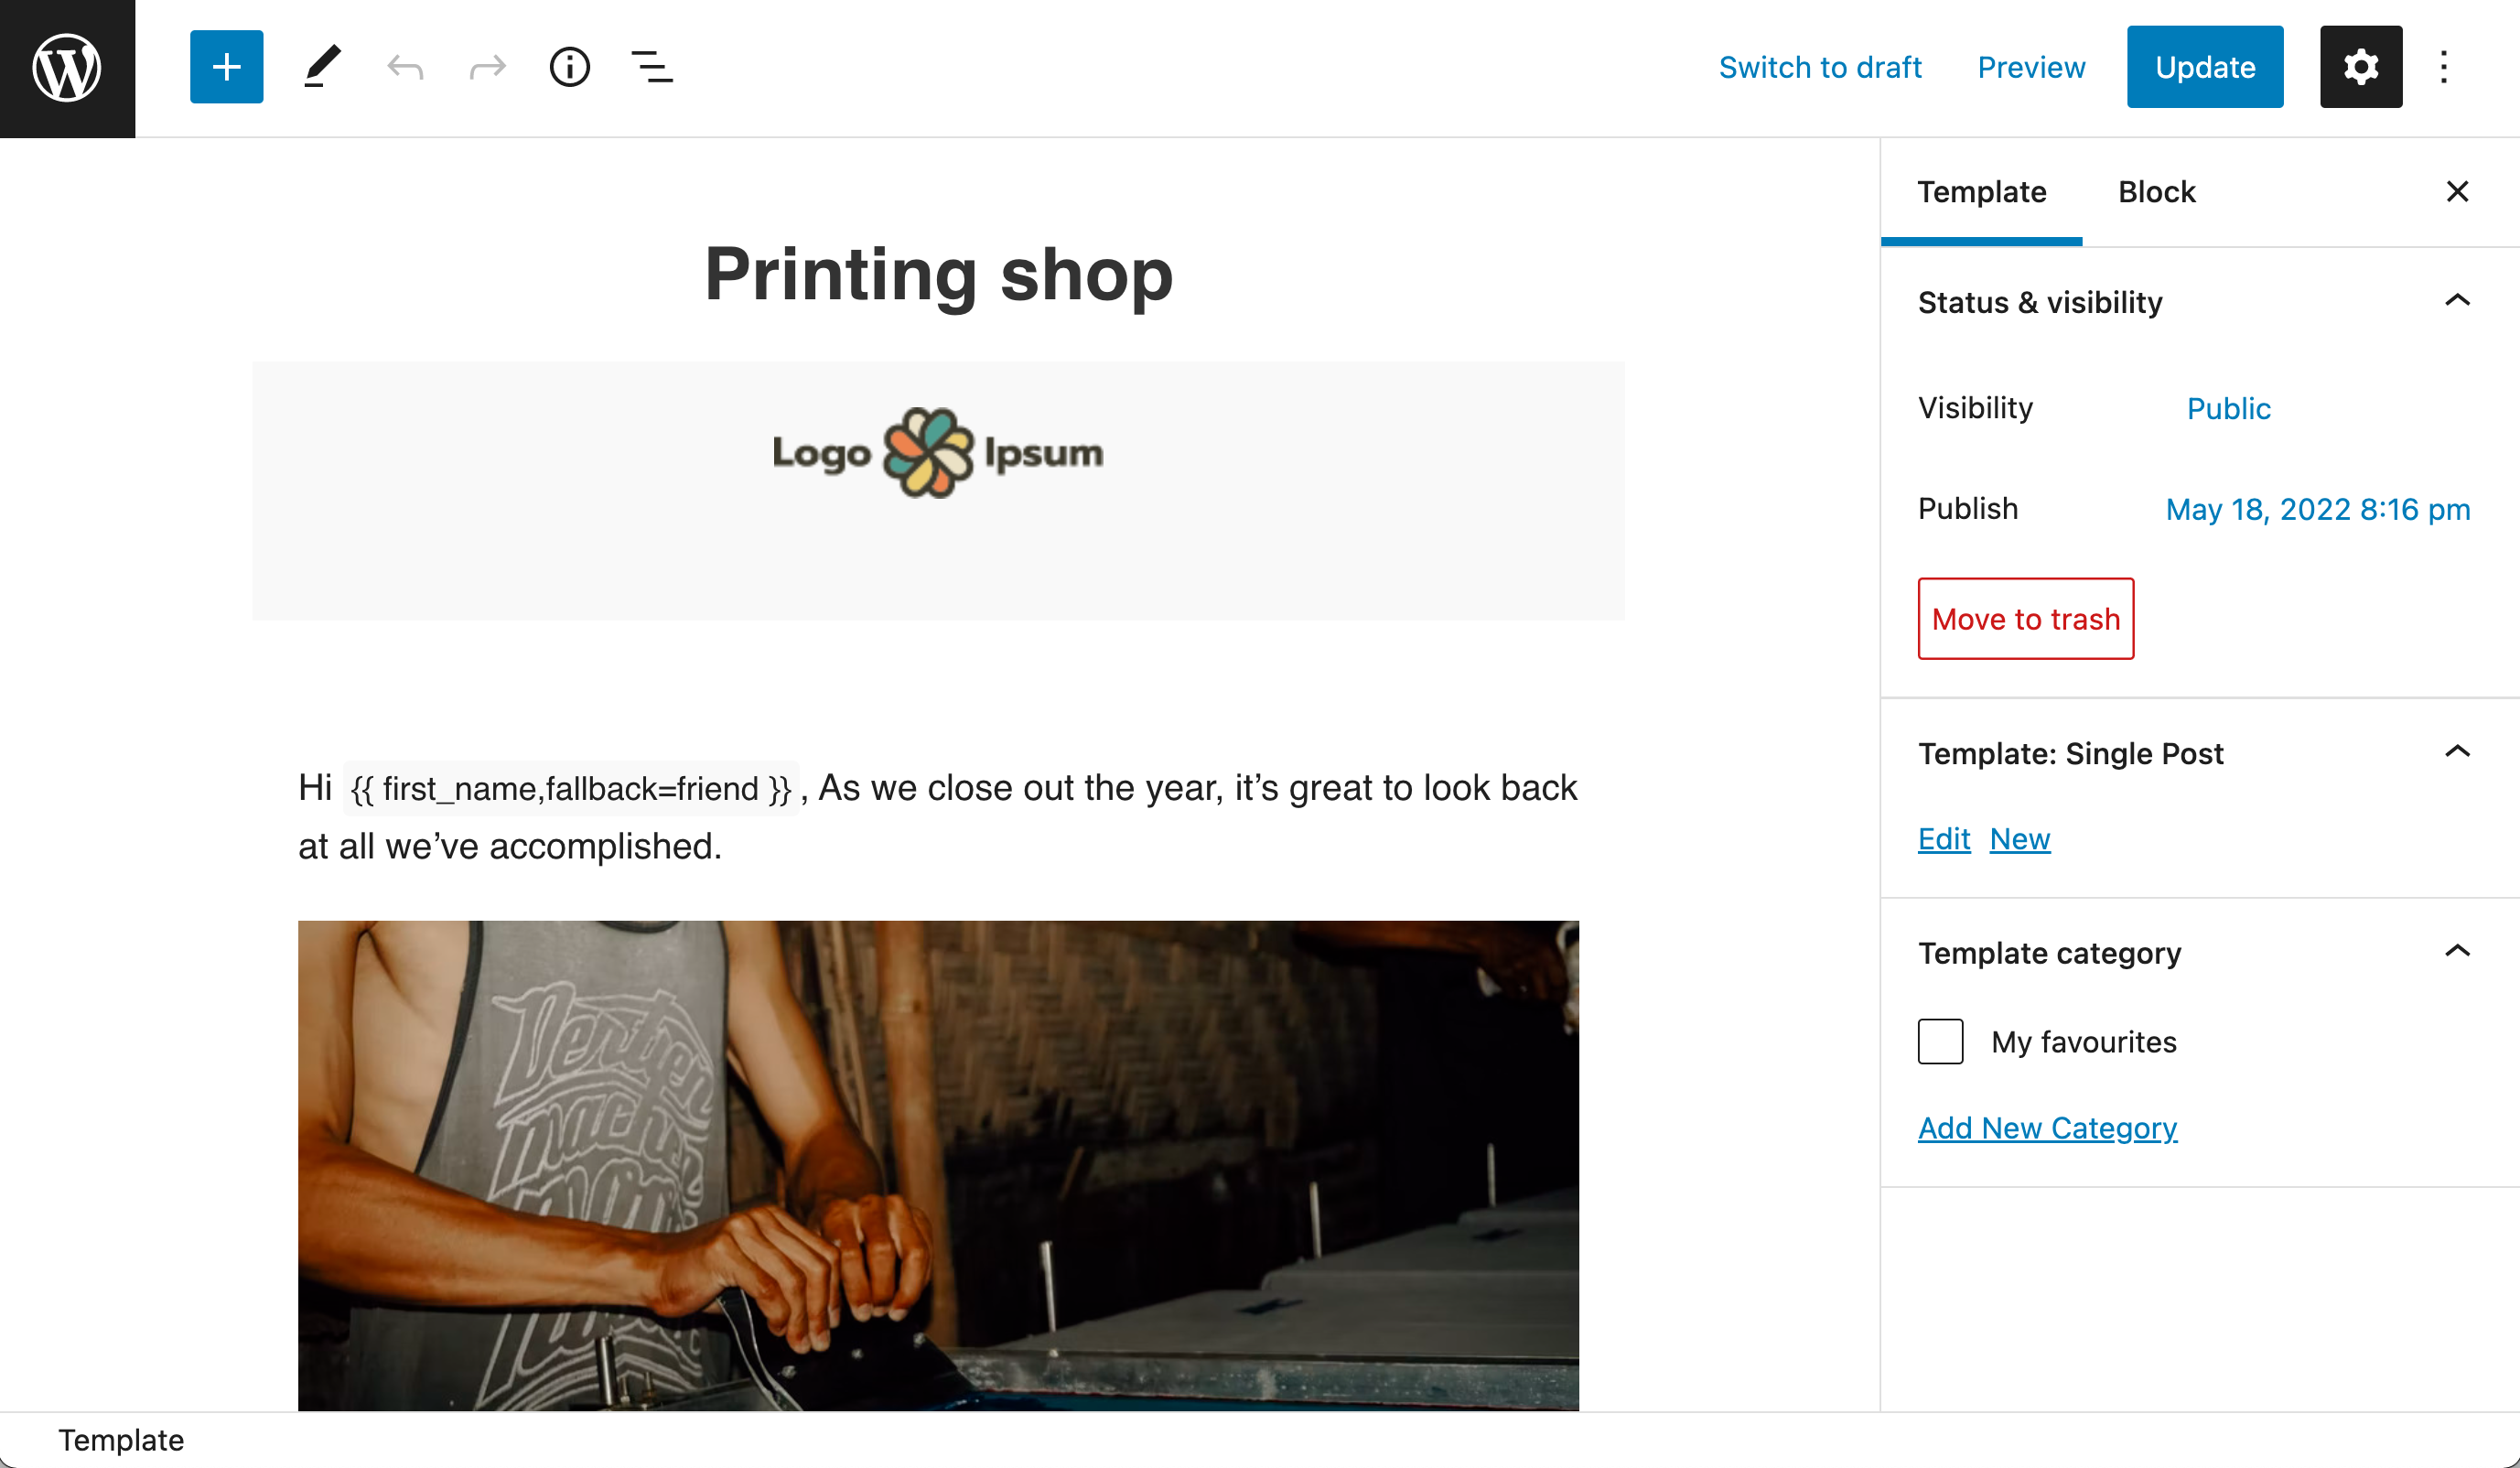
If you are sure you want to edit the default template, simply click Edit again. You’ll be taken straight to the editor where you can begin editing the template.
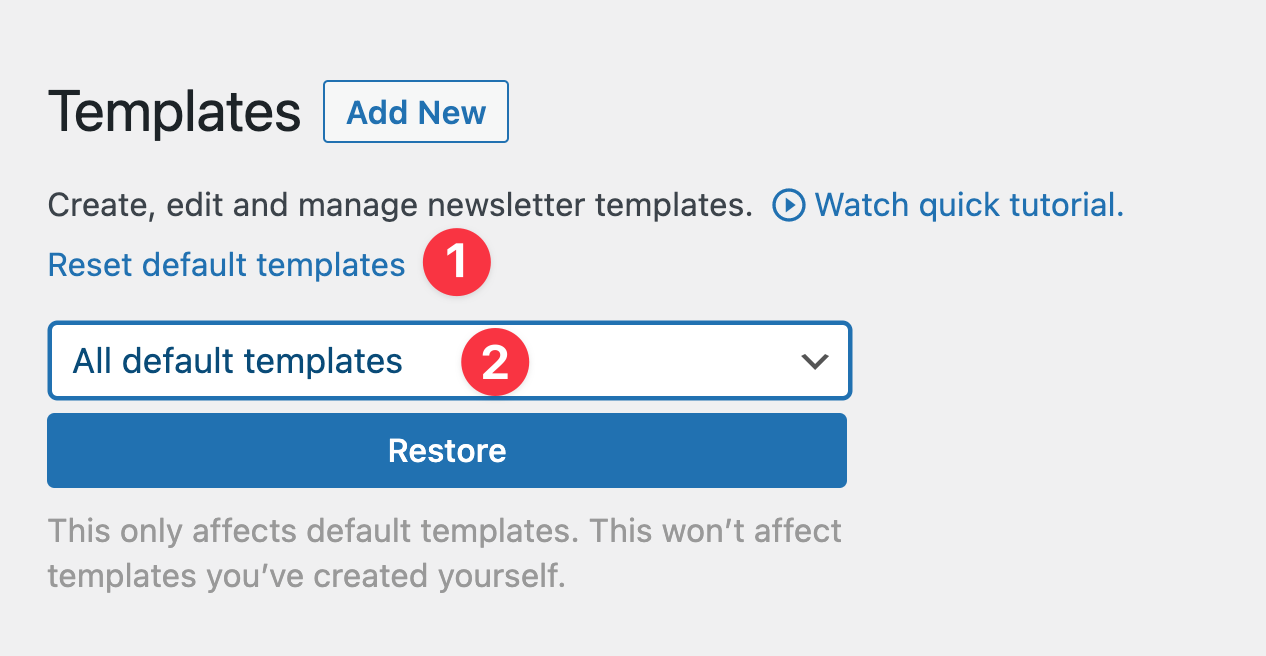
Restore a default template
If you regret the changes you’ve made to the default template, don’t worry. You can always reset any of the default templates. Simply click on Reset default templates and select the template you want to restore.
How to load a template to use for your newsletter
There are two ways you can use templates.
1. Select active template and add new newsletter
Inside Templates, find the template you want to use, then click on Set active template. This will make the selected one the Active template.
Then, in the admin side panel, click on Add New Newsletter. Your active template will be automatically loaded in your new newsletter.
Note: Active templates currently don’t load in any other custom post type.
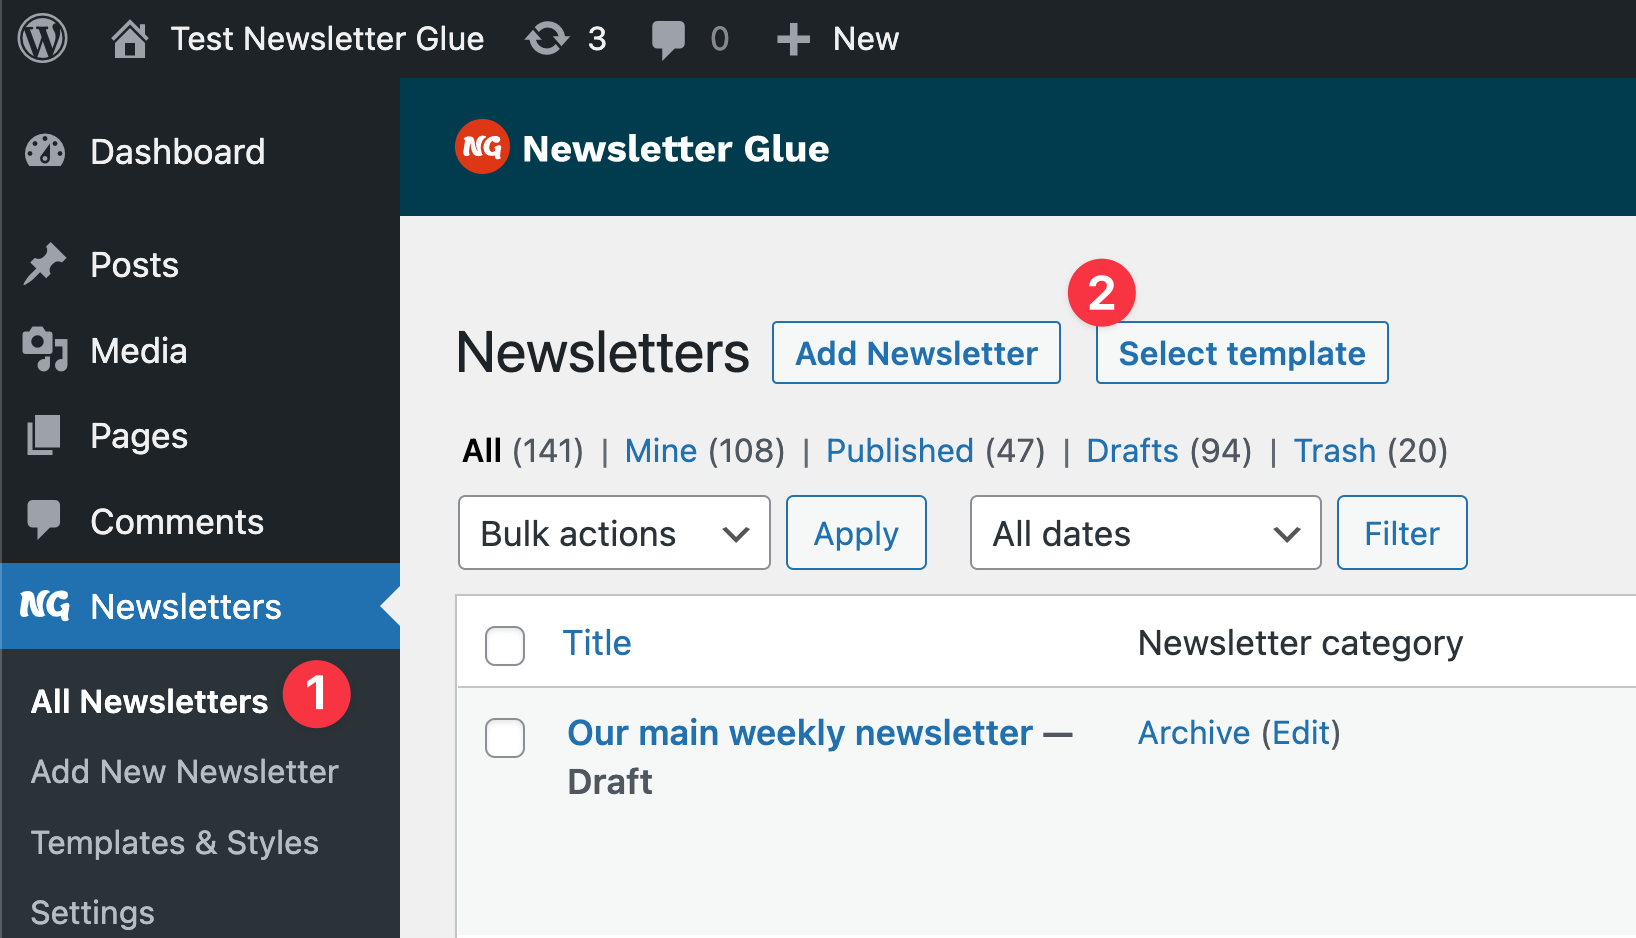
2. Add newsletter or Select template
Inside All newsletters, you’ll see the options to Add newsletter and Select template, next to Newsletters.
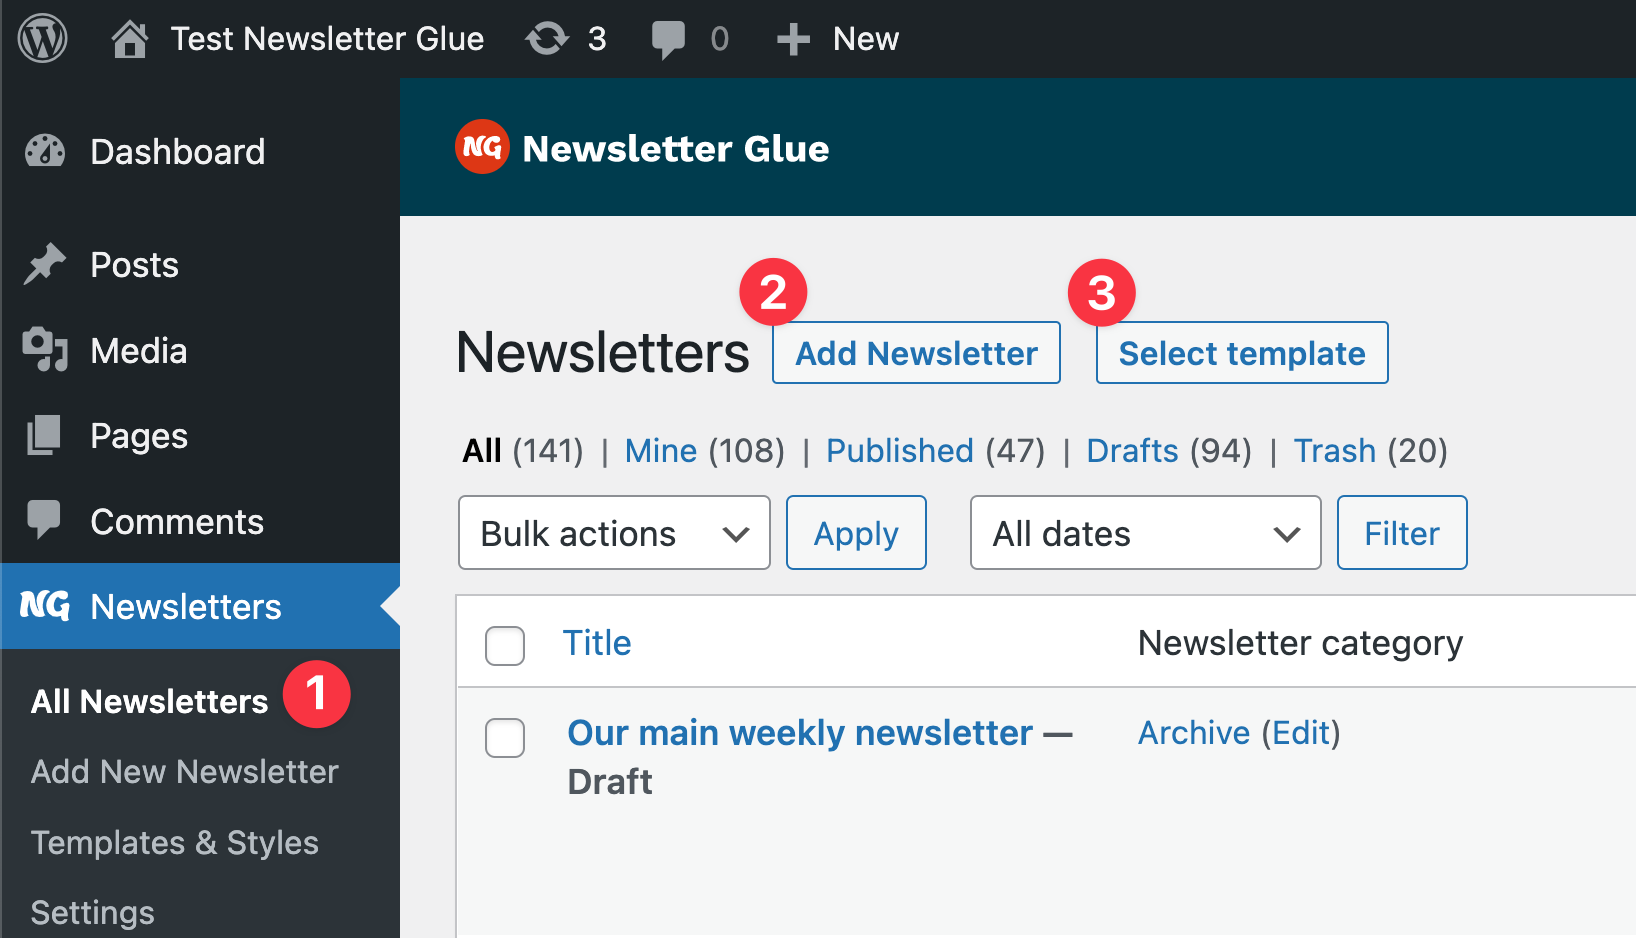
Clicking Add Newsletter will create a new newsletter. Your active template will be automatically loaded in your new newsletter.
As we mentioned above, clicking Select template will open a modal with the template library. Here you can browse all available templates. Click on the template you want to create a new newsletter with that template.
Recommended publishing workflow with templates
Here’s how we recommend you set up your template and use it in your newsletter publishing workflow:
1. Customise your own template
Select one of our templates as your starting point. Hover over it to load more options, then click Duplicate.
Edit the duplicated template.

Begin customising your newsletter inside the editor. Here’s what we suggest you do:
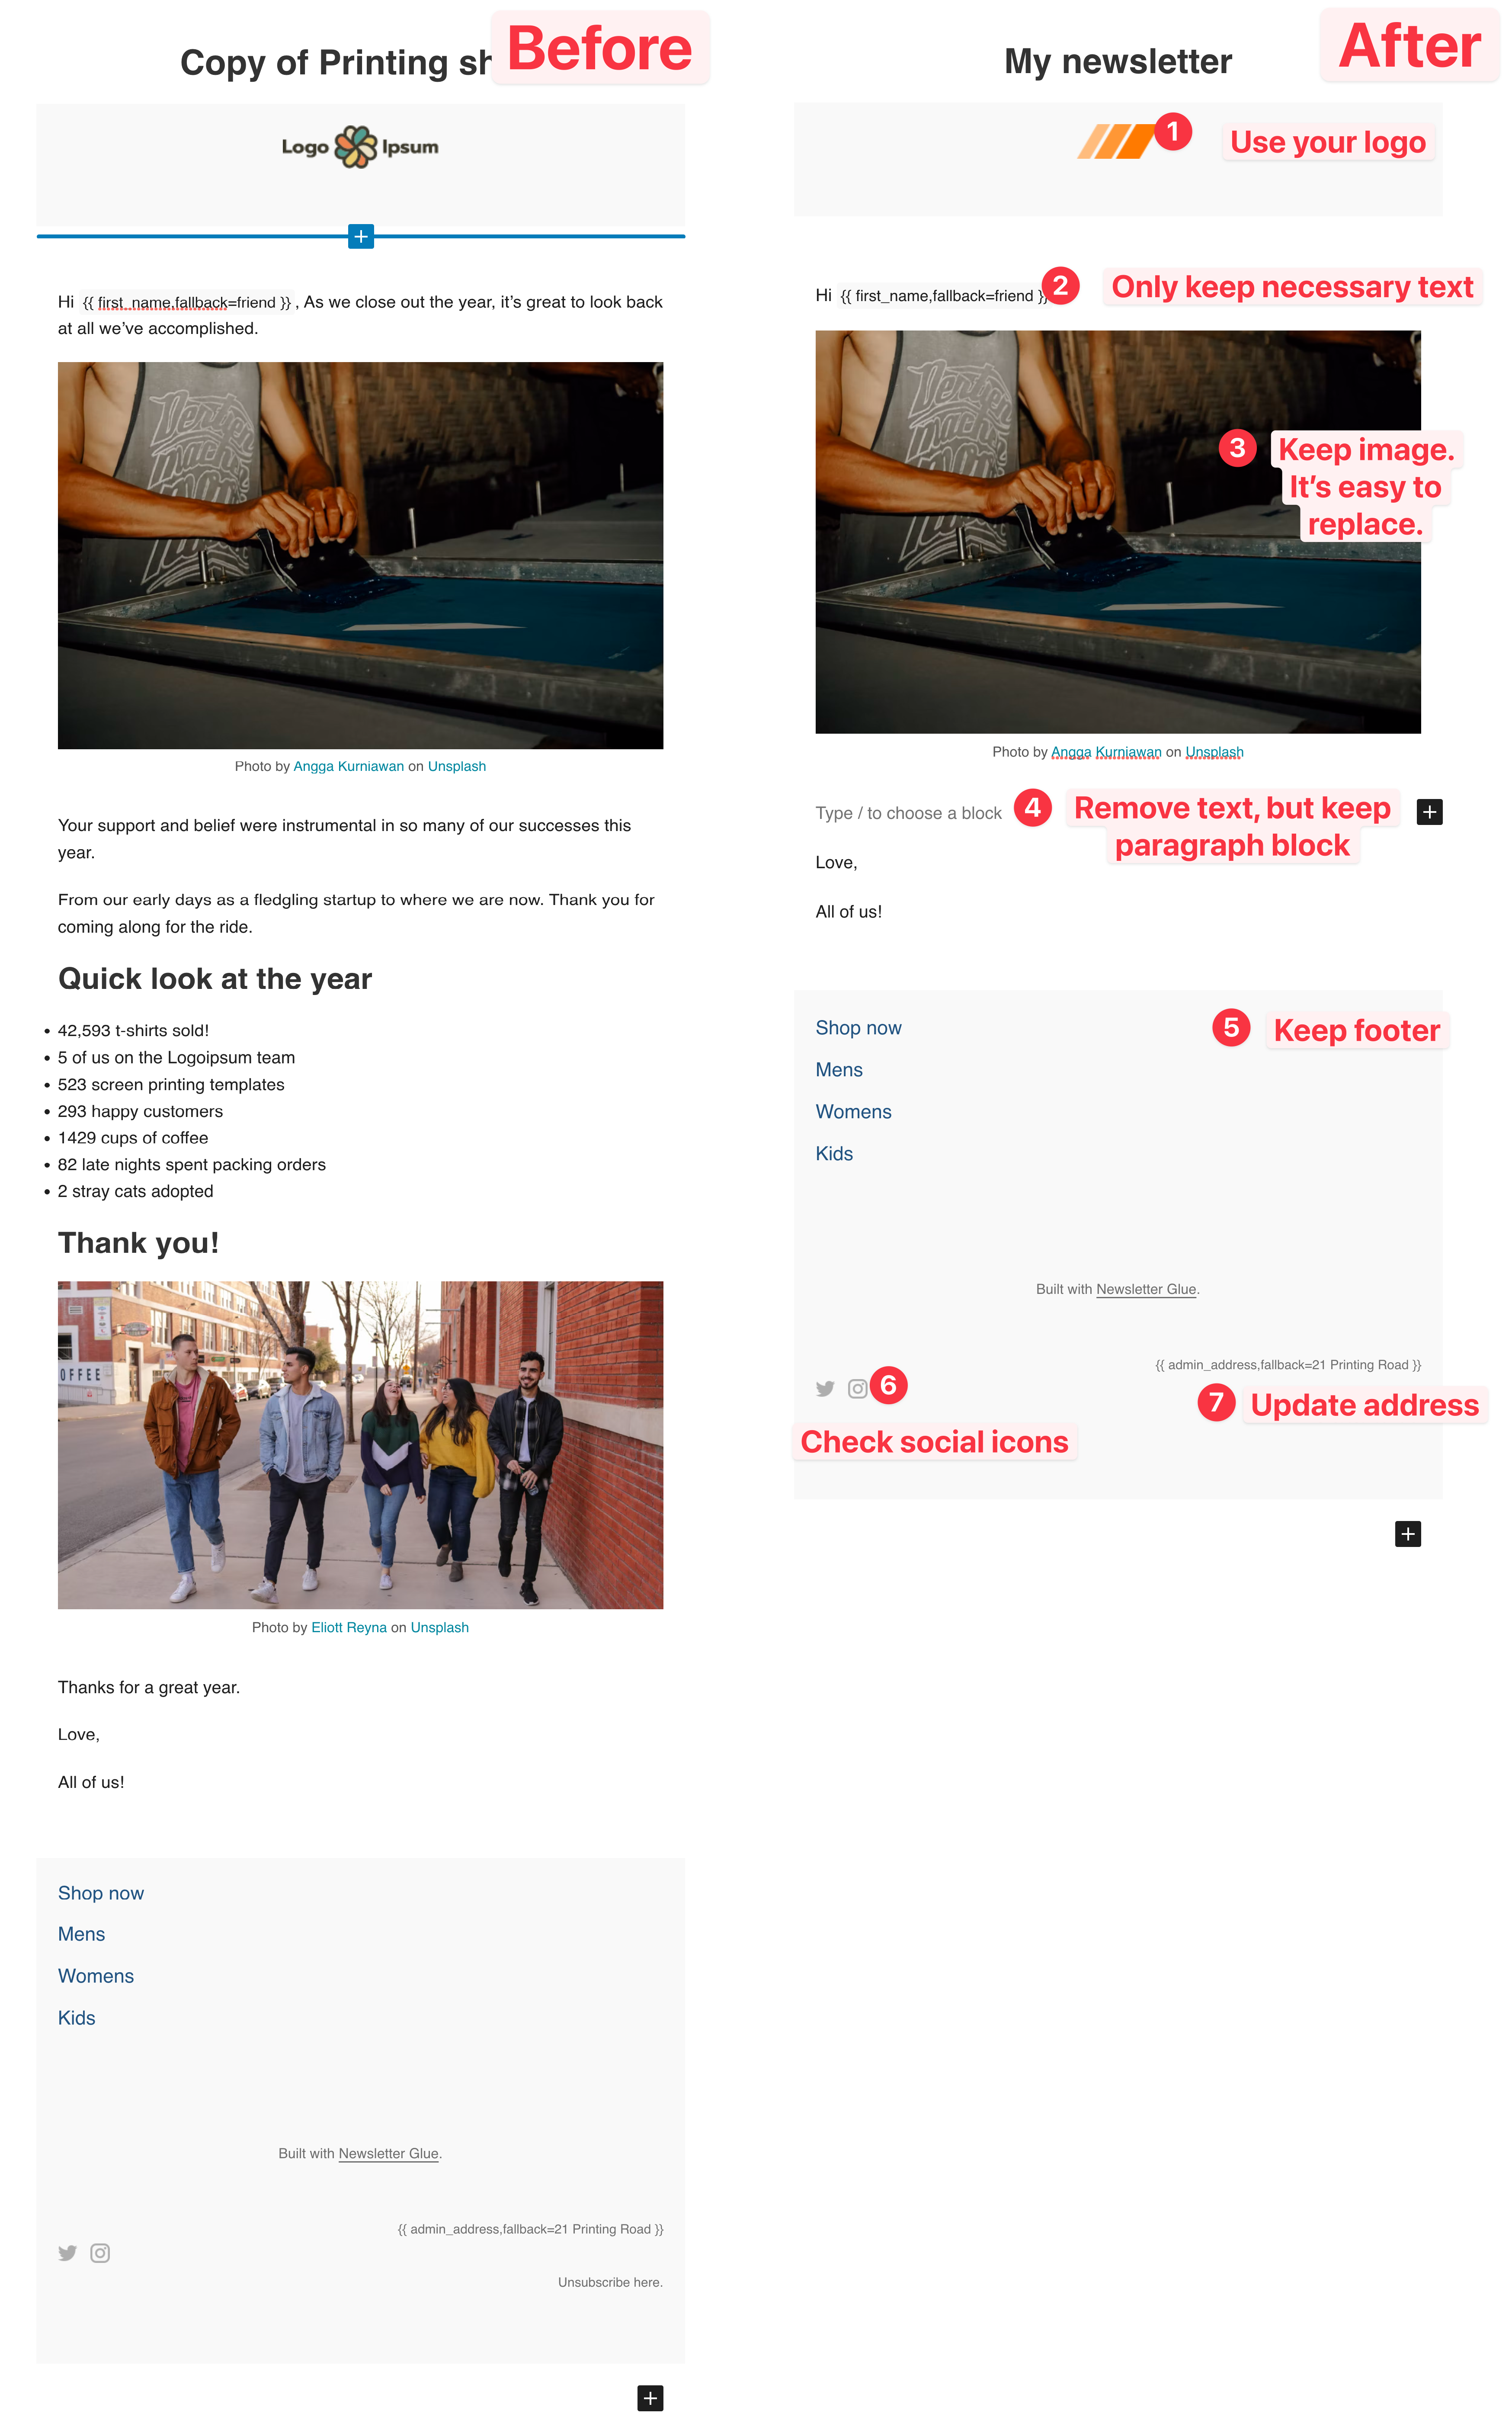
One of the benefits of our templates is that you can keep empty blocks without placeholder text. So once you’ve deleted the placeholder text, and updated your logo, social icons, and address, you’re good to go!
Add pattern blocks to templates
If you use our default patterns or have built your own, you can even add them into your template. This makes it really easy for you to mix and match templates and patterns to easily create the exact newsletter you want.

Save your custom template
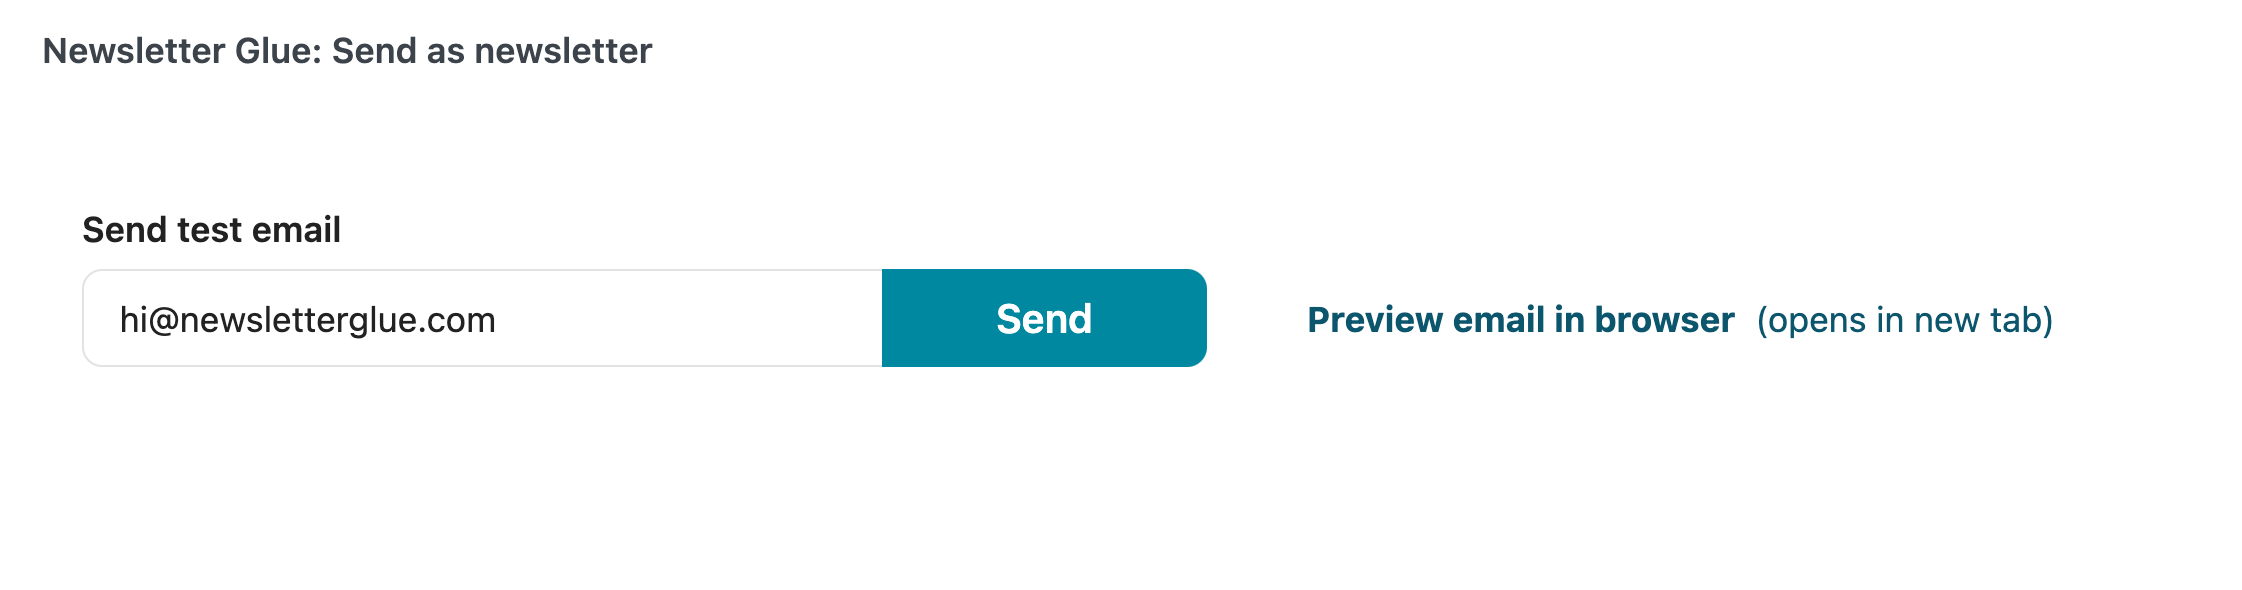
When ready, you can click Update or Save as draft, then check out your email template by clicking Preview email in browser or send yourself a test email.
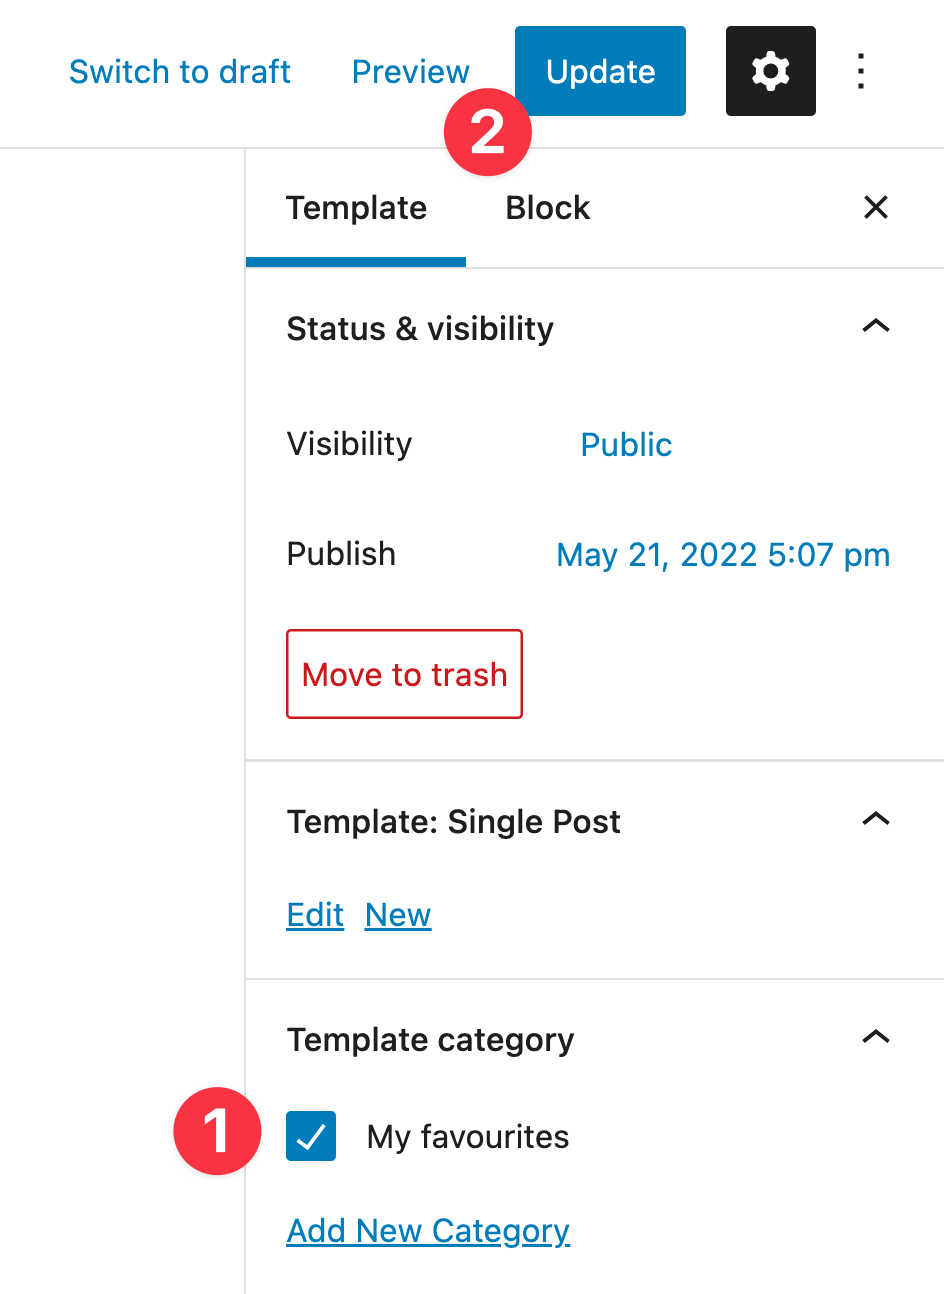
Once you’re happy with how your email template looks, give it a template category for better organisation and click Update to save your template.
2. Select active template
Then in Templates, make your newsletter template the active one, by clicking Set active template.

3a. Add new newsletter – Your new workflow
When it comes to writing a new newsletter, it’s as simple as clicking Add new newsletter. Your active template will auto load and from there, it’ll be as easy as filling out a form every week.
3b. Multiple newsletters – Your new workflow
If you have multiple newsletters, you might not want to set an active newsletter. Instead, your new workflow will be to head to All newsletters, and click on Select template. From there, you can pick the template that’s relevant for that particular newsletter and start writing.
Summary
And that’s it! To recap, here’s some of the key benefits of our new template feature:
- Pre-built default templates for inspiration and easy starting point.
- Save time with Active template feature – Your active template will save you time and clicks by automatically loading every time you create a new newsletter.
- Easily build your own templates in WordPress block editor.
Check out demo template library
If you aren’t a Newsletter Glue customer and would like to try out our template library, great news: You can!
Head to our template library, and click on the template you’d like to check out.
You’ll be taken directly into our custom editor, where you can play around and try out any of our default templates.
Thanks for reading!
