

Email service provider
Sendy Integration
A self hosted newsletter application that lets you send trackable emails via Amazon Simple Email Service (SES) at 100x cheaper than other hosted solutions.
What you can achieve with this integration
- Connect to WordPress via API key. No migration is needed.
- Collect new subscribers with our built-in form that connects to your Sendy account.
- Build your newsletters in WordPress, send them out using Sendy via API.
- Send a campaign to your specific subscriber’s segment.
- Add your own merge tags that are already on Sendy. Includes unsubscribe links.
How to integrate Sendy with WordPress using Newsletter Glue plugin
Prerequisites
- Sendy version 6 account (Important: Newsletter Glue is incompatible with older versions of Sendy)
- Amazon SES account
- Newsletter Glue plugin and license
- WordPress site with Newsletter Glue plugin already installed
Integrate during Newsletter Glue onboarding
Step 1: Get your API key details
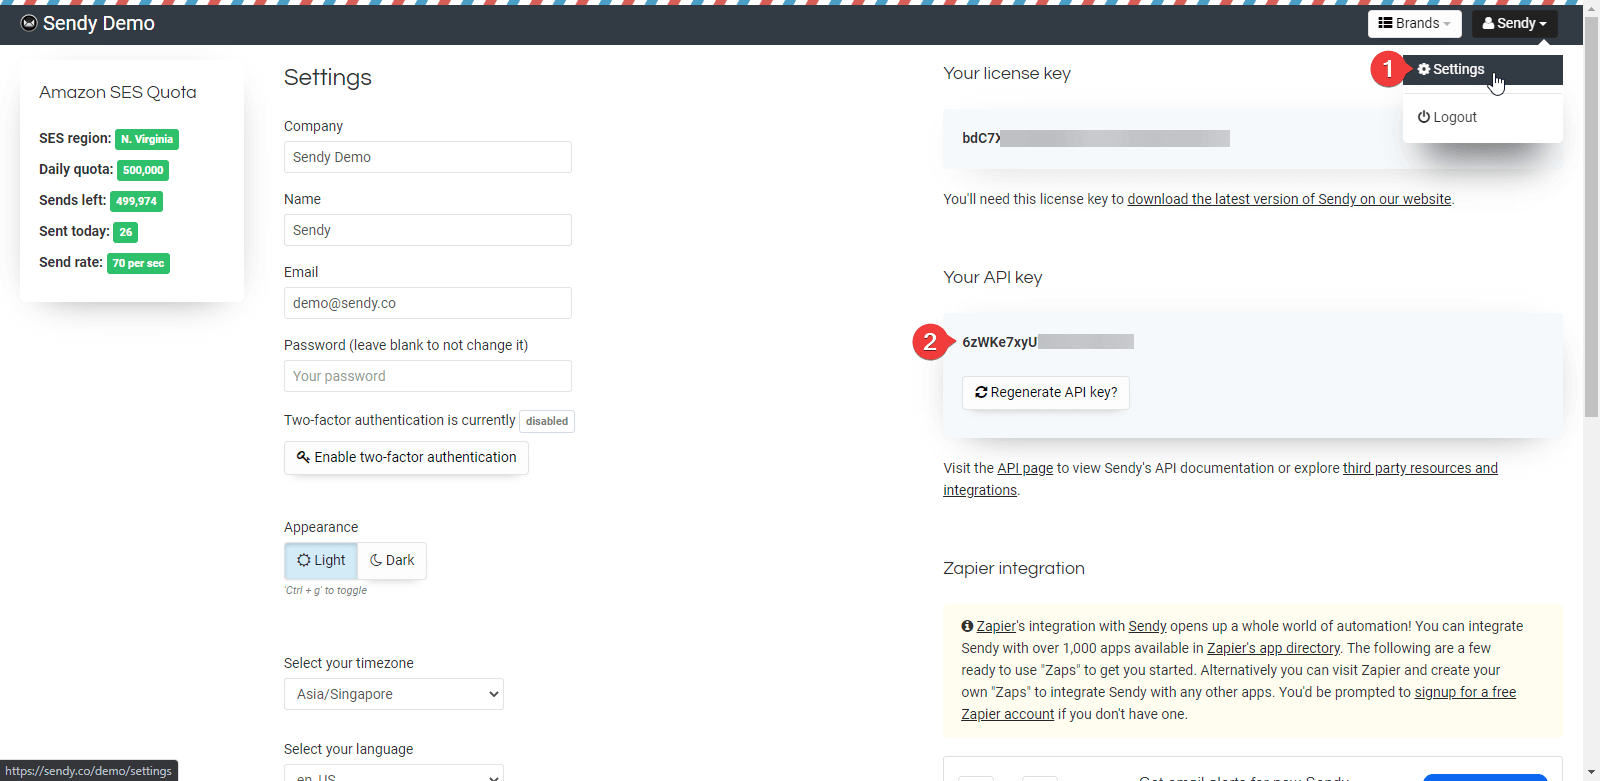
- Go to Sendy Dashboard, click on Profile Menu → Settings
- On the Your API Key section, copy the API Key
- Copy your Sendy installation URL. Important note: use http:// not https:// for your URL.
Step 2: Get your Brand and List IDs
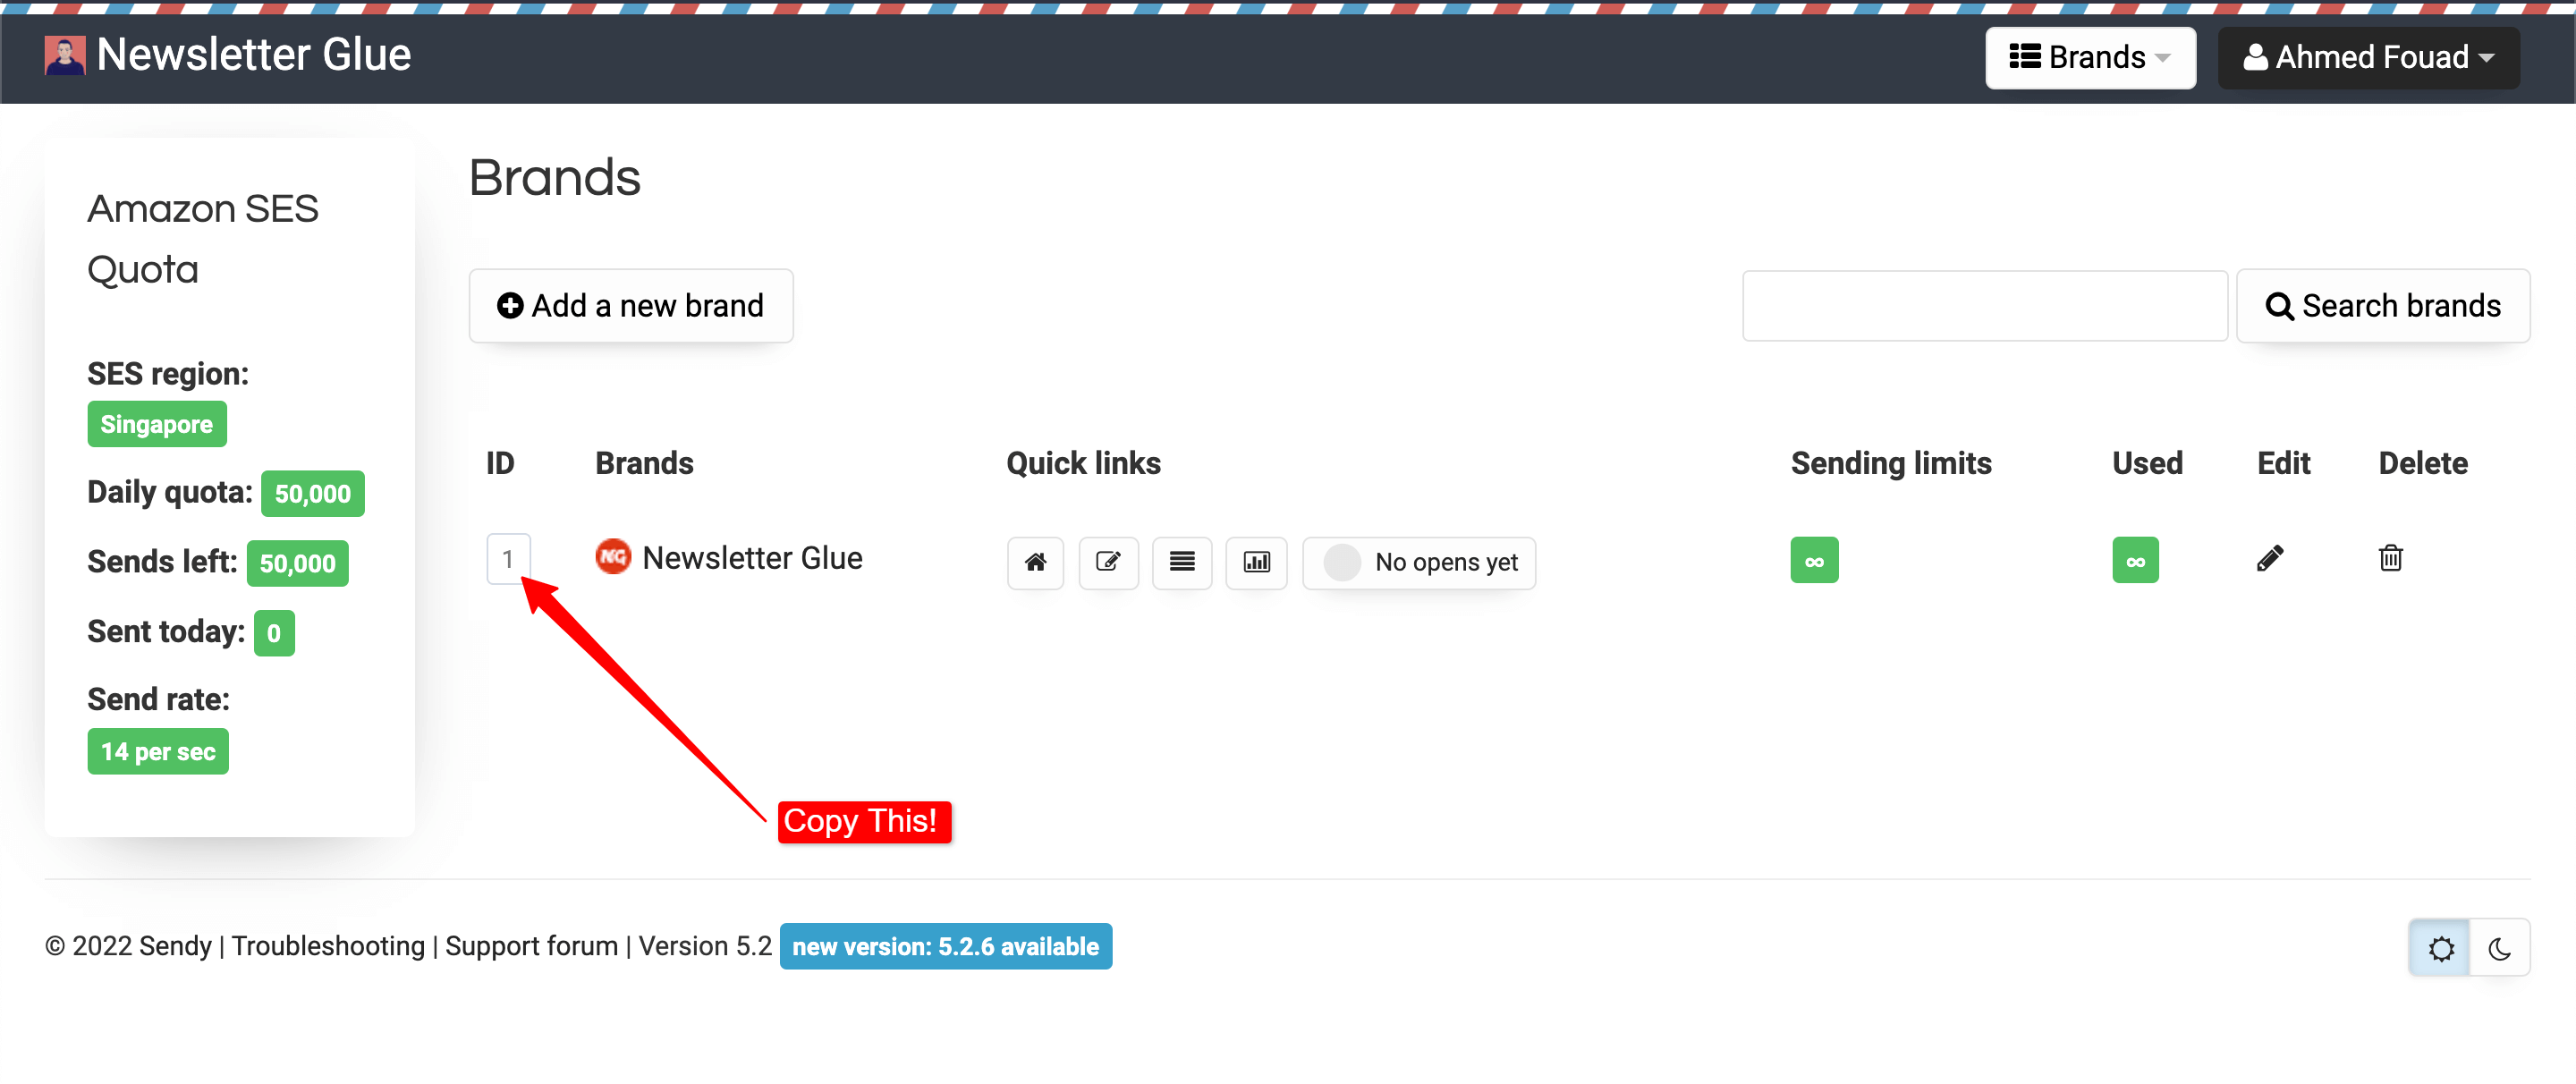
2.1. Get your Brand ID
On your Sendy Dashboard, find a brand you want to add to the Newsletter Glue. Copy the ID number.
2.2. Get your List IDs
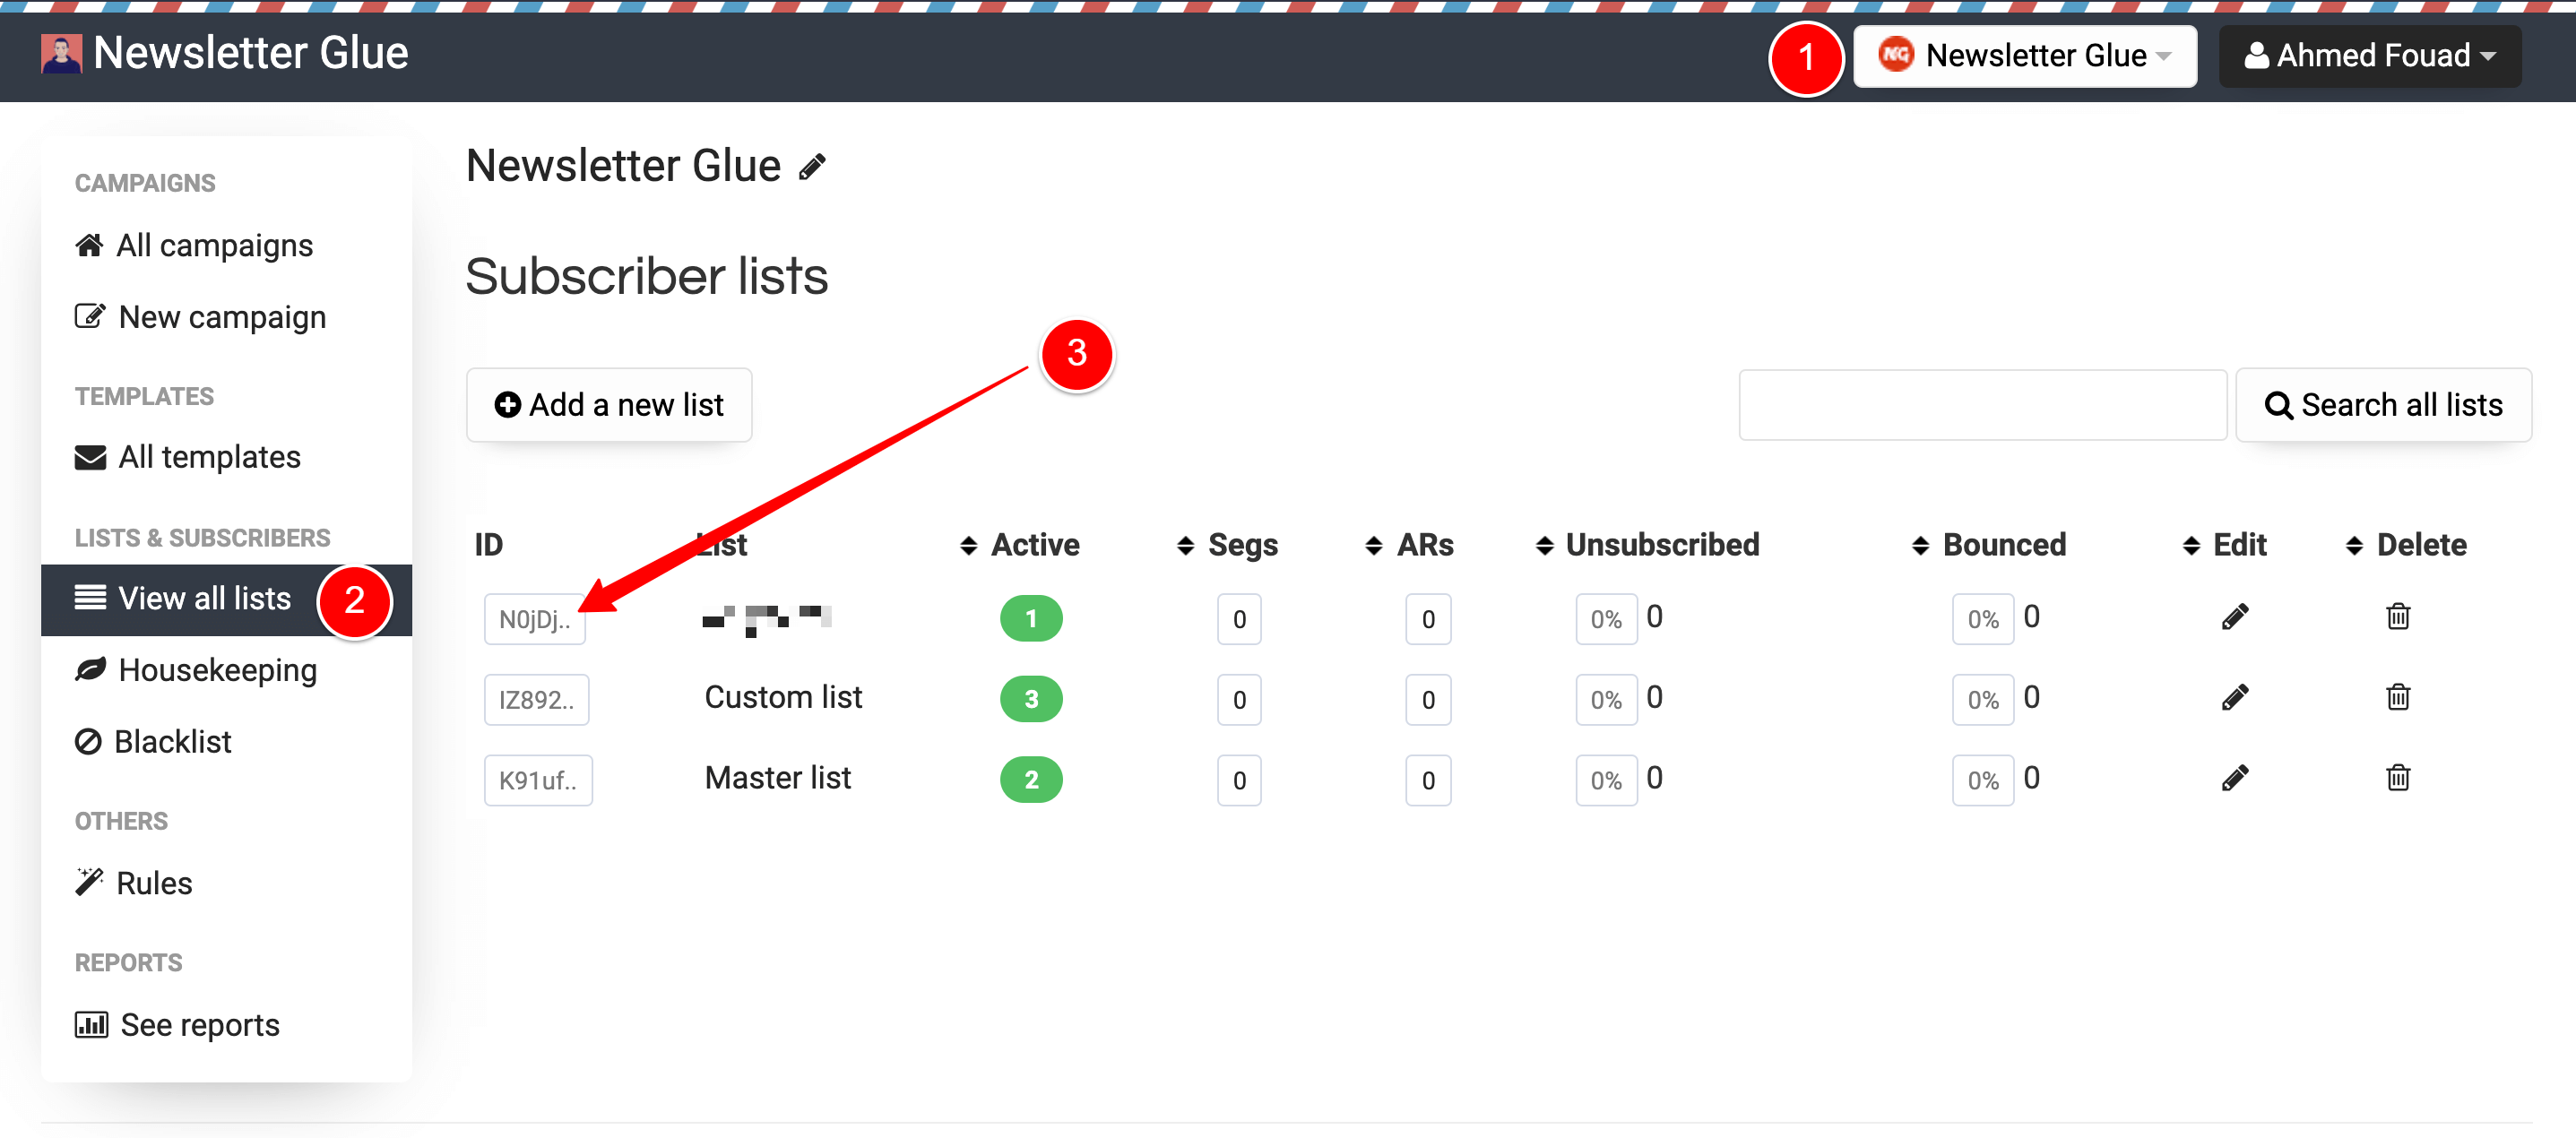
- On your Sendy Dashboard, navigate to your brand from the Brand dropdown
- Click on View all lists menu
- Copy the ID of your List
Step 3: Connect Sendy to Newsletter Glue
After activating the Newsletter Glue plugin, you’ll be taken to our onboarding wizard.
Enter your license key in Step 1.
In Step 2:
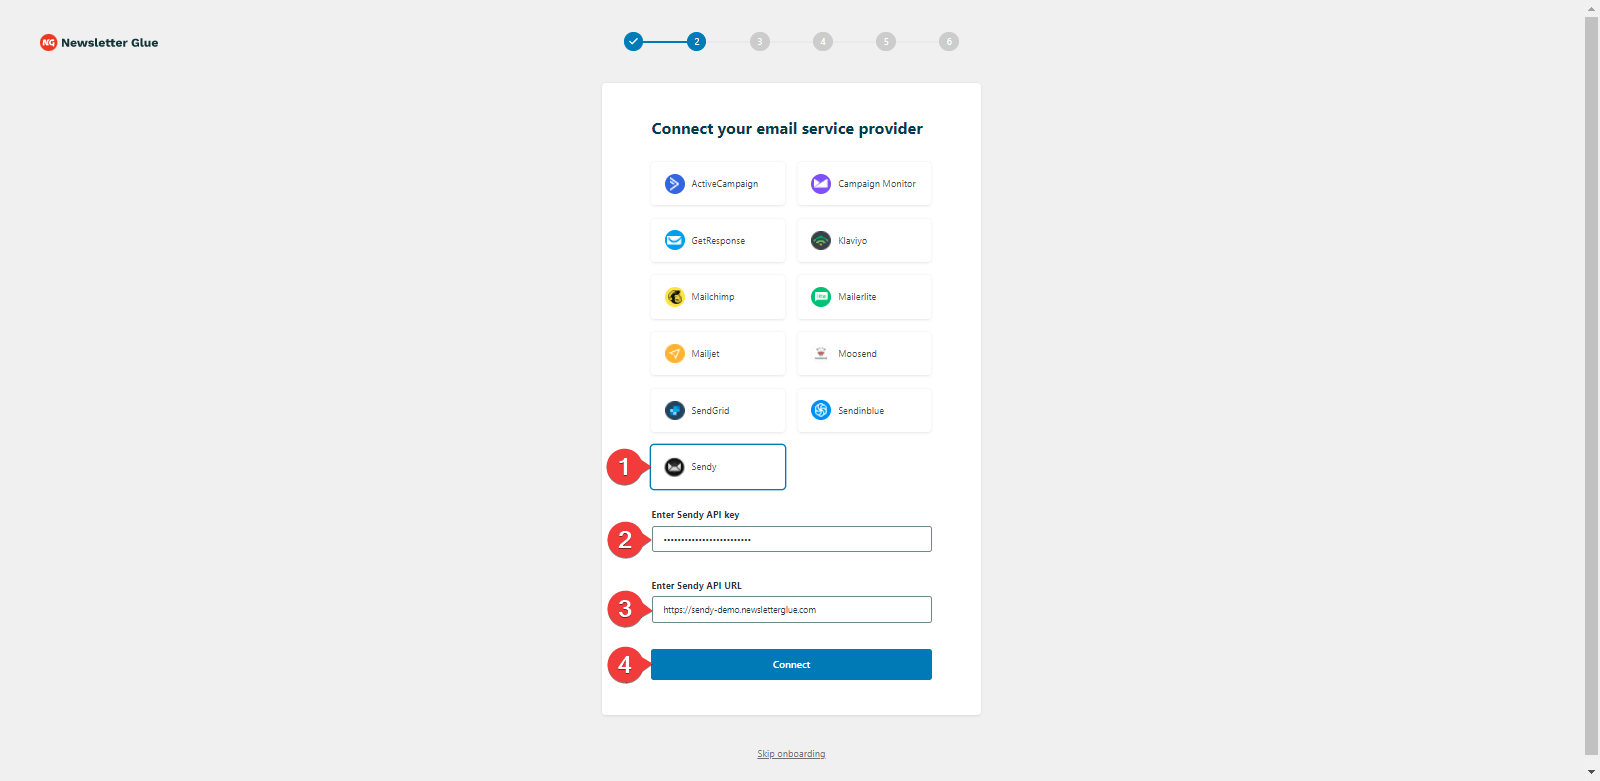
- Select Sendy from the Email service provider options
- Paste your API Key
- Paste your Sendy URL. Remember to use http:// not https://
- Click on Connect button
- Once successfully connected, you’ll be able to select your email defaults, complete your onboarding and begin using Newsletter Glue to build and publish newsletters.
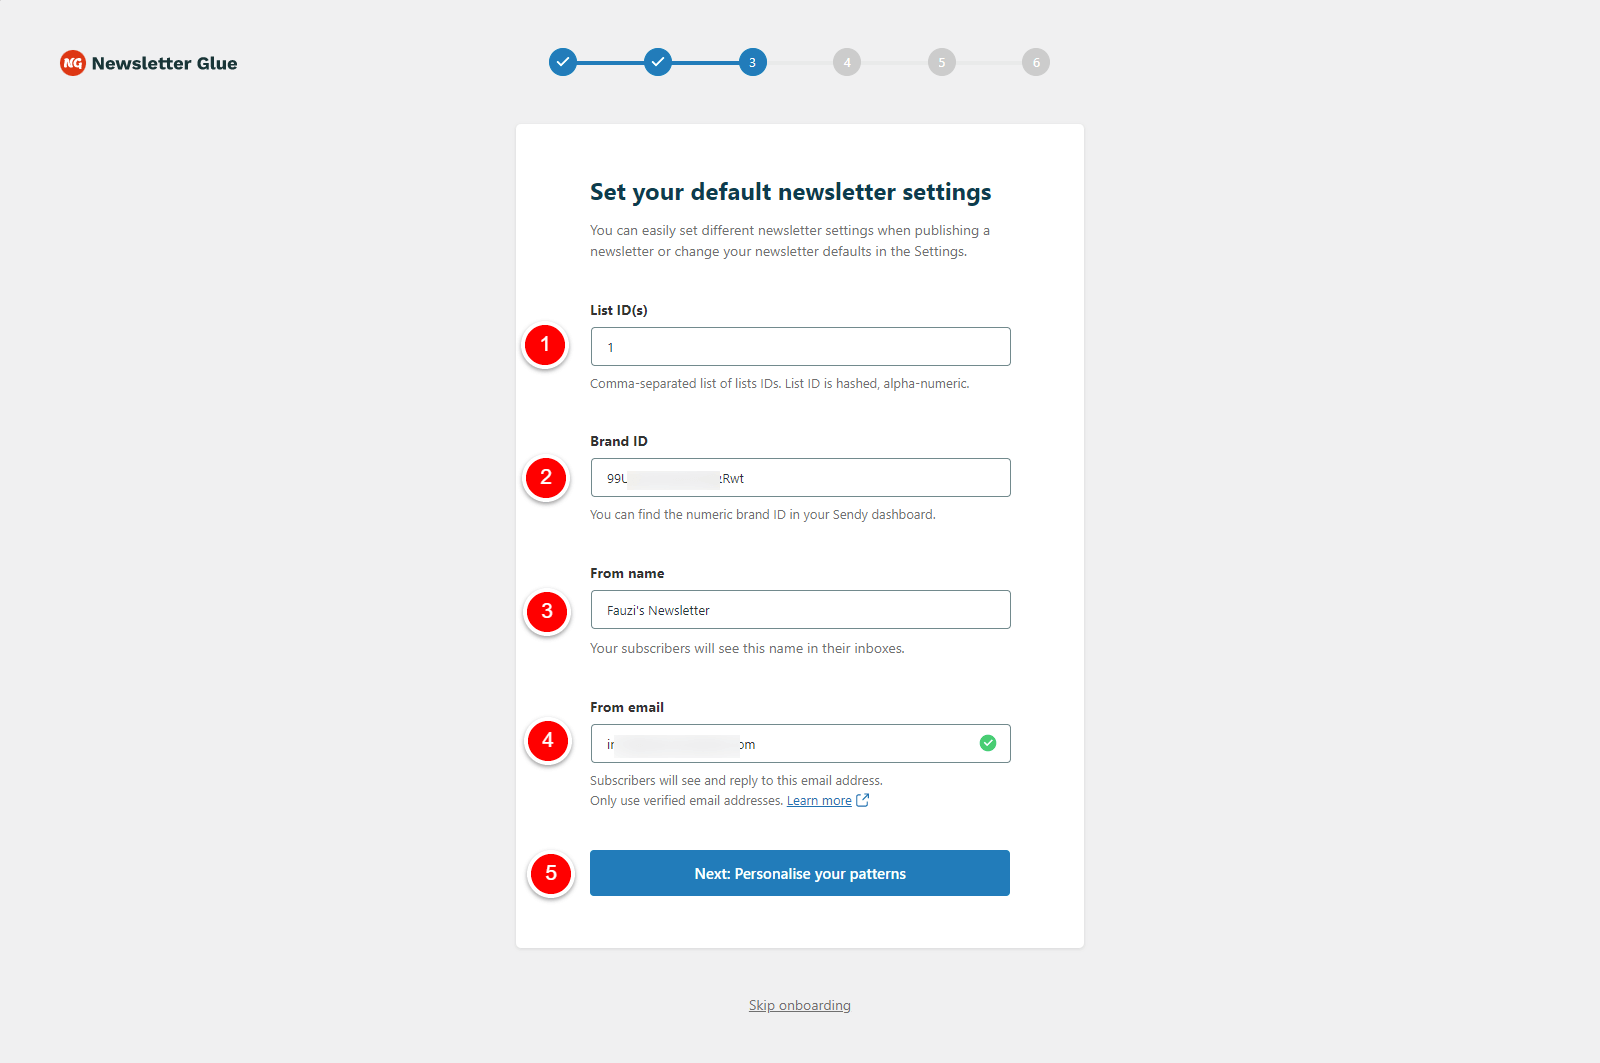
Step 4: Insert your Brand and List IDs
In Step 3:
- Paste your List IDs
- Paste your Brand ID
- Set the From Name
- Set your From Email
- Click Next
Integrate from Settings → Connections
Step 1: Get your API key details
- Go to Sendy Dashboard, click on Profile Menu → Settings
- On the Your API Key section, copy the API Key
- One more thing, copy your Sendy installation url
Step 2: Get your Brand and Lists IDs
2.1. Get your Brand ID
On your Sendy Dashboard, find a brand you want to add to the Newsletter Glue. Copy the ID number.
2.2. Get your Lists IDs
- On your Sendy Dashboard, navigate to your brand from the Brand dropdown
- Click on View all lists menu
- Copy the IDs of your Lists
Step 3: Connect Sendy to Newsletter Glue
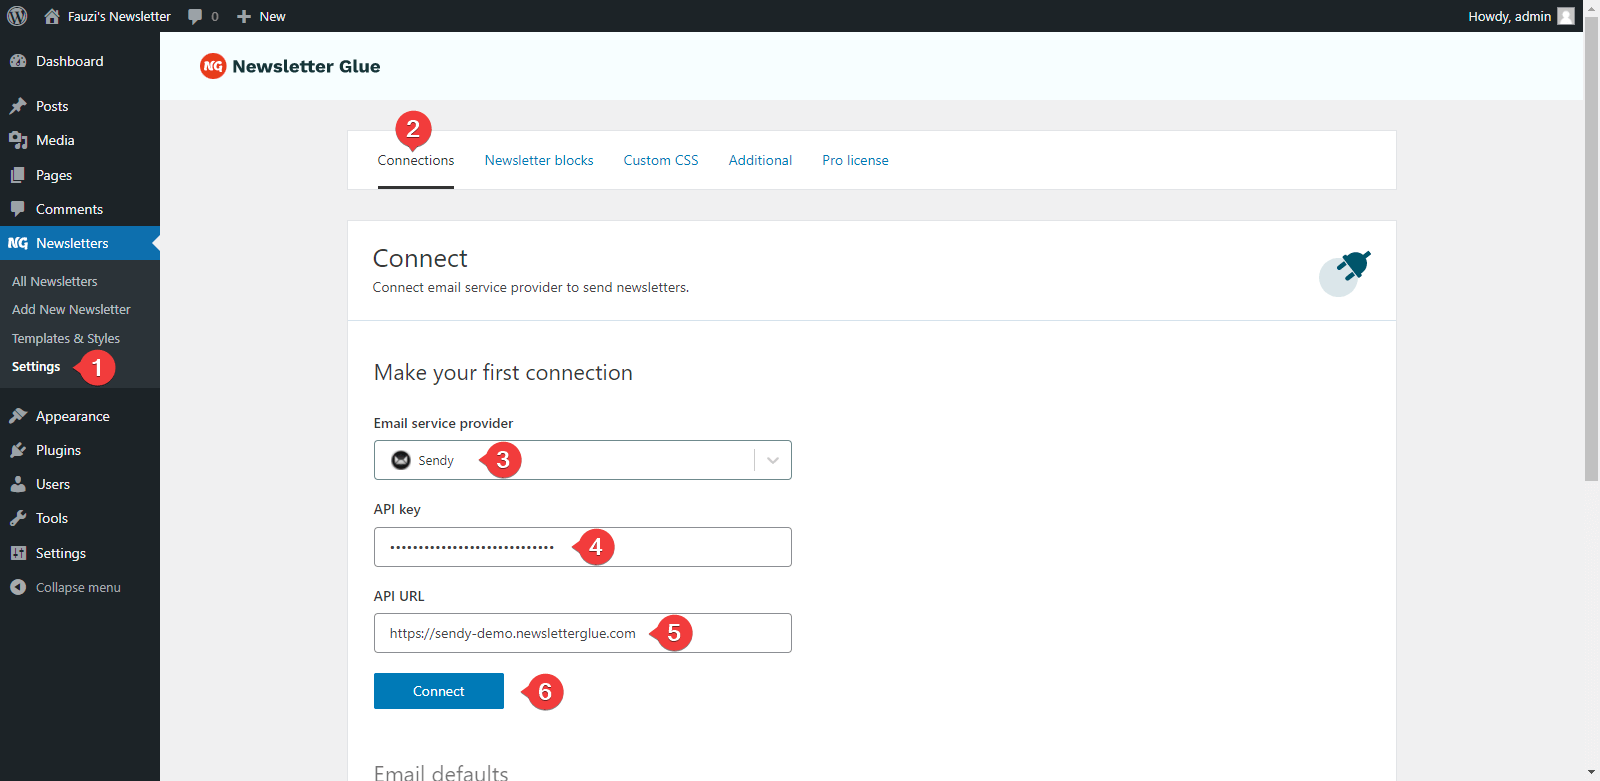
- On your WP Dashboard, go to the Newsletter Glue Settings page
- On the Connections tab, set as follows:
- Select Sendy from the Email service provider dropdown
- Paste your API Key
- Paste your Sendy URL
- Click on Connect button
- Once successfully connected, you’ll be able to use Newsletter Glue to build and publish newsletters.
Step 4: Insert your Brand and Lists IDs
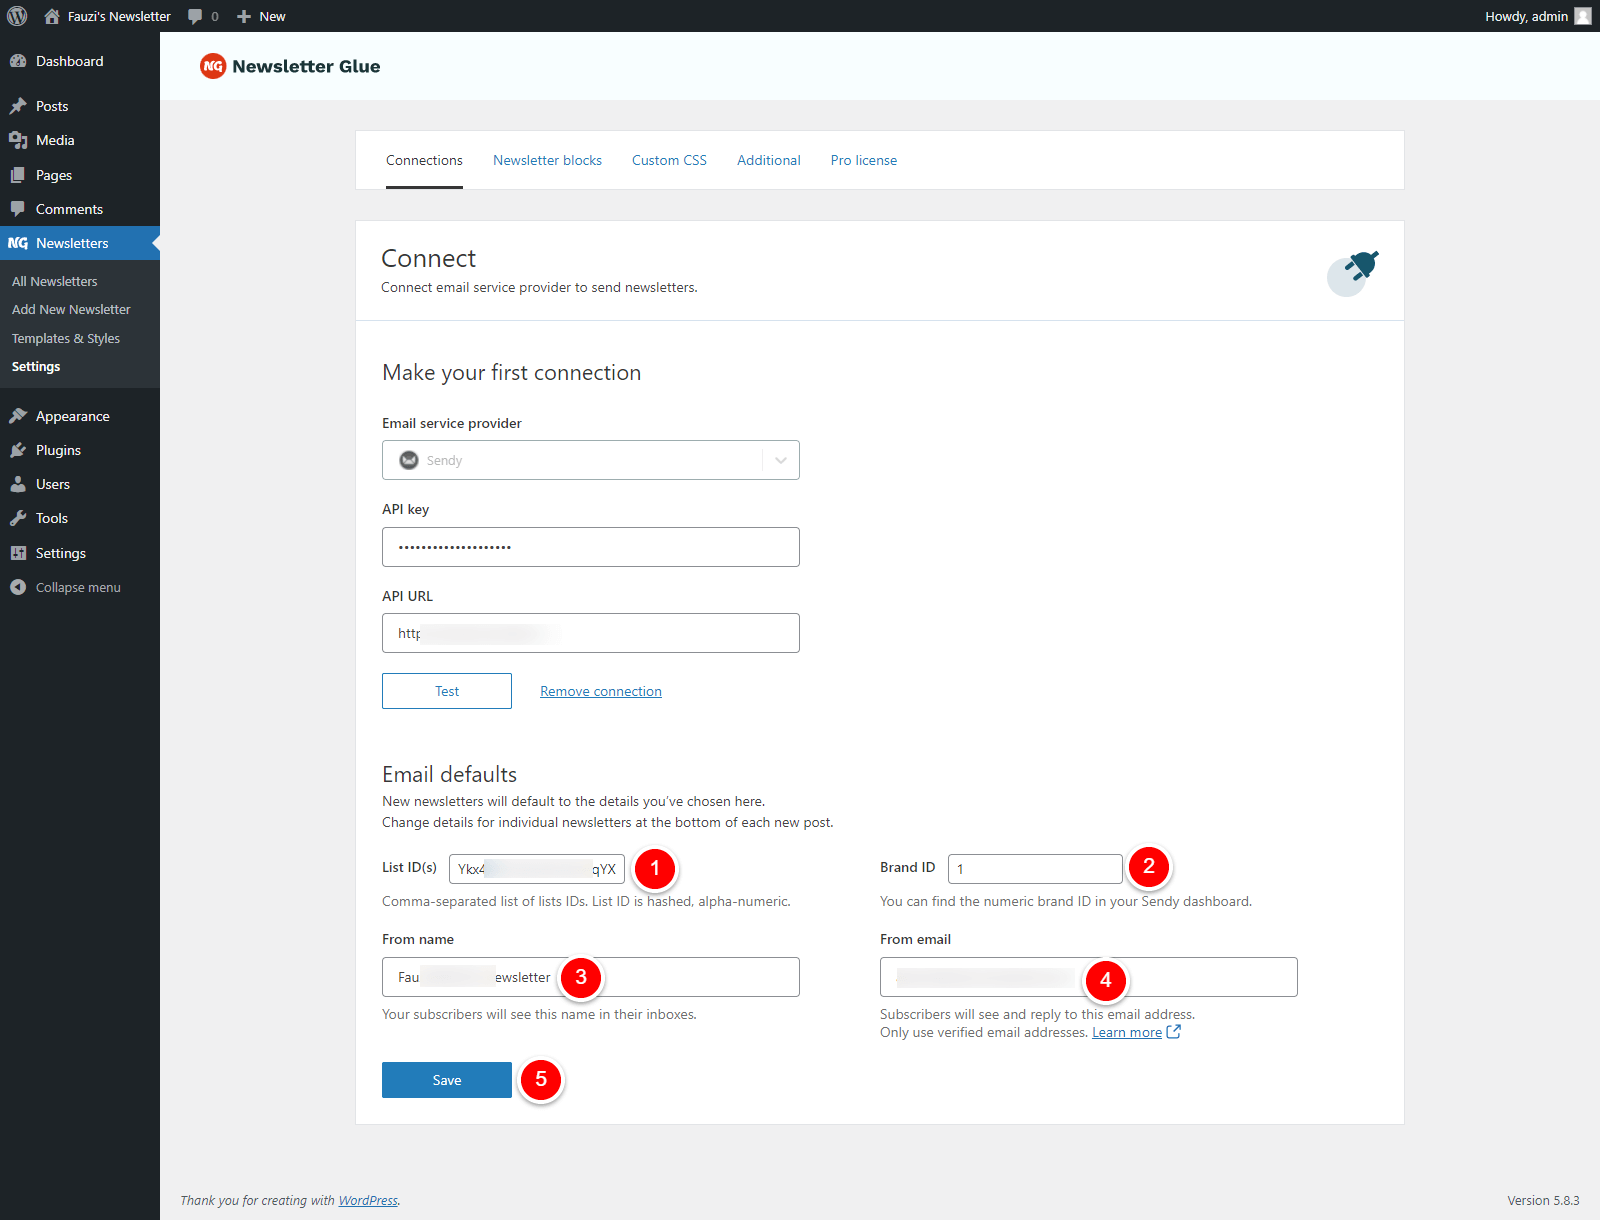
After successfully connected, you can insert your Brand and Lists IDs
- Paste your Lists IDs
- Paste your Brand ID
- Set the From Name
- Set your From Email
- Click Save
Ready for a faster, smoother publishing experience?
Write and grow your newsletter in WordPress. Connect via API. No migration needed.
14-day money back guarantee