A self hosted newsletter application that lets you send trackable emails via Amazon Simple Email Service (SES) at 100x cheaper than other hosted solutions.
What you can achieve with this integration
How to integrate Sendy with WordPress using Newsletter Glue plugin
Pre-requisites
Integrate during Newsletter Glue onboarding
Step 1: Get your API key details
- 1Go to Sendy Dashboard, click on Profile Menu -> Settings
- 2On the Your API Key section, copy the API Key
- 3Copy your Sendy installation URL. Important note: use http:// not https:// for your URL.

Step 2: Get your Brand and List IDs
2.1. Get your Brand ID
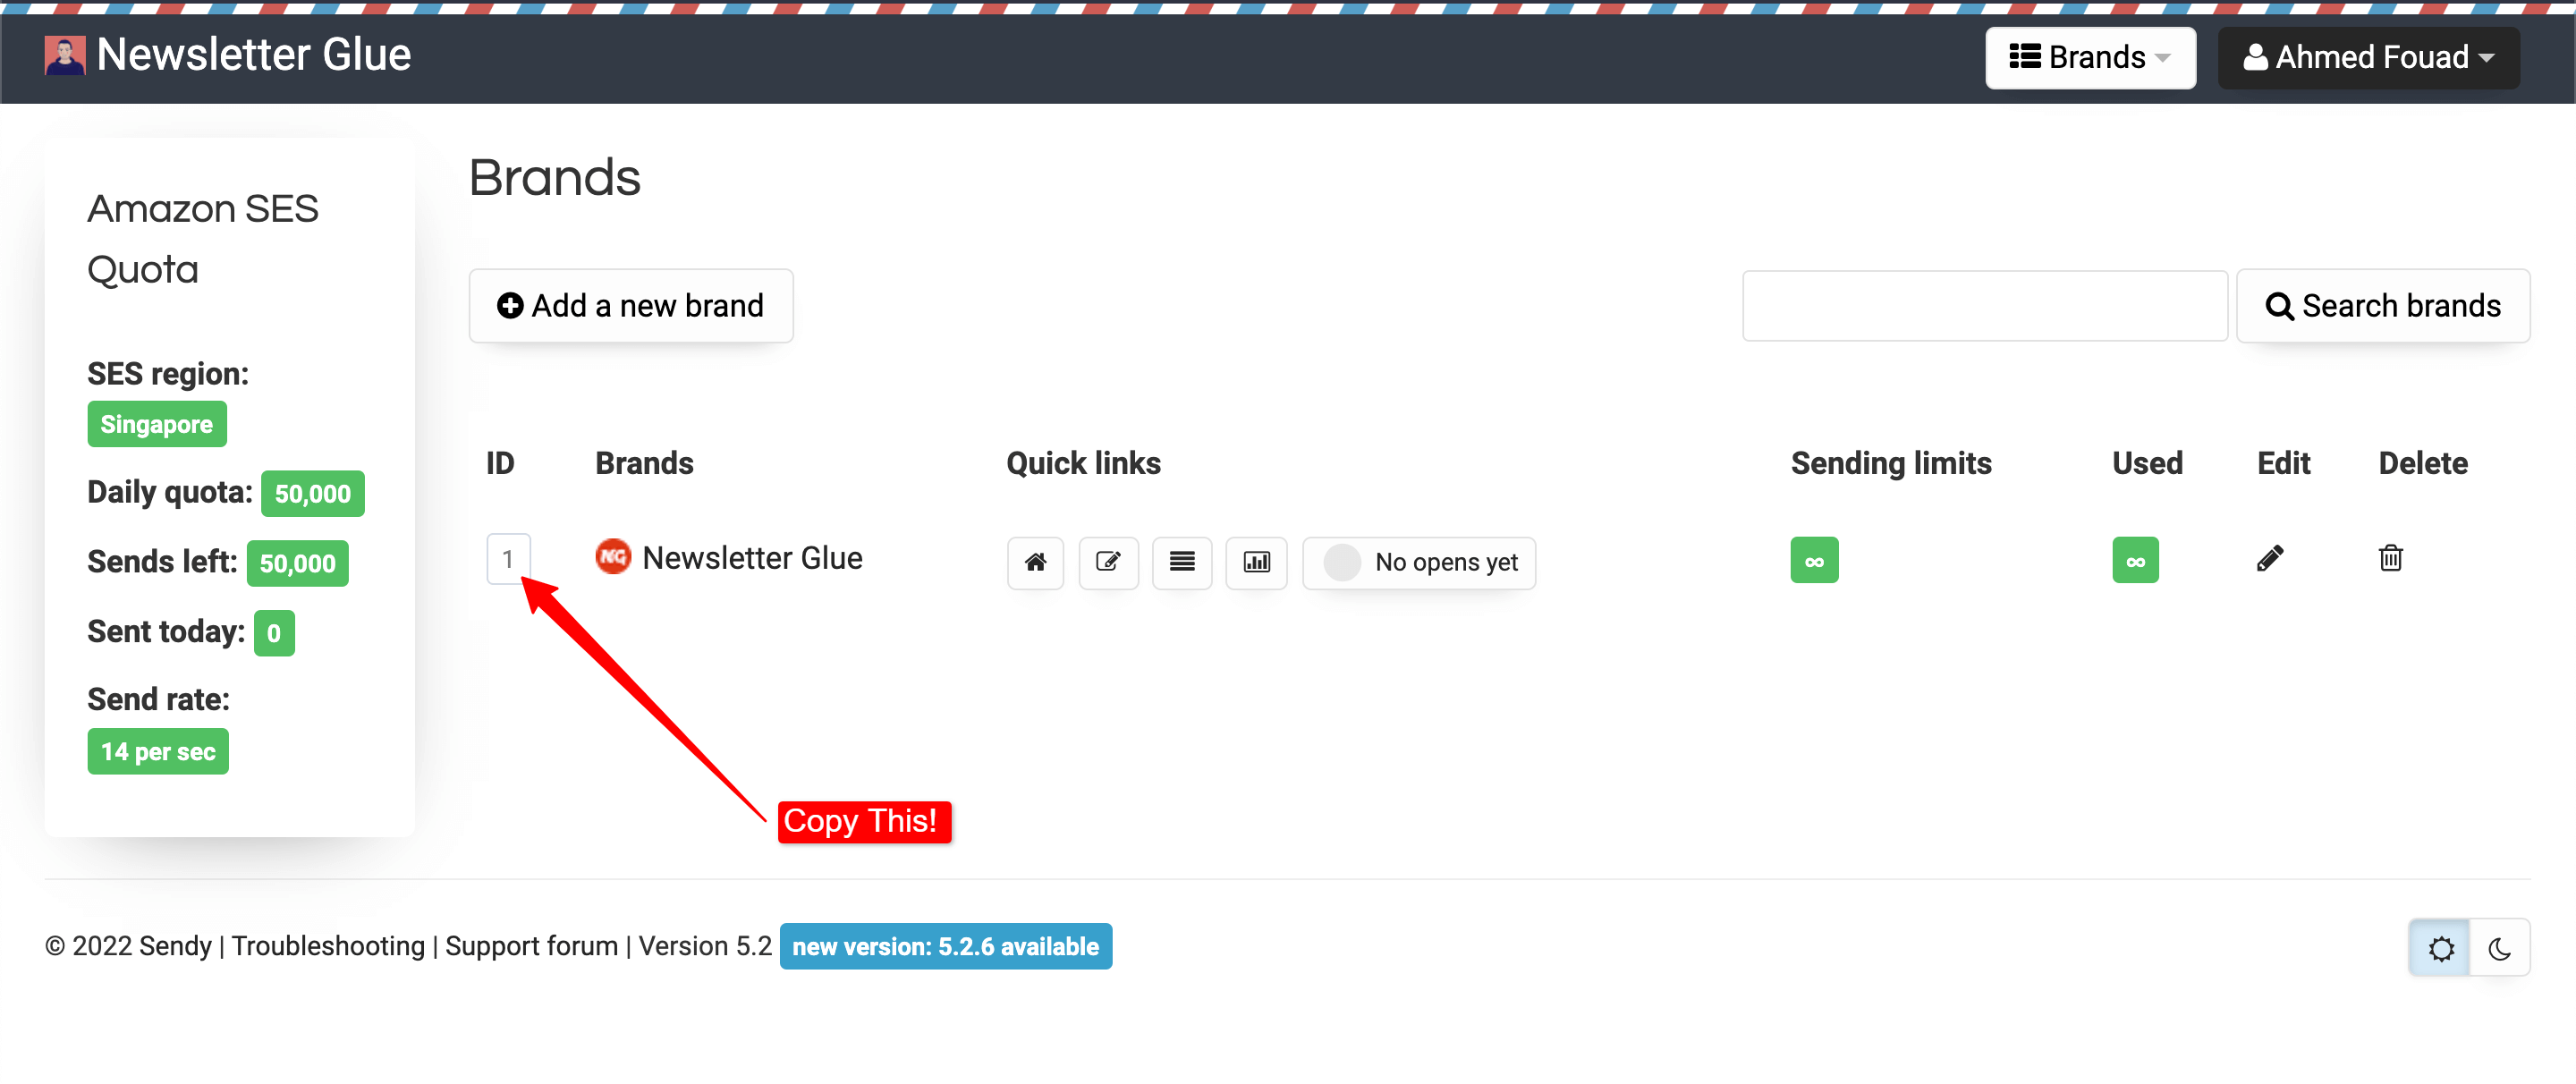
On your Sendy Dashboard, find a brand you want to add to the Newsletter Glue. Copy the ID number.
2.2. Get your List IDs
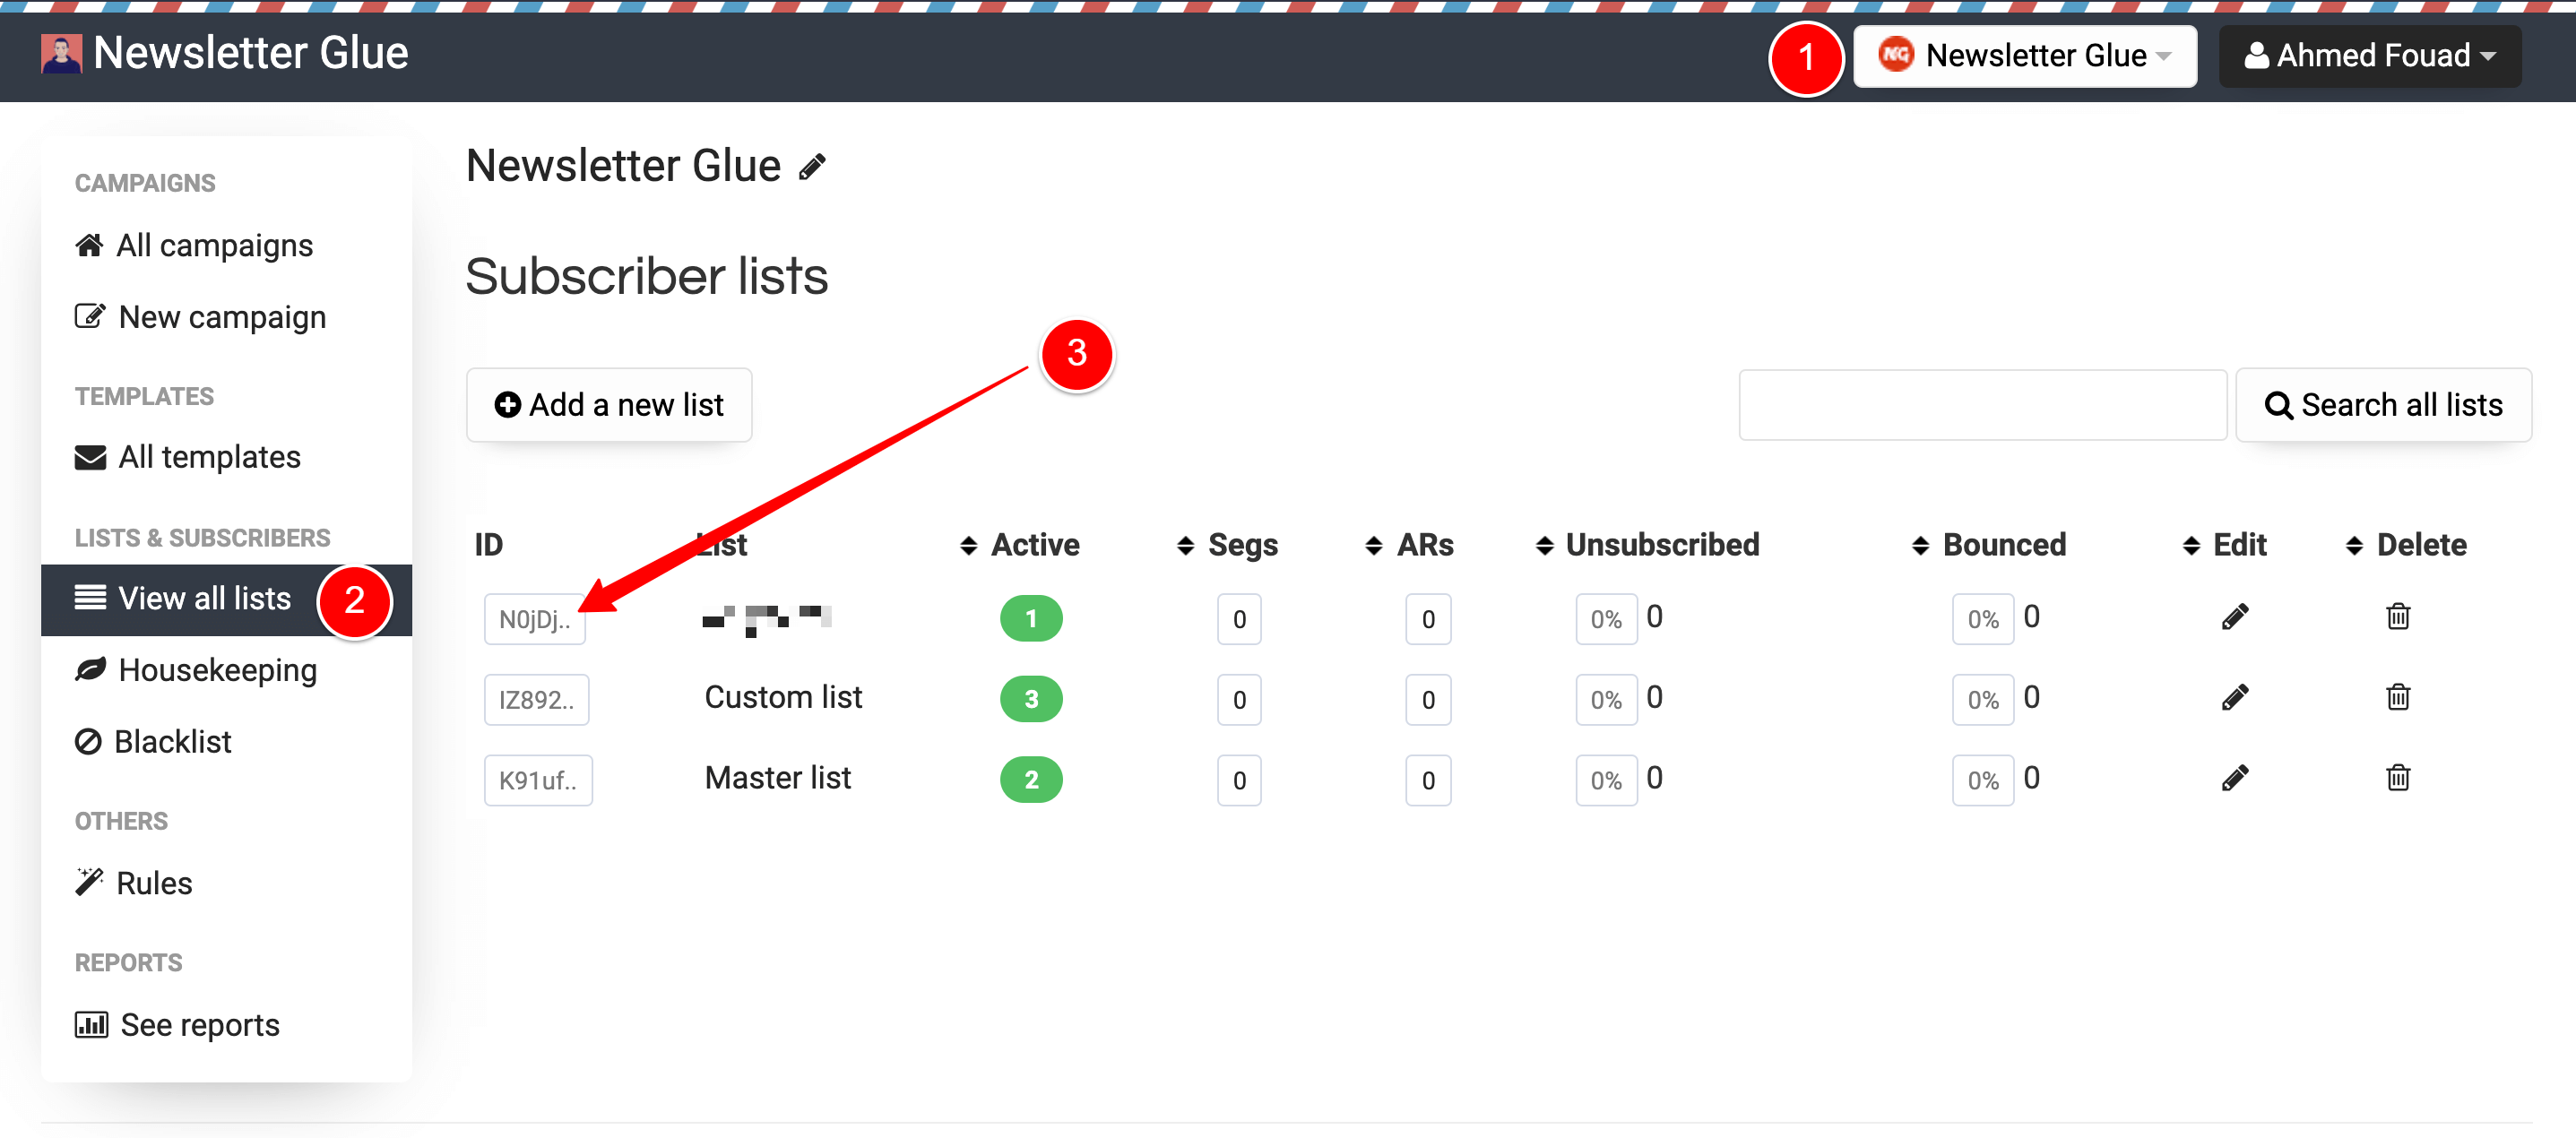
- 1On your Sendy Dashboard, navigate to your brand from the Brand dropdown
- 2Click on View all lists menu
- 3Copy the ID of your List
Step 3: Connect Sendy to Newsletter Glue
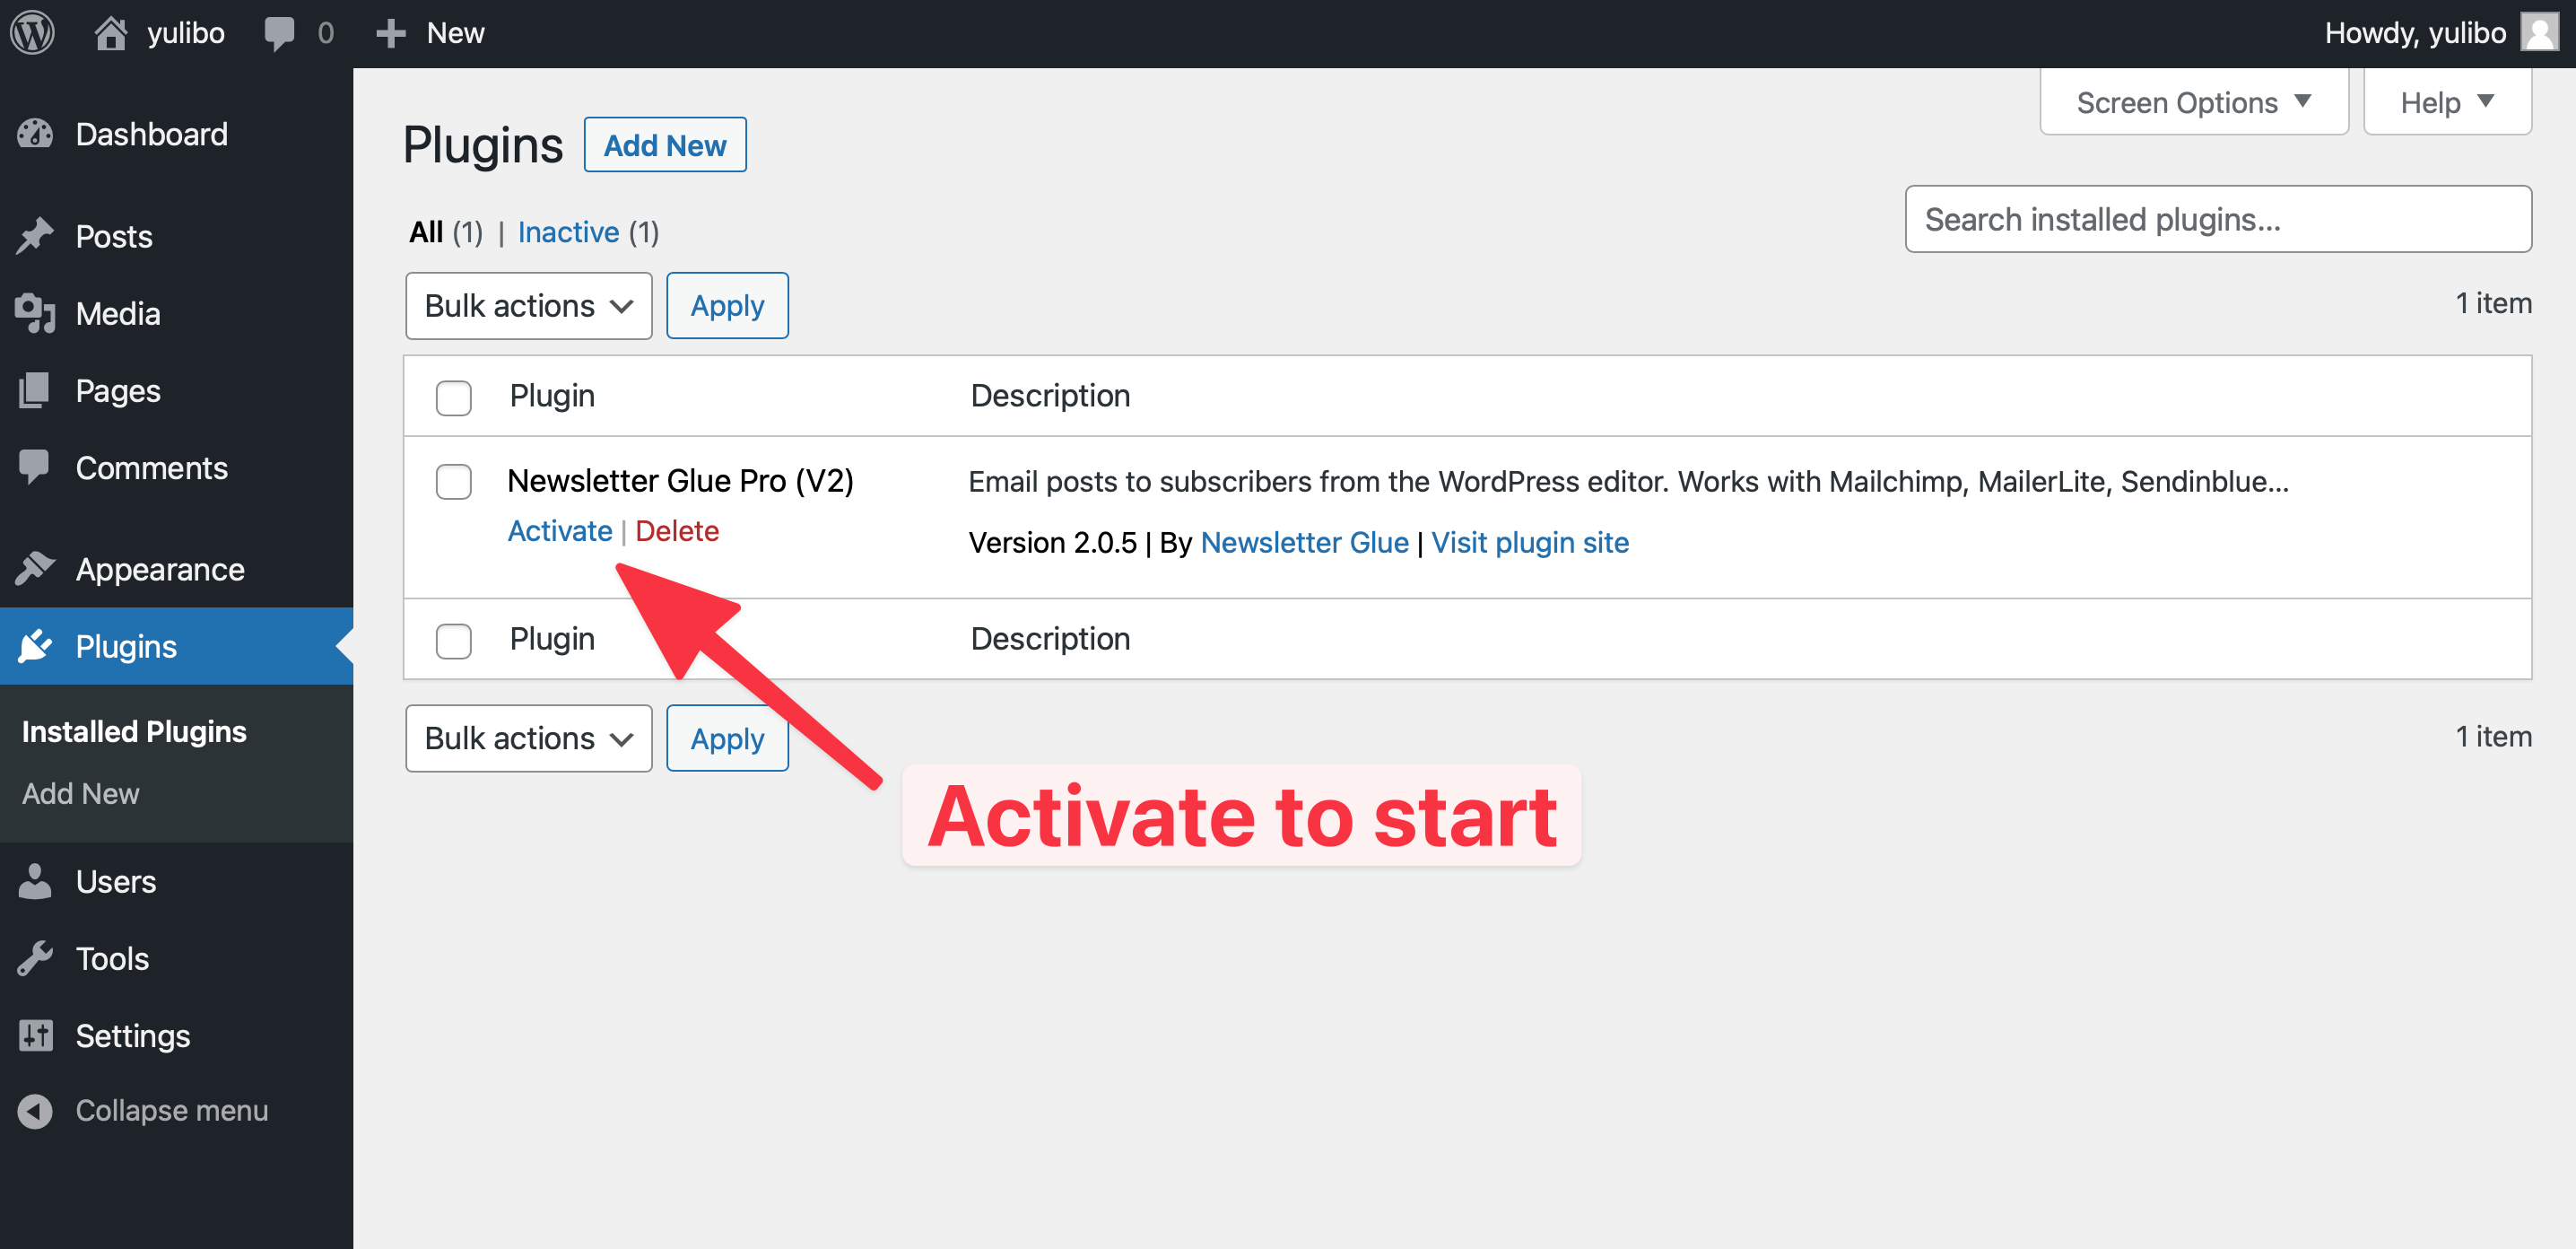
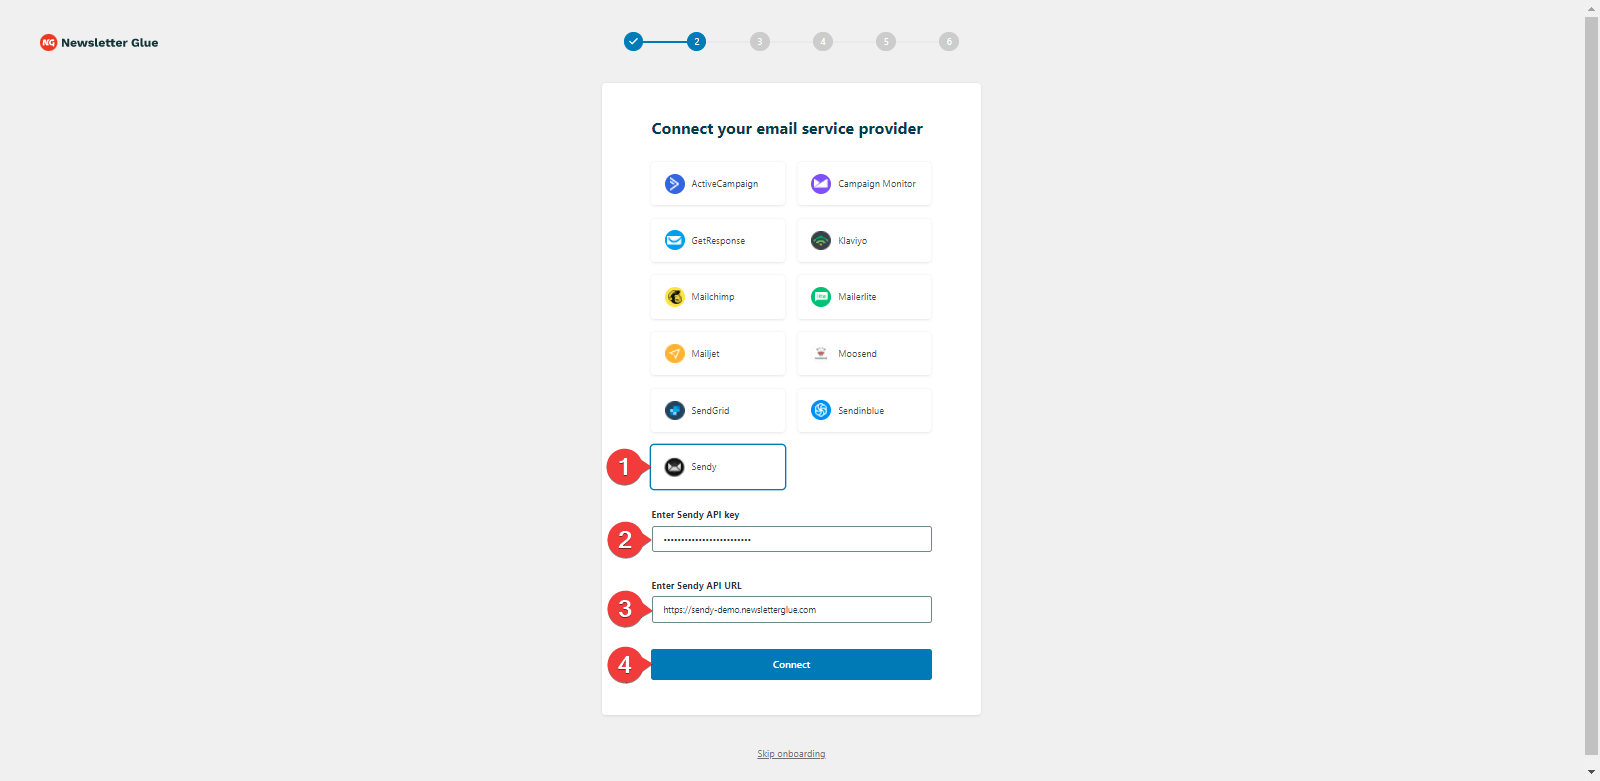
After activating the Newsletter Glue plugin, you'll be taken to our onboarding wizard.
Enter your license key in Step 1.
In Step 2:
- 1Select Sendy from the Email service provider options
- 2Paste your API Key
- 3Paste your Sendy URL. Remember to use http:// not https://
- 4Click on Connect button
- 5Once successfully connected, you'll be able to select your email defaults, complete your onboarding and begin using Newsletter Glue to build and publish newsletters.
Step 4: Insert your Brand and List IDs
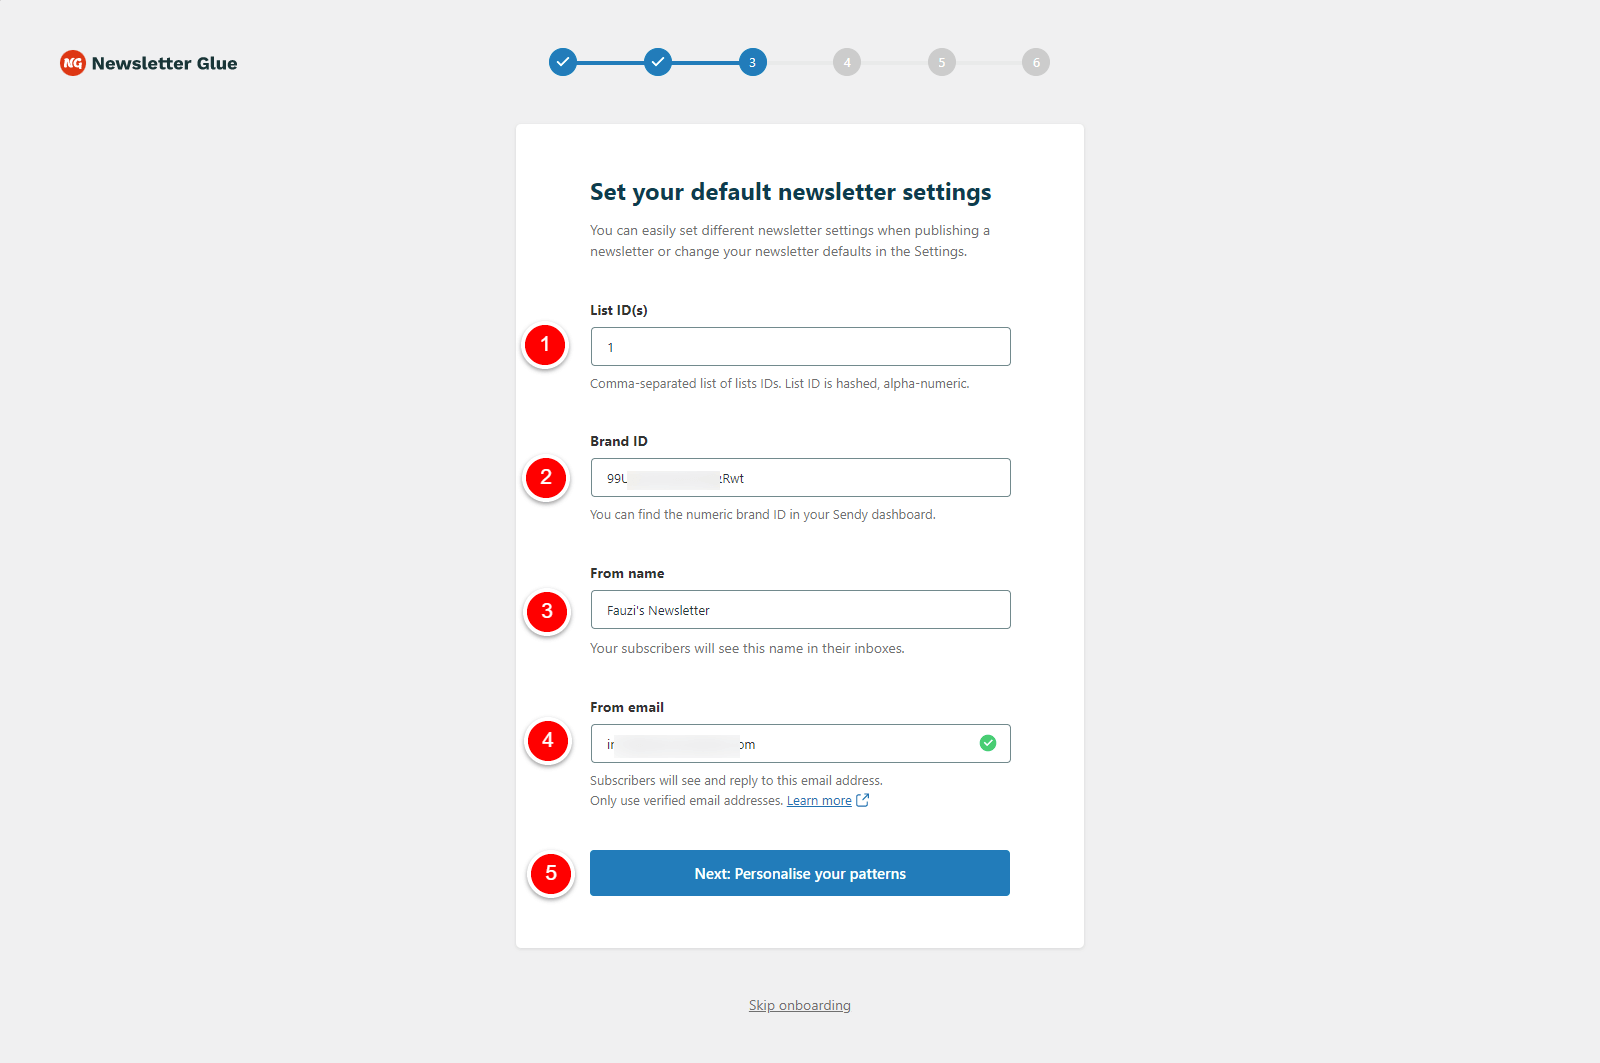
In Step 3:
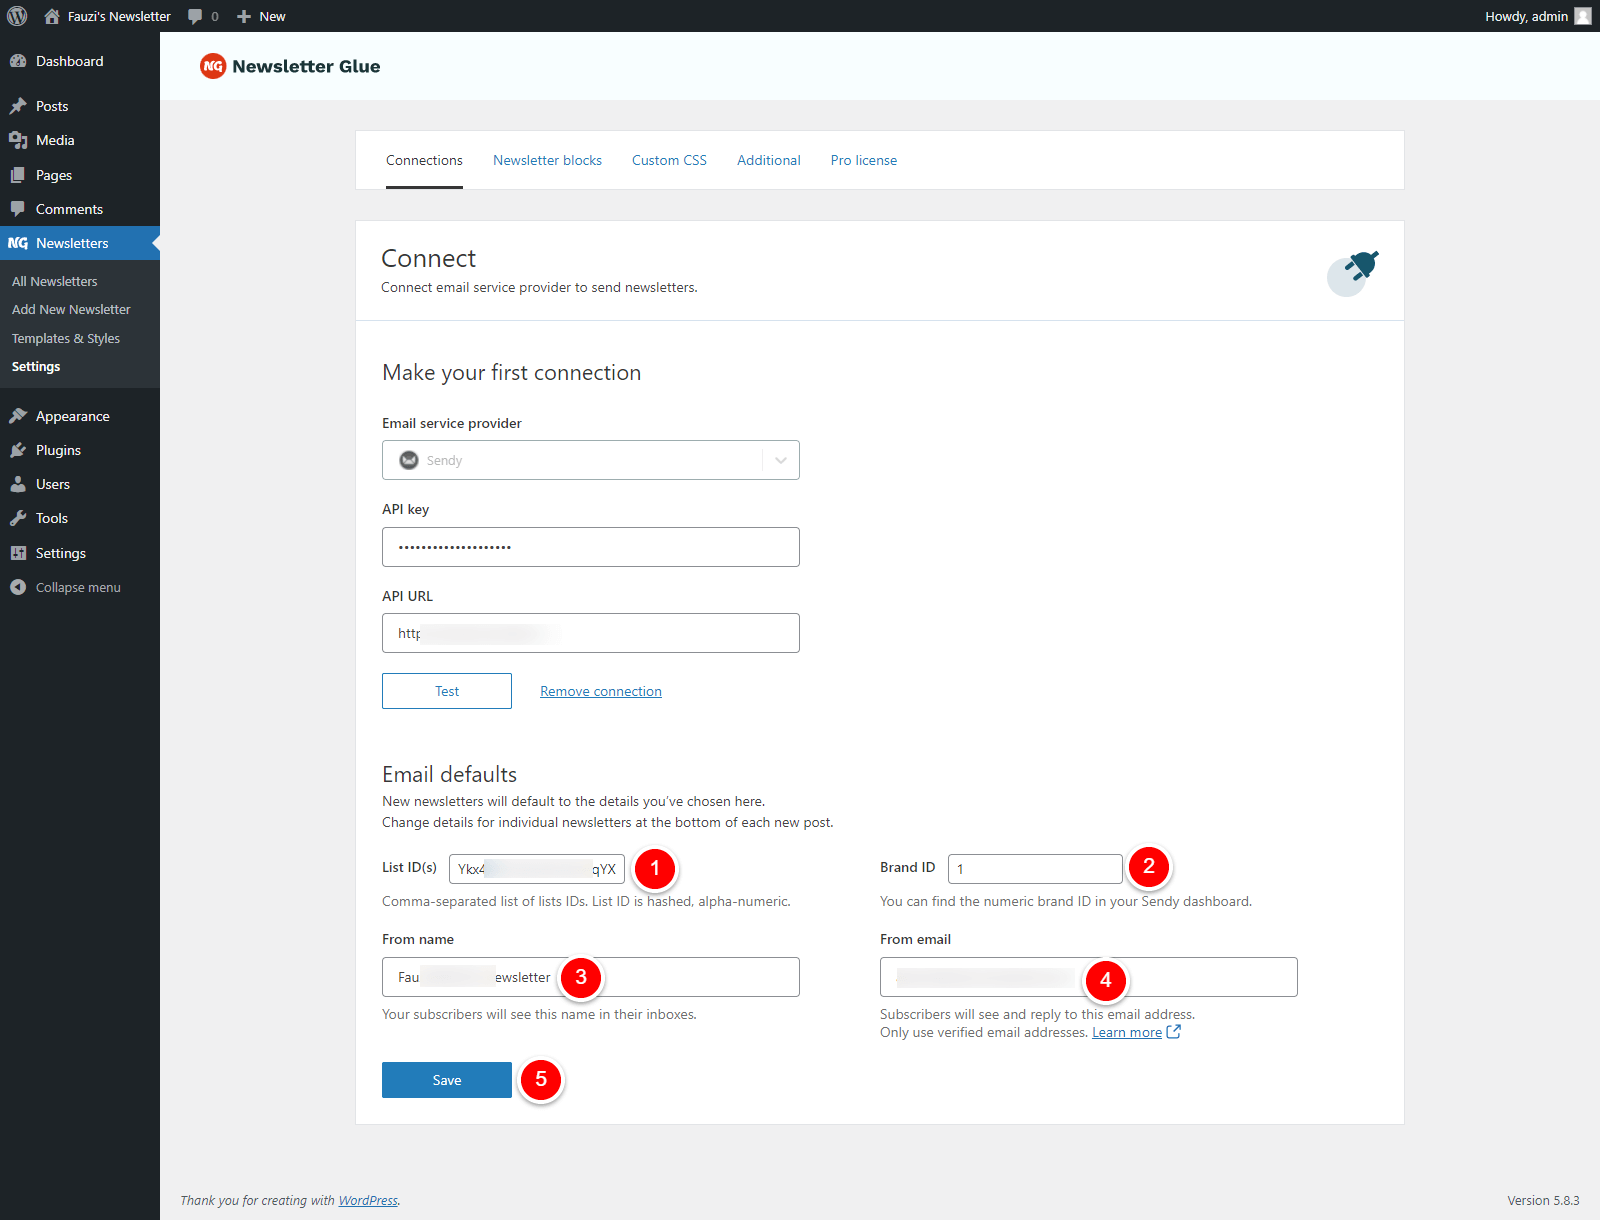
- 1Paste your List IDs
- 2Paste your Brand ID
- 3Set the From Name
- 4Set your From Email
- 5Click Next
Integrate from Settings -> Connections
Step 1: Get your API key details
- 1Go to Sendy Dashboard, click on Profile Menu -> Settings
- 2On the Your API Key section, copy the API Key
- 3One more thing, copy your Sendy installation url

Step 2: Get your Brand and Lists IDs
2.1. Get your Brand ID
On your Sendy Dashboard, find a brand you want to add to the Newsletter Glue. Copy the ID number.

2.2. Get your Lists IDs
- 1On your Sendy Dashboard, navigate to your brand from the Brand dropdown
- 2Click on View all lists menu
- 3Copy the IDs of your Lists

Step 3: Connect Sendy to Newsletter Glue
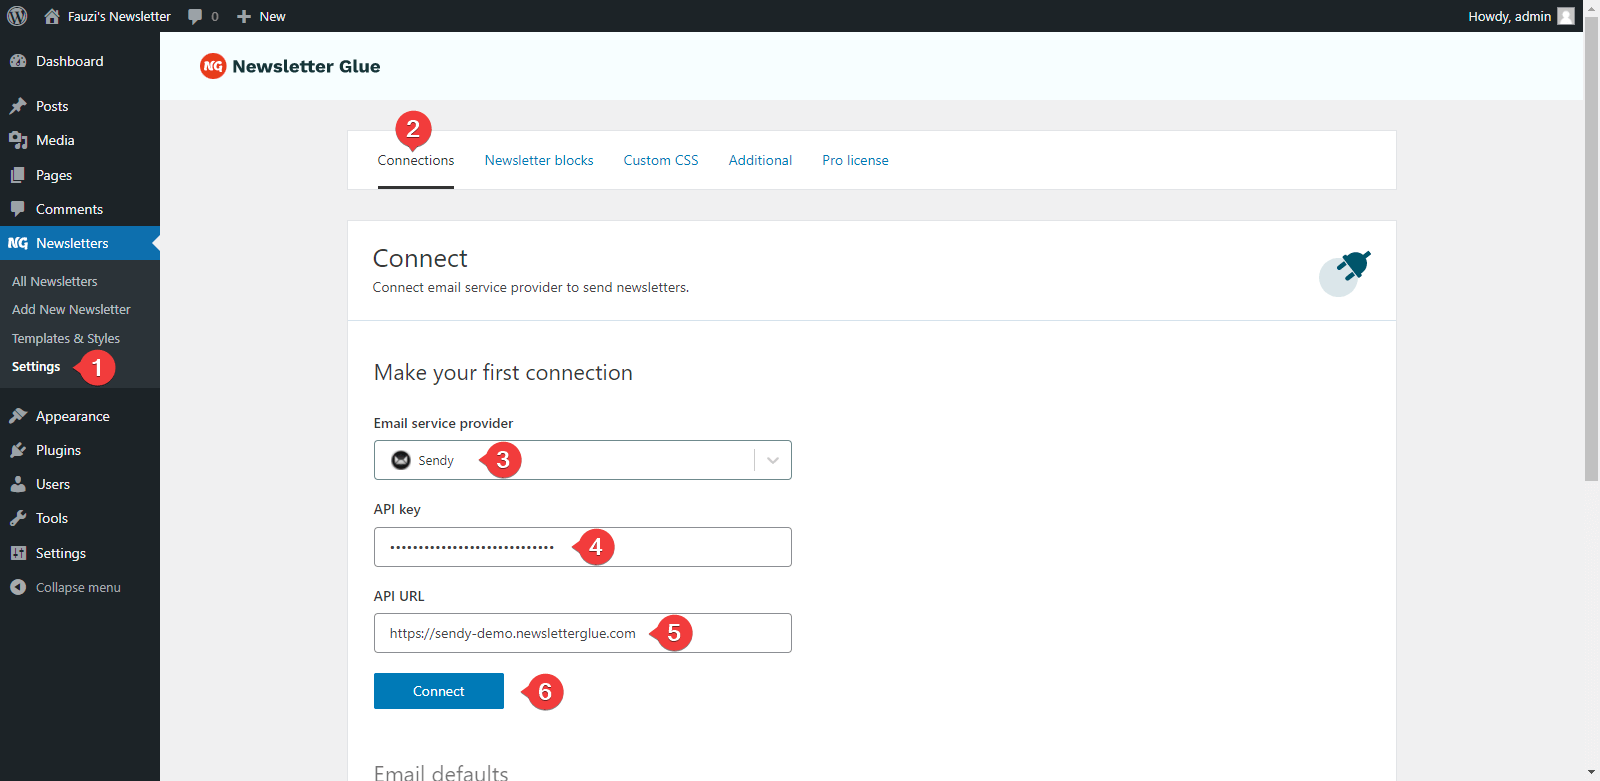
- 1On your WP Dashboard, go to the Newsletter Glue Settings page
- 2On the Connections tab, set as follows:
- 3Select Sendy from the Email service provider dropdown
- 4Paste your API Key
- 5Paste your Sendy URL
- 6Click on Connect button
- 7Once successfully connected, you'll be able to use Newsletter Glue to build and publish newsletters.
Step 4: Insert your Brand and Lists IDs
After successfully connected, you can insert your Brand and Lists IDs
- 1Paste your Lists IDs
- 2Paste your Brand ID
- 3Set the From Name
- 4Set your From Email
- 5Click Save
