
This post is part 3 of 3 in the mega guide to setting up a paid newsletter on WordPress with Paid Memberships Pro. Read part 1, 2.
What is Newsletter Glue and why should you use it?
Newsletter Glue is a WordPress plugin that allows you to send your blog posts as email newsletters. It is a great tool that helps save time by eliminating the need to write the same piece of content in both email marketing software and WordPress.
How does it fit into our current workflow?
We’ve set up a WordPress membership website where users can purchase our premium newsletter subscription. We added the Paid Memberships Pro Mailchimp addon, which automatically adds members to the Mailchimp audience list.
However, there’s nothing that connects Mailchimp with WordPress.
That’s where Newsletter Glue comes into the picture. It connects WordPress to email services and allows you to create newsletters using the drag-and-drop WordPress block editor. It allows you to publish the newsletter as a blog post and send it to your mailing list in a well-formatted way.
Let’s see how to install and set it up on our website.
Set up Newsletter Glue
The first step to send newsletters directly from WordPress is to install the Newsletter Glue plugin and connect it to an email service like Mailchimp, MailerLite, Campaign Monitor, and Sendinblue.
For this tutorial, we’ll connect it to Mailchimp, but the steps to connect to other services are the same.
First and foremost, visit the Newsletter Glue website and purchase the plugin.
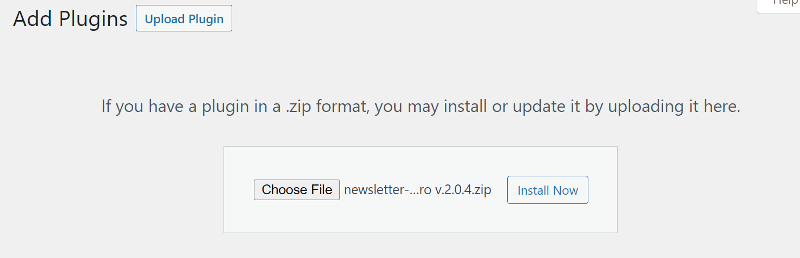
Install Newsletter Glue Pro plugin
Once you’ve downloaded the Newsletter Glue Pro zip file, navigate to your WordPress dashboard and click on Plugins > Add New. Click the Upload Plugin button at the top and select the plugin zip file from your computer to install and activate it.
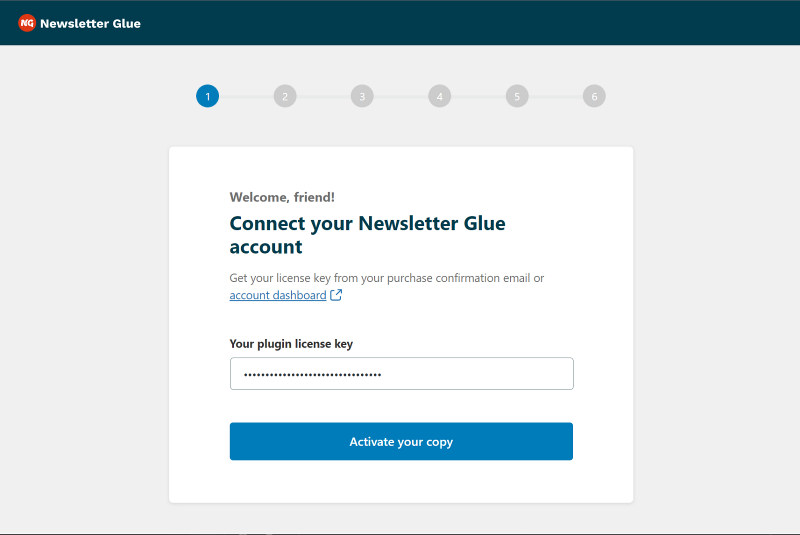
As soon as you do that, the plugin’s onboarding wizard will start. The wizard will assist you to set up the Newsletter Glue plugin on your website.
The first step in the onboarding wizard is to validate your license key. You can find it in your Newsletter Glue account or in the purchase confirmation email.
Copy and paste it into the box to verify your license and unlock Pro features from the plugin. Once done, click on Activate your copy and it will take you to the next step.
Set up email service provider
Newsletter Glue will display all of the email service providers with which it integrates. You can select any from the list, but for this guide, we’ll stick with Mailchimp.
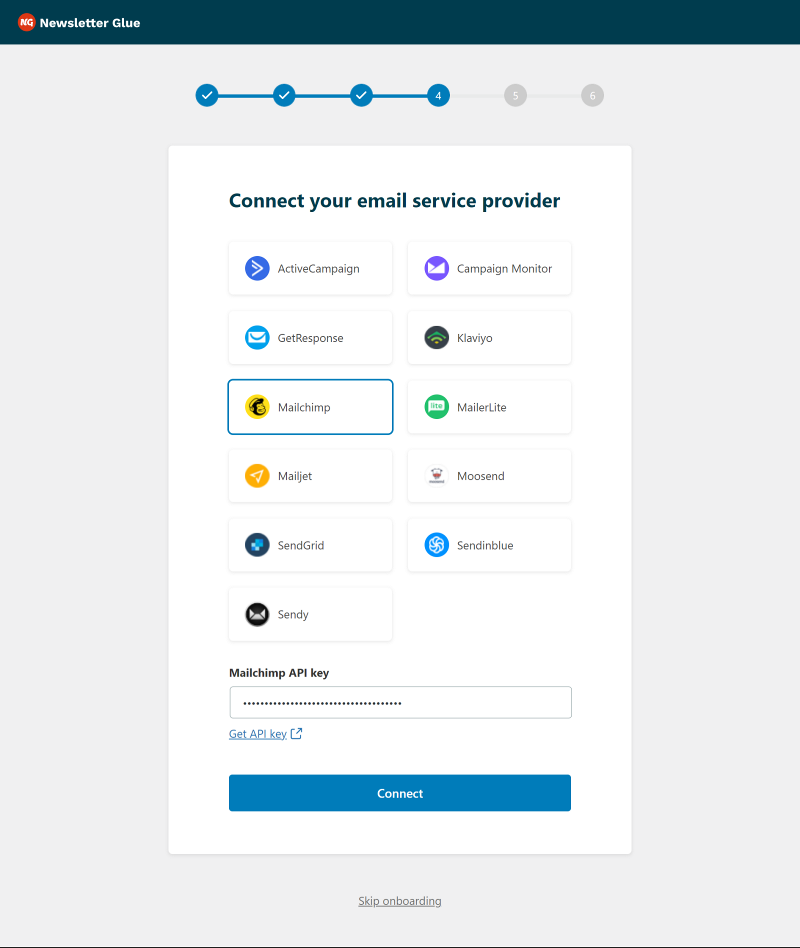
When you click on Mailchimp from the list, a box will appear down below for you to enter your API key. Copy and paste the API key from your Mailchimp account.
Click on the Connect button and it will validate the key and move you to the next step.
In the next step, you can select your Mailchimp audience list and segment that will receive your email newsletters. Below it, you can specify a From name and From email address for the email newsletters that will be sent using Newsletter Glue. Your audience will see this as the sender in their inbox, so it’s best to use your brand name and email address.
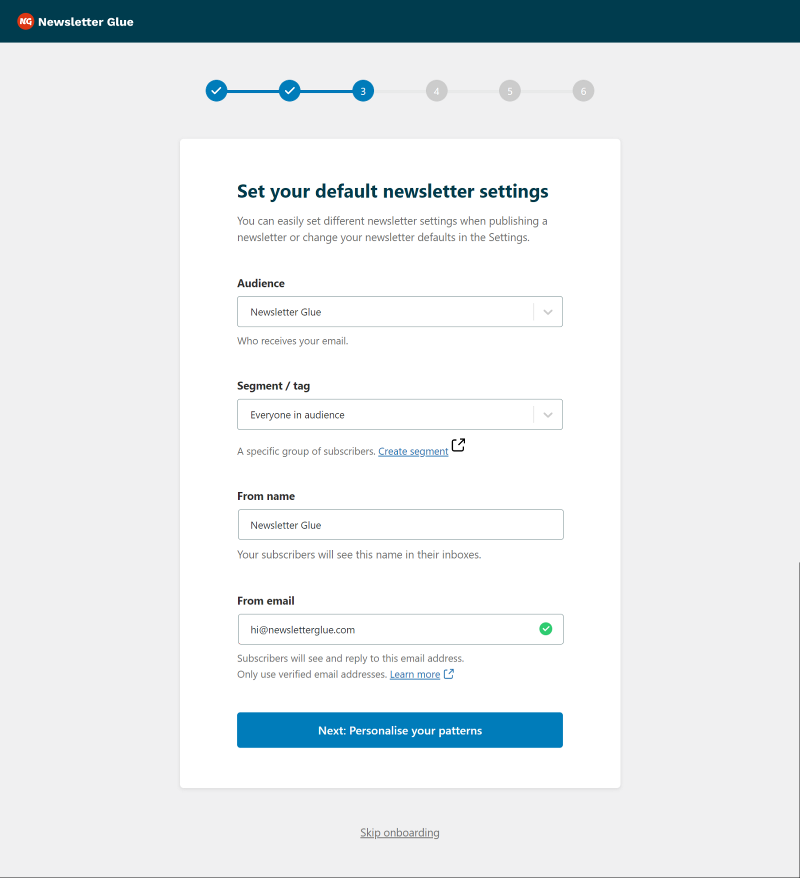
Once everything is done, click on the button at the bottom to move to the next step.
Personalize your newsletter pattern and add a logo
In the next step of the onboarding wizard, you need to provide your company or brand name and its physical address. This is important as it will be used in the newsletter footer and is needed to comply with international anti-spam laws.

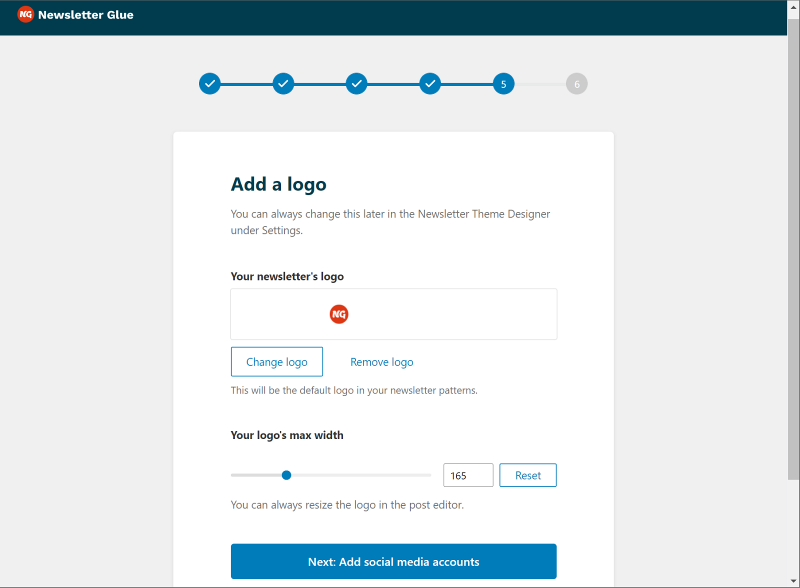
Once done, go to the next step and upload your logo and adjust the max-width to be used in the newsletter.
Next, you can add your social media account links and click the button at the bottom to complete the onboarding wizard.
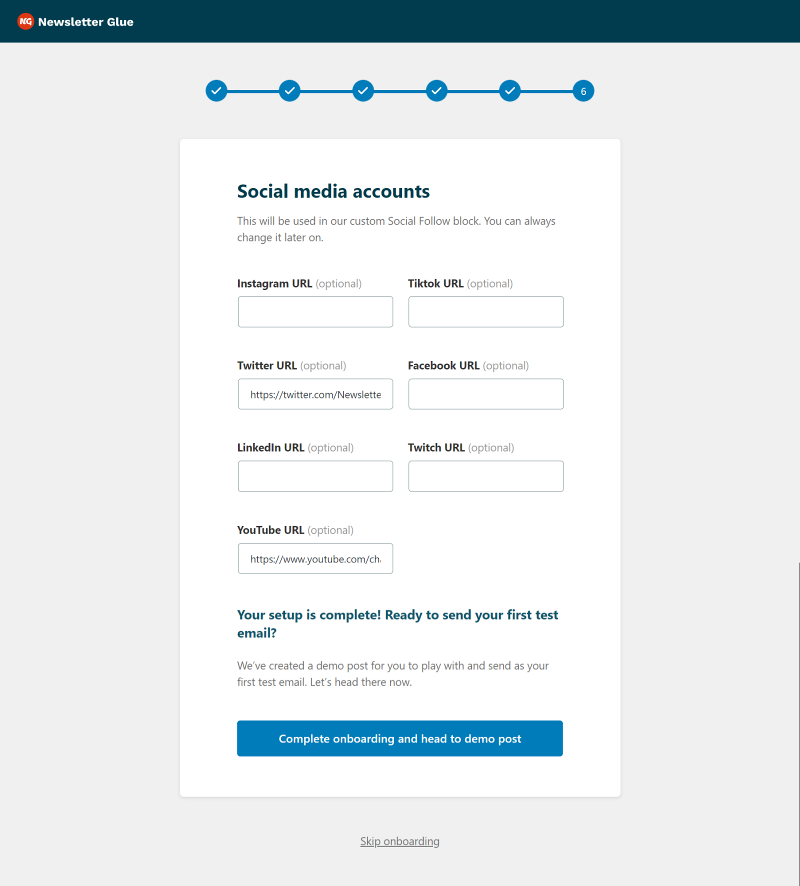
The plugin will automatically take you to a demo post where you can send your first paid newsletter in WordPress.
Write and publish your first paid subscription newsletter
The demo newsletter opens in the WordPress block editor, just like a regular post. You can edit it or add new newsletter content using the various Gutenberg blocks. Newsletter Glue also comes with some additional blocks to help you design your newsletter.
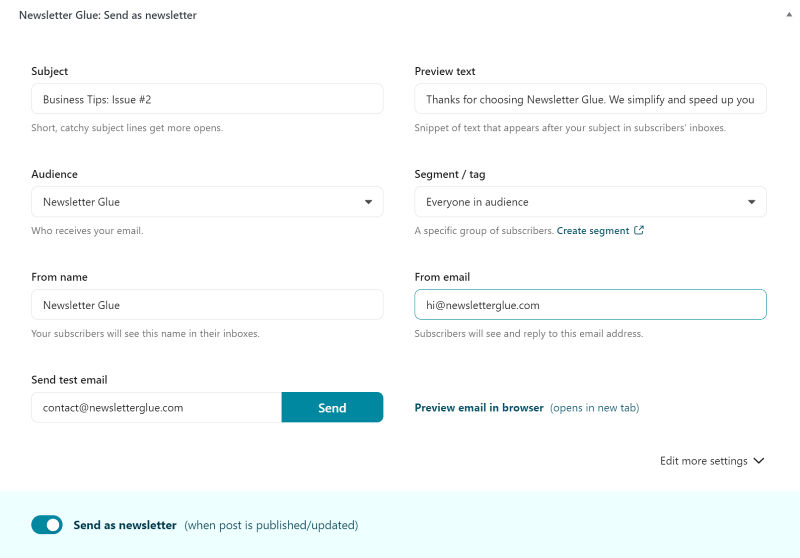
When your newsletter is ready, you can scroll down to the bottom of the page to find Newsletter Glue settings.
Get your newsletter ready to publish
Most of the fields in the settings panel will be pre-filled based on the information you entered in the onboarding wizard. You only need to add a subject and a preview text.
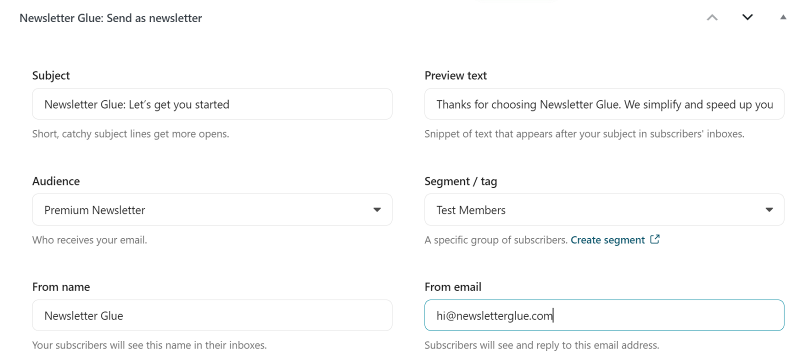
Before publishing your newsletter, Newsletter Glue lets you send a test email to ensure that everything looks as it should. For a safer side, change your segment/tag/list to a test version to avoid accidentally sending it to your entire mailing list.
Next, change the email for the test or keep it as the admin email address, and then click the Send button. Check your inbox for a test email of your Newsletter.

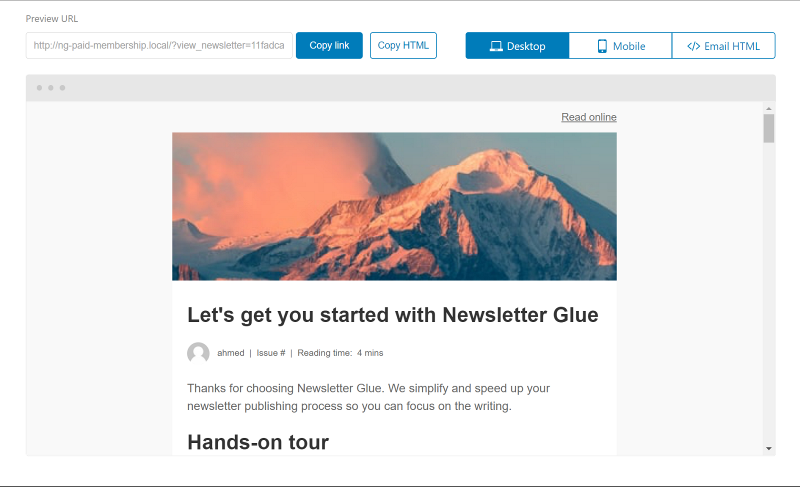
Alternatively, to check how the newsletter will look in real, you can preview and see it on both mobile and desktop devices. Click the Preview email in browser link next to the Send button to open the preview in a new tab. You can also view or copy the HTML of the newsletter email from the preview screen. Along with that, you also get a shareable preview link that lets you share the preview with someone who doesn’t have access to your website’s dashboard.
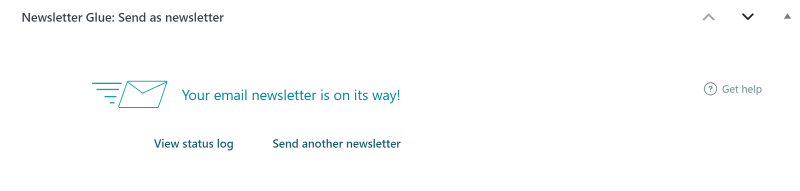
Once you are ready to publish the newsletter, toggle the Send as newsletter button and hit the Publish button at the top.

At the bottom of your post, you should see a notification that says, ‘Your newsletter is on its way!’
Congratulations on sending your first newsletter with Newsletter Glue!
Now that you’ve configured everything and understand how to send newsletters with Newsletter Glue, let’s design a simple workflow that you can use to publish your newsletter from now on.
Put together your new publishing workflow
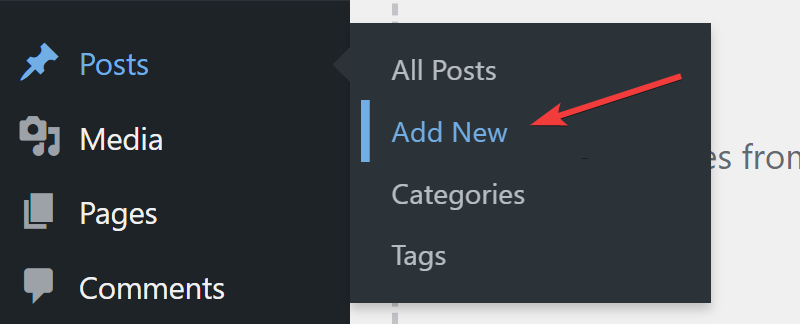
You can start the workflow by navigating to Posts > Add New.
This will load the WordPress editor where you can start adding your newsletter content using Gutenberg blocks. Since you are using Newsletter Glue Pro, you also get access to newsletter specific custom blocks.
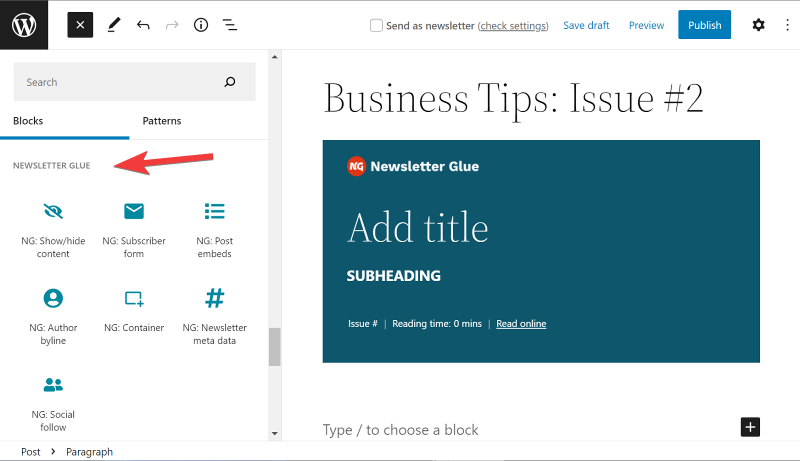
As an example, check out our author byline and post embed pro blocks. How they look inside the WordPress editor is exactly how they’ll show up on email as well.

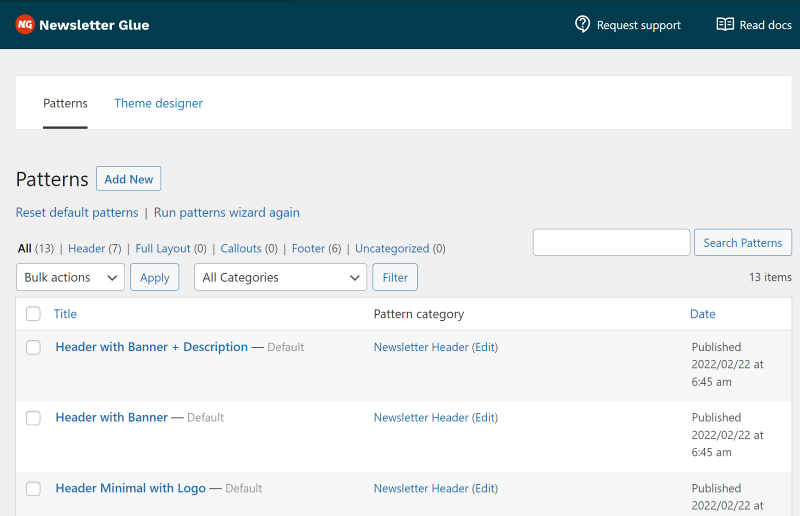
You can save time creating a newsletter by making use of block patterns. Newsletter Glue ships with some pre-built templates to help you get started quickly. They are easily customizable and are located at Newsletter Glue > Templates & Styles. If you want, you can add additional patterns to the library and they will be available inside the editor.
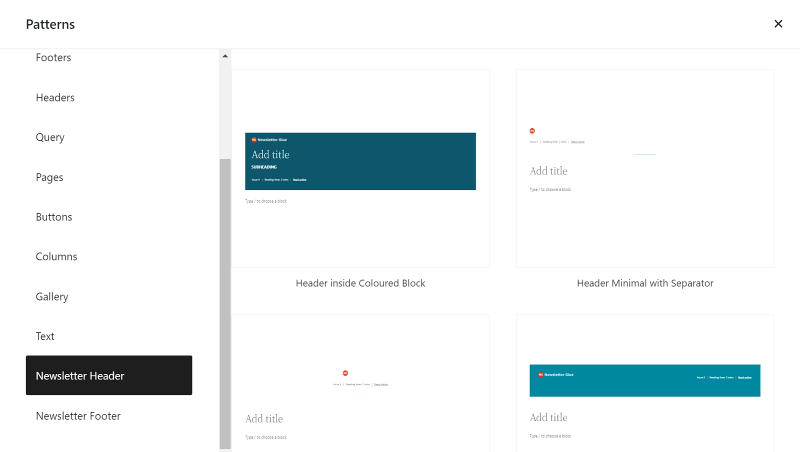
Once you are into the editor, you can insert the patterns by clicking the plus icon “+” in the header, then switching to the Patterns tab, and then clicking the Explore button.
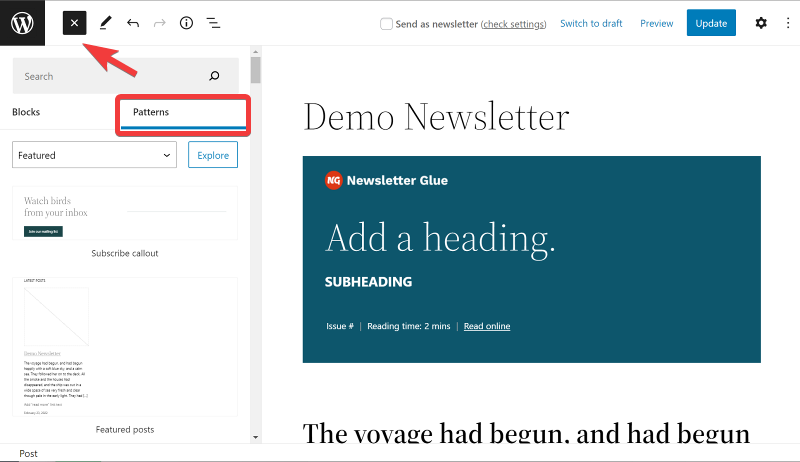
This will open a popup in which you can scroll through the sidebar to find the Newsletter Glue patterns at the bottom.
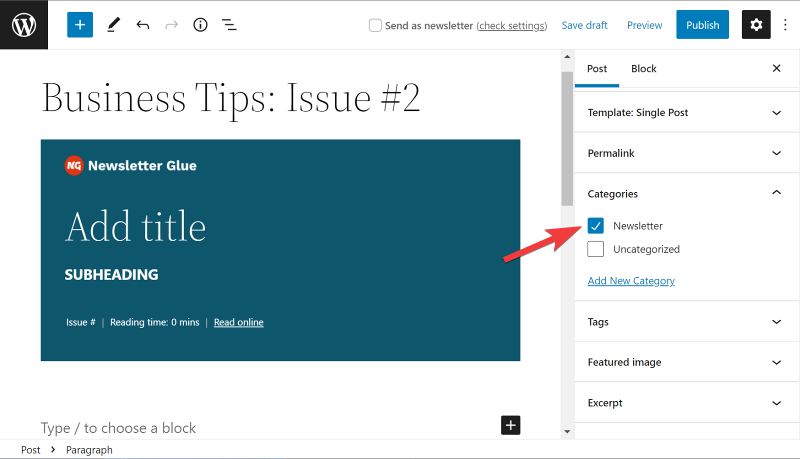
When you have finished adding all of the content, check the box for the Newsletter category that we created. This will ensure that this newsletter is only accessible to members.
Next, scroll down and in the Newsletter Glue: Send as newsletter settings, enter the email subject and preview text. Send yourself a test email and if everything looks perfect, choose the audience and segment to which you want to send your newsletter.
Finally, toggle the Send as newsletter button and publish your newsletter.
If you’d like to schedule your newsletters well in advance, you can do that too. Simply change your article publish schedule from immediately to a specific date and time in the future.

That’s it for this mega guide. We hope you found it helpful.
If you were able to follow this guide to create your own paid newsletter in WordPress, please leave a link to your newsletter in the comments below, we’d love to check it out!
