
Easily create and edit an unlimited number of sales, editorial, or curated newsletter templates in WordPress editor with Newsletter Glue.
Newsletter Glue turns the regular WordPress block editor into a newsletter template builder.
“I love rebuilding the same newsletter layouts every time,” said no one ever. Like all those other no ones, I prefer to make my newsletter process as efficient as possible. It’s challenging enough to come up with new content every week. If I have to rethink my layout every time, I get out of the flow, and the whole experience just feels like a plodding, unpleasant task. I would much rather focus on writing high-quality content and keep the layout part as streamlined as possible.
You can set up reusable templates in many email service providers, such as MailChimp. It can make things much easier when you don’t have to use your last cognitive energy to rebuild your weekly email layout.
Now you can build your newsletter templates in WordPress.
To learn the best way to set up templates in WordPress, it’s good for you to understand a bit about how the plugin works. Newsletter Glue leverages the power of Gutenberg blocks and patterns that are already a part of the WordPress platform. These blocks and patterns make it much easier to create customized layouts than ever.
What are Gutenberg block patterns?
With the launch of version 5.5, WordPress introduced block patterns in Gutenberg. Block patterns allow you to insert predefined layouts in your posts and pages. They’re convenient when you repeatedly create the same type of content, like groups of curated posts or contact forms.
They’re straightforward to use. When you have a new block selected in the layout, click on the blue + button in the top left of your toolbar. In the panel that pops out on the left, select the Patterns tab and choose which type of patterns you want to see.
In the current version of WordPress, you can’t create new block patterns without writing code. But what if you can’t write code to save your own life? Or maybe you’re like me, where you can code, but sometimes you don’t want to code just to get your newsletter out there. That’s where Newsletter Glue makes it easy with their specialized block patterns and newsletter templates.
I’ve already given you three example newsletter templates at the top of this post. Now let’s go through exactly how to create them yourself.
Step-by-Step: Creating Newsletter Glue newsletter templates in WordPress
Creating your own newsletter templates in WordPress is easy, but it’s best to follow these steps to get the most out of them.
Step 1: Update the newsletter theme designer
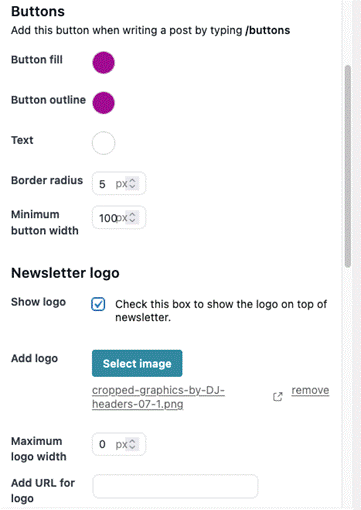
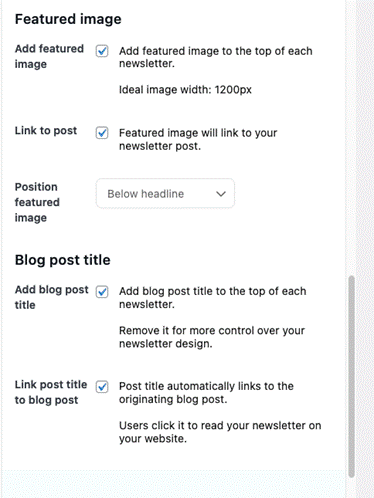
The first thing you need to do is look at your theme designer panel and configure your style options. In the dashboard, go to Newsletters>Settings. Navigate to the Newsletter Theme Designer tab. The menu will look like this:
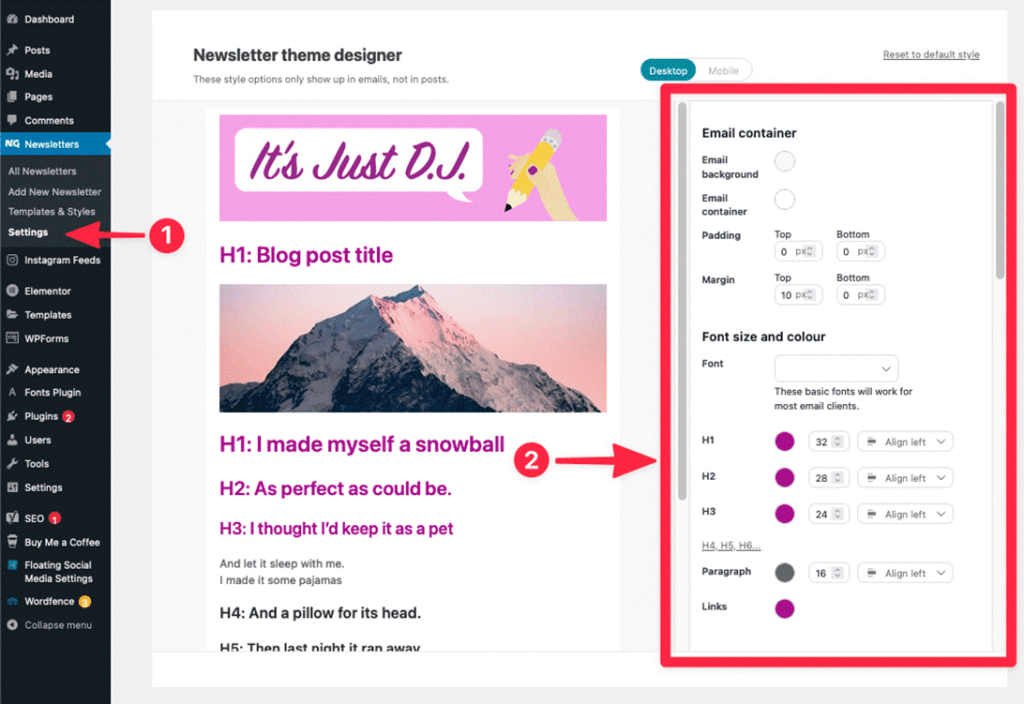
You’ll see that you have lots of options to set up. This is where you’ll determine the style of headers, the email container, buttons, and many other settings that help make your newsletters look their best. As you scroll down the right side, more options will appear, as below:
Now that you’ve set up your theme preferences, it’s time to create some templates!
Step 2: Combining header and footer patterns to create a full newsletter
Essentially what you’ll be doing in this step is crafting a layout that you’ll be able to use repeatedly, with the click of a button.
In the dashboard menu, head over to Newsletters>Templates & Styles. You’ll see that there are already some templates listed.
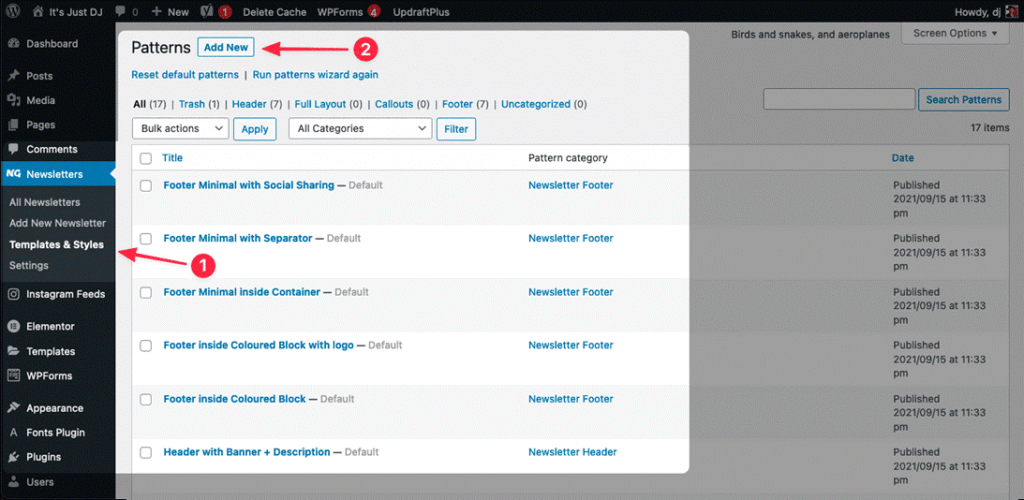
At the top, click Add New. That will take you to a new pattern layout page, which looks just like any new WordPress post or page editor – which in fact, it is.
Enter a title for your pattern. It’s not mandatory, but it will be helpful later on when you go back to choose or edit your template.
Newsletter Glue provides you with some default headers and footers to make it easy to get started. Simply click the header and footer you want to add to blocks in your layout.
Make adjustments and edit your header and footer sections as you like.
Step 3: Add middle section
Even if you’ll be adding new content to your newsletters later, it’s a good idea to build some placeholder blocks for content. For example, if you always use an image and an H1 heading to start your email, add those sections and enter some dummy text. When you use the template to create your newsletter, you’ll be able to change the content to whatever you like – it won’t affect the template at all.
Are you starting to see the magic in using Newsletter Glue to build your newsletter templates in WordPress?
Step 4: Saving it under a category
Once you have your layout the way you want it, the final step is to save your template. Just as you would for a blog post, you will add a new category. I created a category named Editorial Full for my weekly full newsletter layout. That way, when I start a future newsletter, I can simply choose it by name from the patterns menu. You can see that it shows up in my Patterns menu:

Similarly, I have templates named Curated Full and Black Friday Full.
Click that blue Publish button in the upper right corner, and that’s it! Now you can use the template every week to save time and add consistency and professionalism to your newsletter.
The Curated and Black Friday newsletters I showed you previously were created precisely the same way. Each time, you simply set up a new layout using the steps above and save them in your templates to use later. No more recreating a structure every time you send the same type of newsletter!
Using Pattern templates for your weekly newsletter
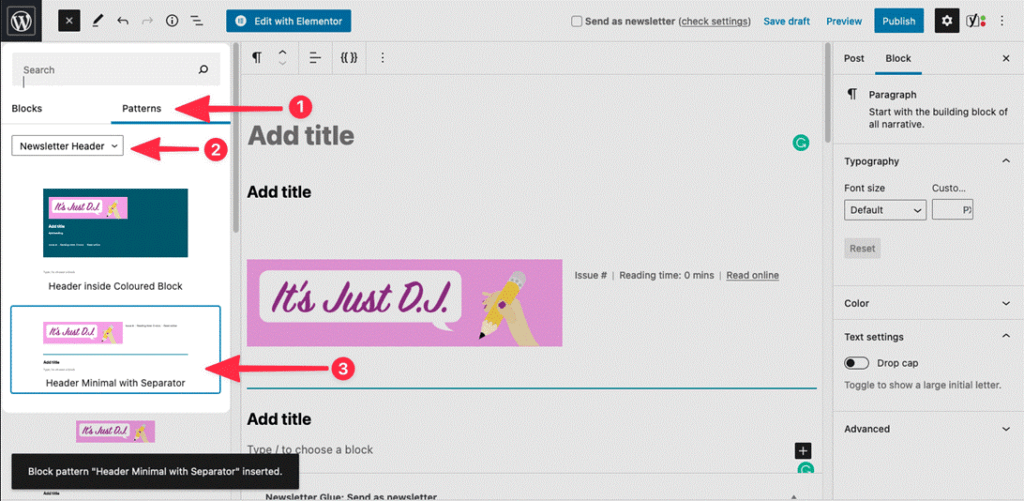
Now that you’ve created your pattern templates, open the Patterns menu in your post.
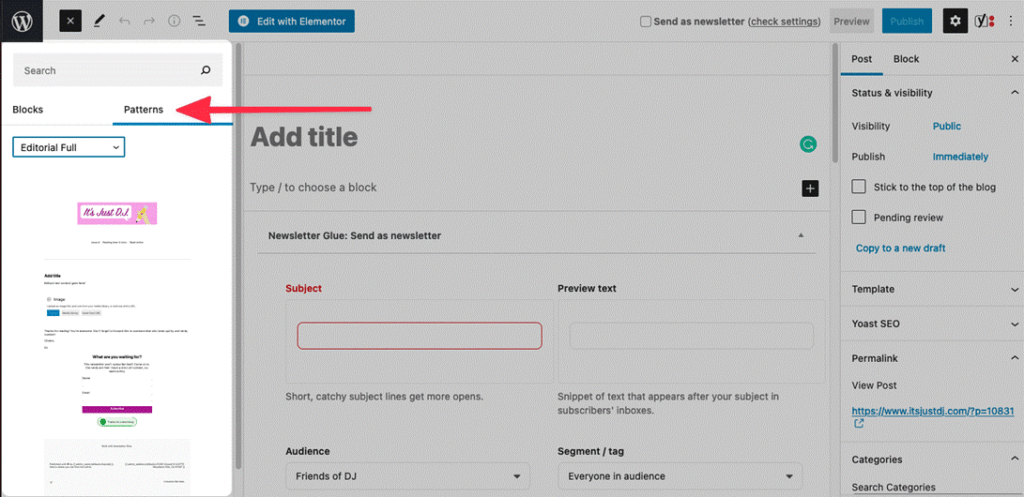
For patterns, switch to the Patterns tab and click the dropdown menu. The default pattern choices are Newsletter Header and Newsletter Footer. These are ready-made patterns provided for you. They will allow you to get started fast when creating your newsletter layouts.
Newsletter template examples in Newsletter Glue
Now that you know how to create newsletter templates in WordPress, let’s look at how you can create your own unique layouts for all your different newsletter categories.
In this section, I’ll show you three typical newsletter types and what they look like when built with Newsletter Glue:
- Editorial
- Curated
- Sales.
Let’s get your wheels turning.
Editorial
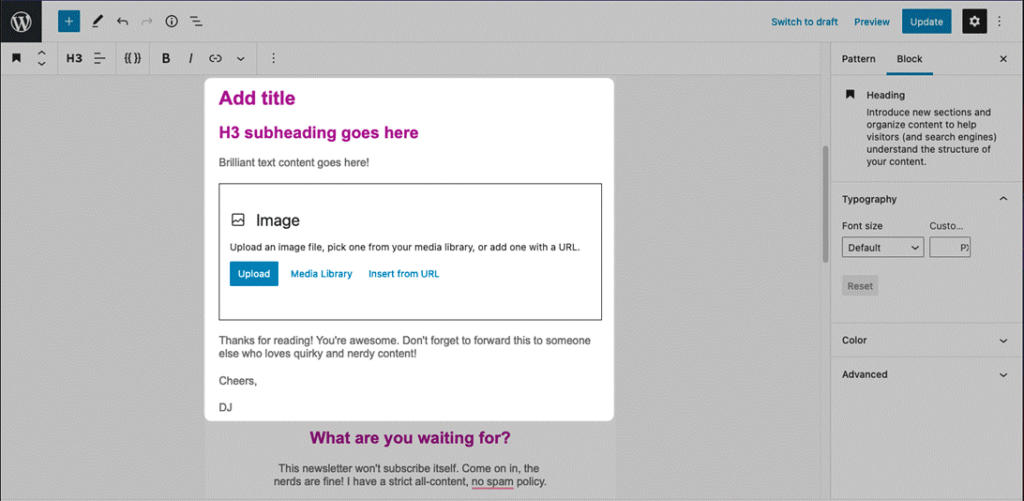
My regular newsletter is all editorial. It’s my personal essays and stories, created for a small audience. Now and then, I’ll throw in an image or a video to spice things up, but it’s mostly text. Here’s what my layout looks like in the editor:
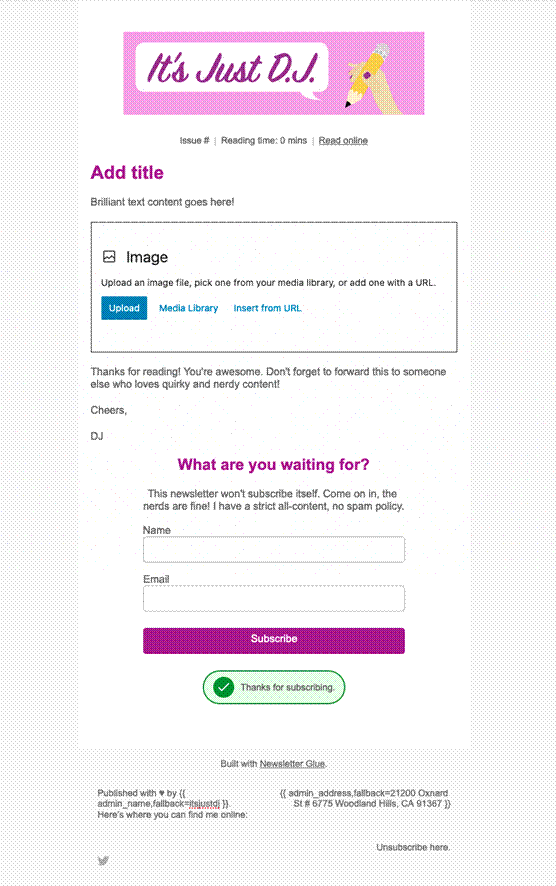
You can see in the template that I’ve created placeholders for regular content. When I use the template to make my actual newsletter, I’ll add my content into those sections. This way, I’ll never have to rethink what content is most important to include. For example, I always want to include a form in my newsletter so new readers can subscribe, so I’ll put that in my template.
However, I don’t want my existing subscribers to be annoyed by sign-up forms when they’re already subscribed. Newsletter Glue allows me to hide the form from my email with a simple toggle, so it only shows up in the blog, not in the email.
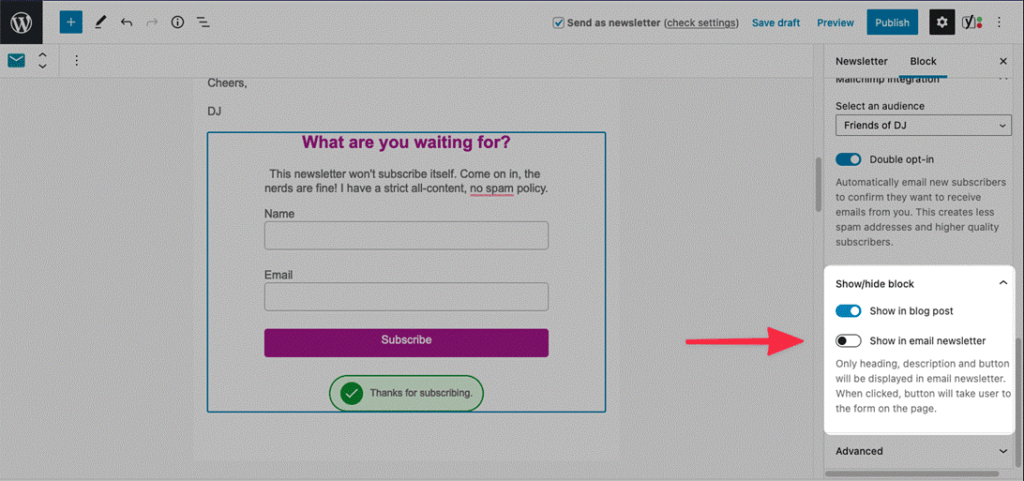
I set the visibility settings in the template so that I don’t worry about it when writing my weekly newsletter. When existing subscribers get my emails, they won’t see that subscribe form at all.
Curation
Even though my regular newsletter features only one piece of content, I like to mix it up for my audience by sending out some curated content every month. Here’s what one of my finished curated newsletter template emails looks like:
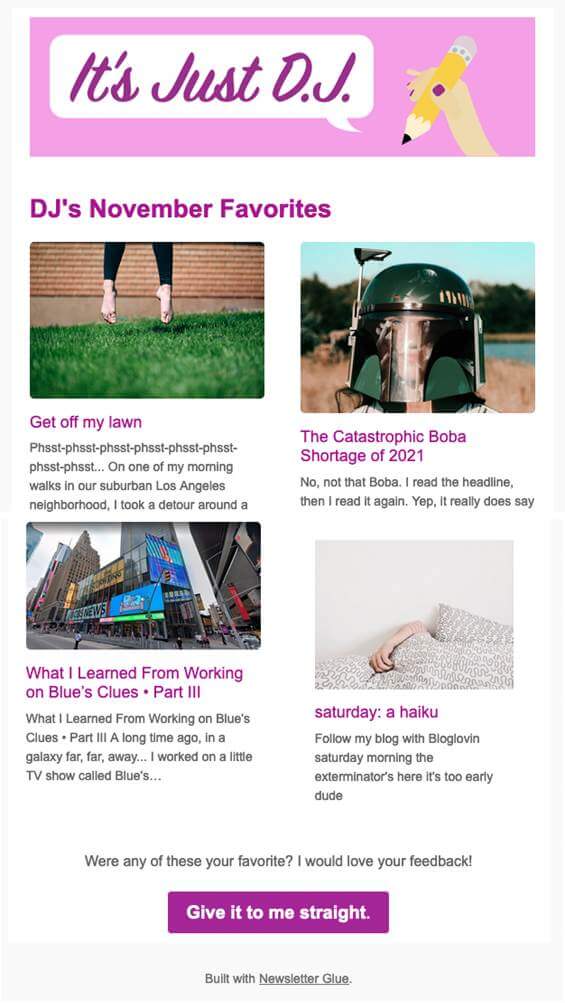
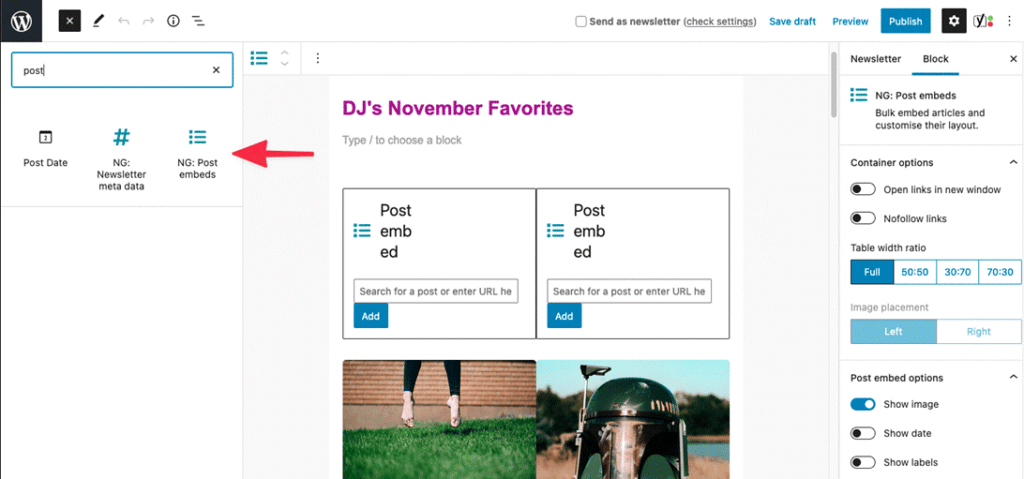
The post embed block is perfect for curated content. It uses a query to pull in the posts I want, and I can adjust the layout for each block once I add it. The Newsletter Glue post embed block is easy to find. Just type “post” in the search bar under blocks and it comes right up.
The beauty of the post embed block is that it’s pulling in your previously published content, but you can give it some new life by resending it in a curated format.
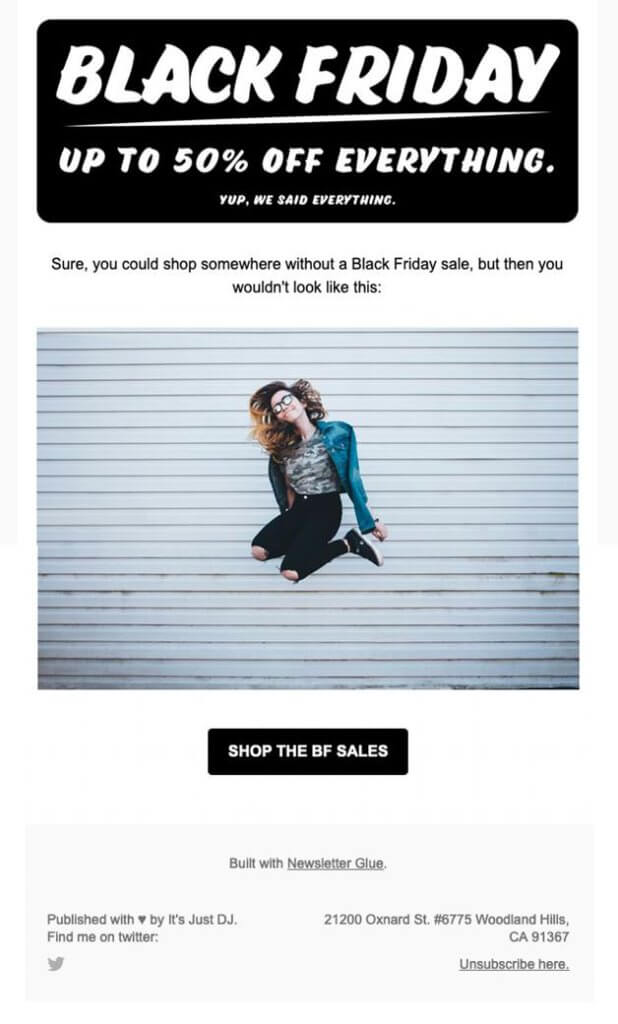
Sales
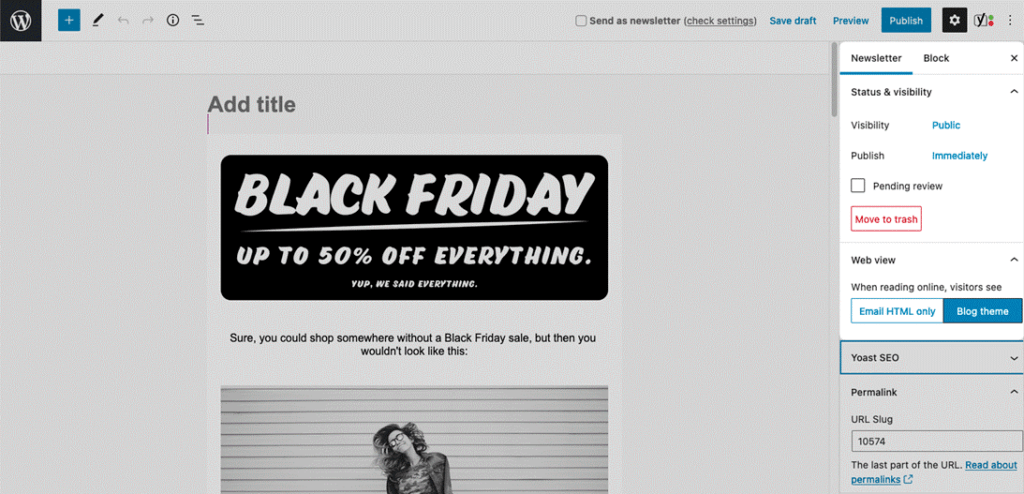
You’ll want to be concise and quick for these types of emails. In my case, I want to lead viewers right to the big shop button at the bottom. Using a template, all I have to do when creating my Black Friday sale email is change the text and add a new image.
In the editor, setting up a template like this works just like creating a regular WordPress post.
Now that you’ve seen some examples of what can be done with Newsletter Glue templates, you’re on your way to creating unlimited templates yourself!
But perhaps you’re hesitating because you’re worried these templates result in heavy, bloated, broken emails. If so, this next section is for you.
Heavily-tested, lightweight email HTML templates
Behind the scenes, Newsletter Glue converts your templates and newsletters into email HTML. If you’ve tried coding email HTML before, you’ll know that it’s quite different from website code. You might also know that other email clients (like Gmail or Outlook) have different coding standards and that juggling all of this can be very painful.
Newsletter Glue takes care of all that for you. Our templates are heavily tested in Litmus and Testi by us and our customers. And the email HTML we output is lightweight, so even long-form newsletters fit inside Gmail’s 102kb cut-off.
Bonus Tip: Use Newsletter Glue for transactional or drip email templates
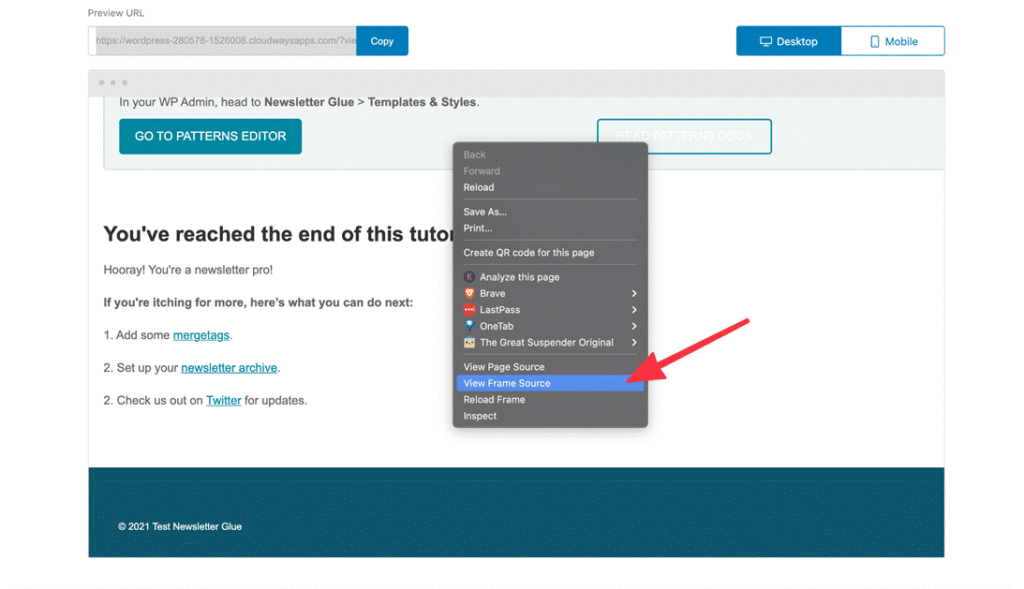
You can even use Newsletter Glue to build your transactional email or drip email templates. Use the preview URL to easily copy and paste your newsletter templates into Mailchimp or MailerLite. If your email service provider doesn’t have that option, you can put your cursor in the preview email, right-click, and click on View frame source. Copy all the code in there and paste it directly into your email.
Summary
Now you know how to use Newsletter Glue to create custom newsletter templates in WordPress. The more you use it, the more ways you’ll discover how to make your email creation process increasingly efficient.
What I love most about Newsletter Glue is that I don’t have to leave WordPress to create and send my newsletter. Once I discovered patterns and templates, it was even easier to stay inside my WordPress site and be productive.
Leveraging the power of Gutenberg blocks in WordPress opens up excellent opportunities to share your content more effectively with your audience. Newsletter Glue provides you with the tools to make it easier and more fun.
Build newsletter templates in WordPress
Easily create and edit an unlimited number of sales, editorial or curated newsletter templates directly inside the WordPress editor with Newsletter Glue.
