Pre-requisites
- Salesforce Marketing Cloud account, not Salesforce account
- Newsletter Glue plugin and license
- WordPress site with Newsletter Glue plugin already installed
- The PHP Soap extension must be enabled in your php.ini file
Get the client credentials
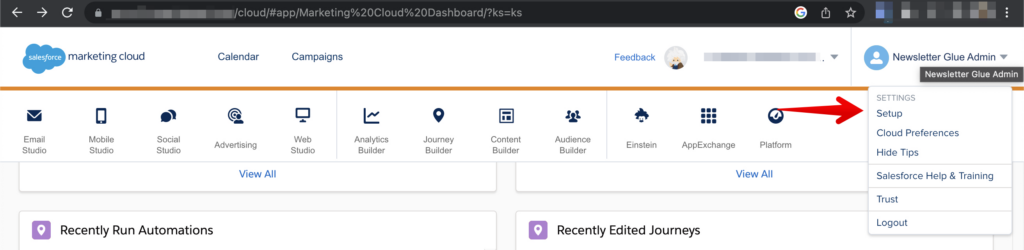
- Go to the Salesforce Marketing Cloud Dashboard and click on Settings -> Setup from the right top corner.
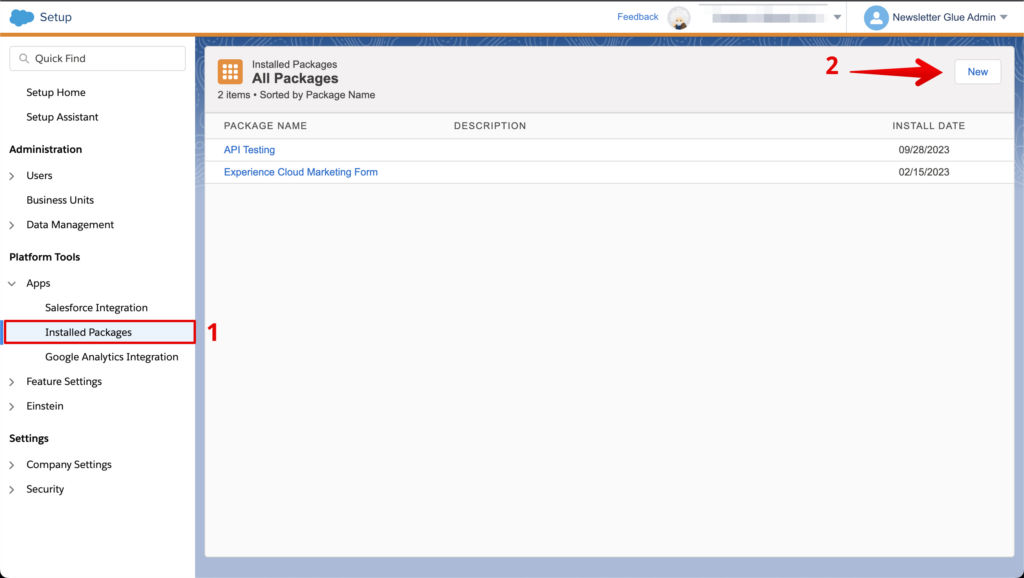
- Click Platform Tools > Apps > Installed Packages > New, then enter any name and description, then click the save button.
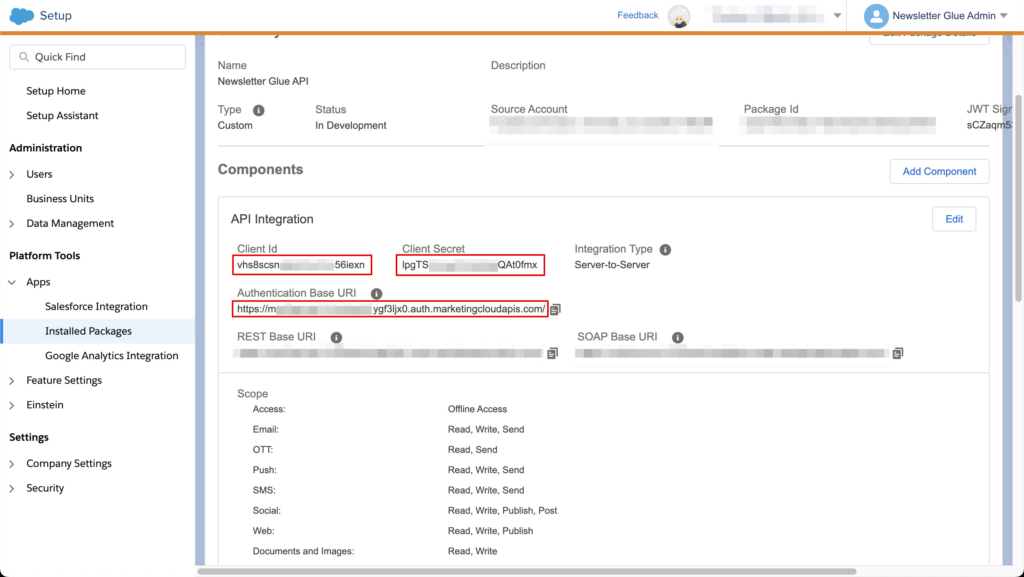
- Click the Add Component button > API Integration > Server-to-Server, then check all the scopes of permission and click the save button.
- Copy the client ID, client secret, and authentication base URI, then use with Newsletter Glue.
Integrate during Newsletter Glue onboarding
Connect Salesforce to Newsletter Glue
After activating the Newsletter Glue plugin, you’ll be taken to our onboarding wizard.
Enter your license key in Step 1.
In Step 2:
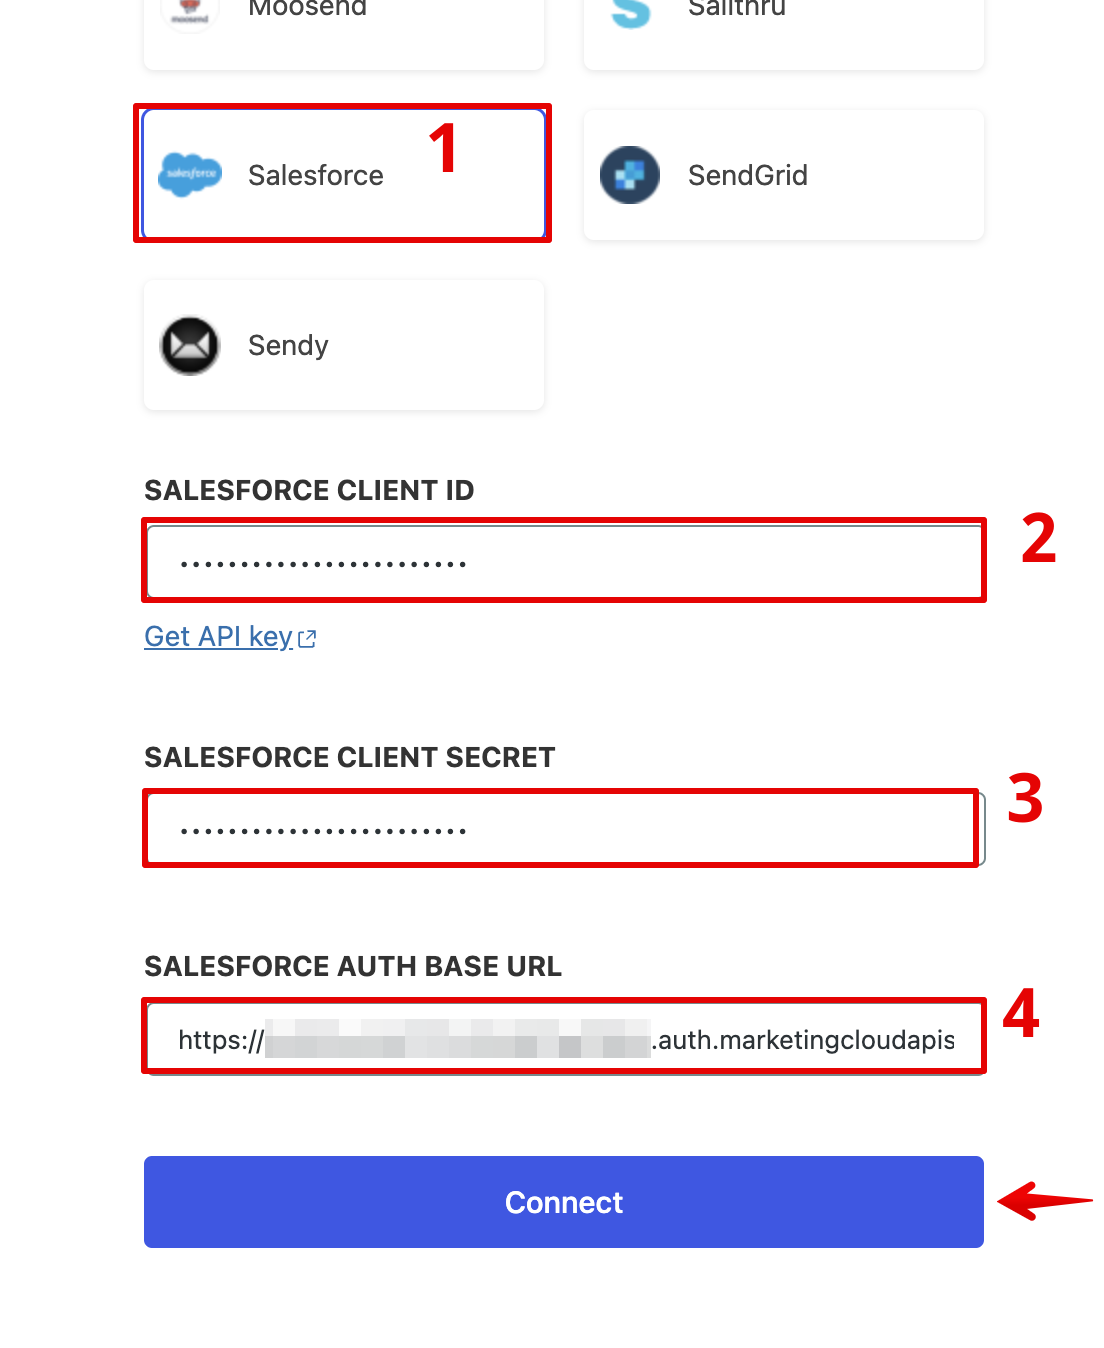
- Select Salesforce from the Email service provider options
- Use your client ID, client secret and authentication base URI which you generated above
- Click on Connect button
- Once successfully connected, you’ll be able to select your email defaults, complete your onboarding, and begin using Newsletter Glue to build and publish newsletters.
Integrate from Settings -> Connections
Connect Salesforce to Newsletter Glue
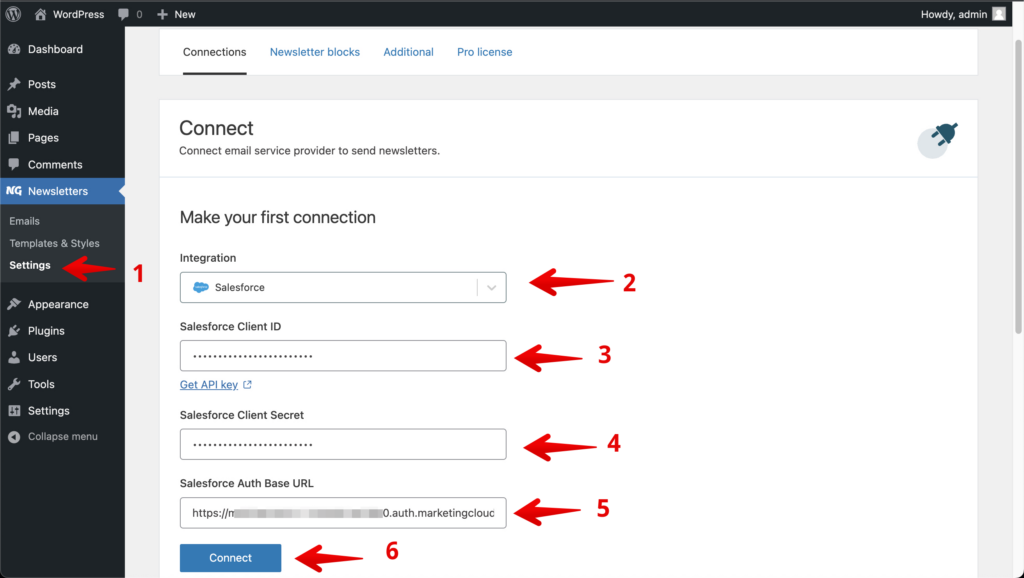
- On your WP Dashboard, go to the Newsletter Glue Settings page
- On the Connections tab, set as follows:
- Select Salesforce from the Email service provider dropdown
- Use your client ID, client secret and authentication base URI which you generated above
- Click on Connect button
- Once successfully connected, you’ll be able to use Newsletter Glue to build and publish newsletters
Sending requirements
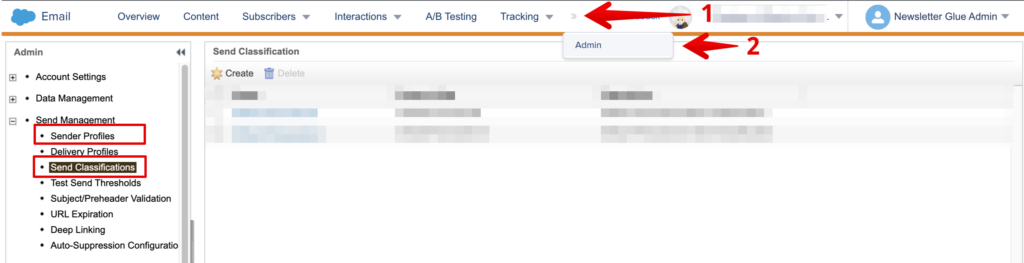
- At least one Sender Profile and one Send Classification must be set up from your Salesforce marketing cloud account, or your API won’t work. The options are available at Email Studio > Email > Admin > Send Management.

- Each newsletter must have the following tags: {{ admin_name }}, {{ admin_address }}, {{ update_preferences }}, {{ unsubscribe_link }}, or sending a newsletter will not work.
Additional notes
- A newsletter can be sent to a list or a data extension. Both of them are available together in the list dropdown.
- You can add a subscriber only to a list using Newsletter Glue’s subscriber form.
- At this moment, conditional content is not supported.