Pre-requisites
- Campaign Monitor account
- Newsletter Glue plugin and license
- WordPress site with Newsletter Glue plugin already installed
Integrate during Newsletter Glue onboarding
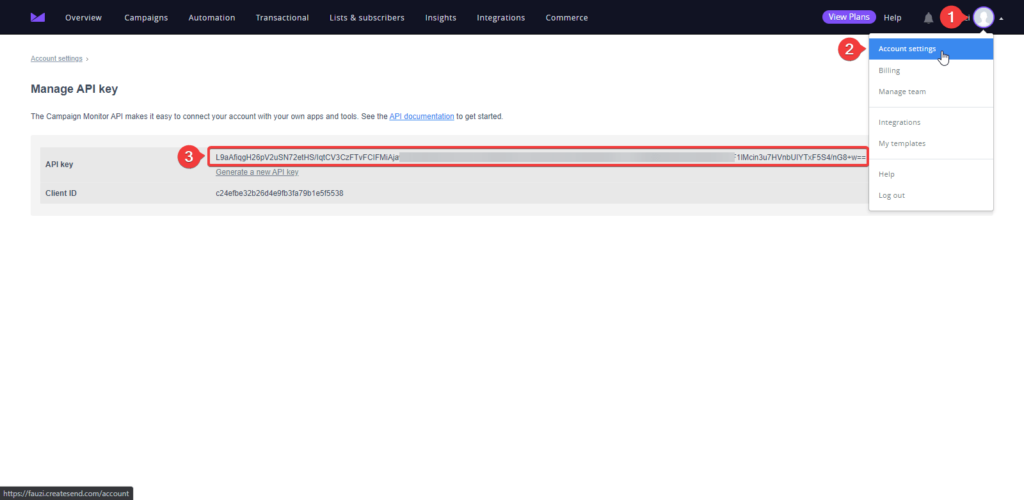
Step 1: Get your API key details
- Go to Campaign Monitor Dashboard, click on Profile icon
- Click on Account settings menu
- Copy the API URL or generate API key if you don’t have any
Step 2: Connect Campaign Monitor to Newsletter Glue
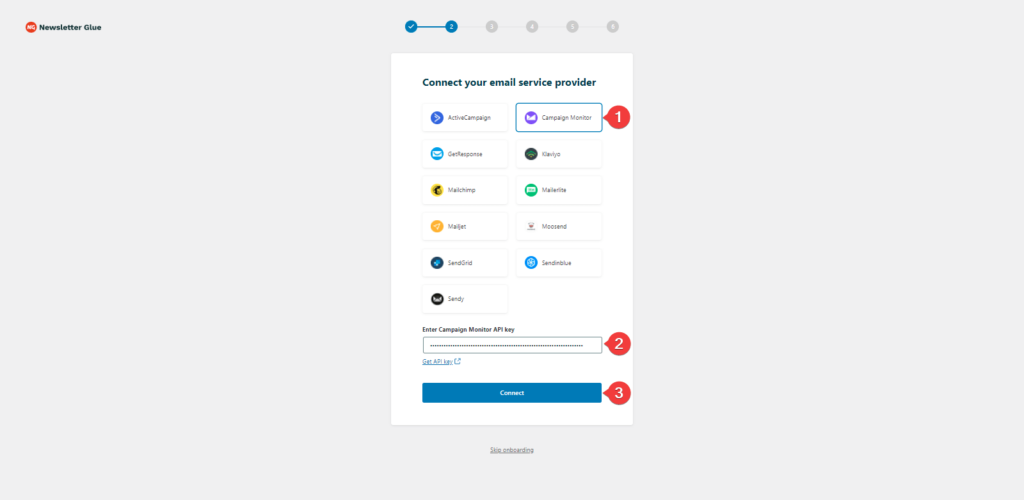
After activating the Newsletter Glue plugin, you’ll be taken to our onboarding wizard.
Enter your license key in Step 1.
In Step 2:
- Select Campaign Monitor from the Email service provider options
- Paste your API Key
- Click on Connect button
- Once successfully connected, you’ll be able to select your email defaults, complete your onboarding and begin using Newsletter Glue to build and publish newsletters.
Integrate from Settings -> Connections
Step 1: Get your API key details
- Go to Campaign Monitor Dashboard, click on Profile icon
- Click on Account settings menu
- Copy the API URL or generate API key if you don’t have any

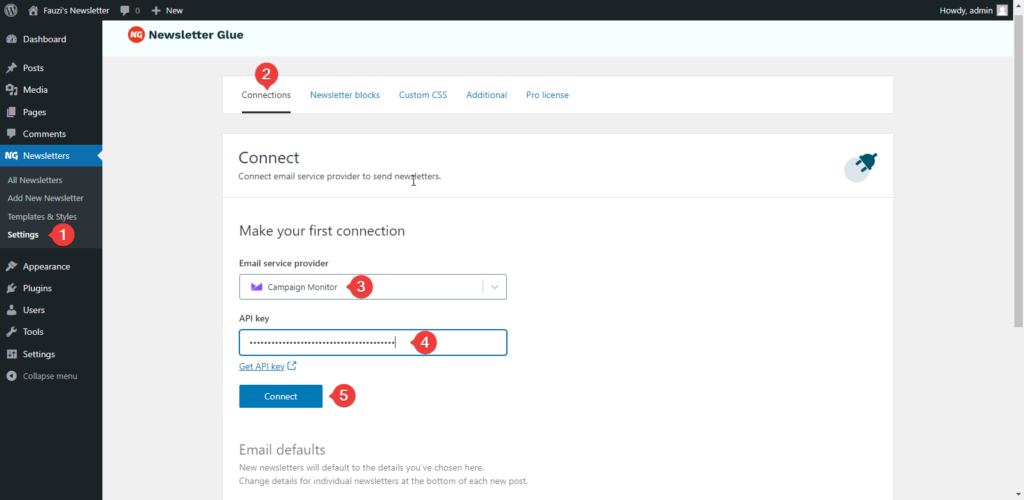
Step 2: Connect Campaign Monitor to Newsletter Glue
- On your WP Dashboard, go to the Newsletter Glue Settings page
- On the Connections tab, set as follows:
- Select Campaign Monitor from the Email service provider dropdown
- Paste your API Key
- Click on Connect button
- Once successfully connected, you’ll be able to use Newsletter Glue to build and publish newsletters.