UTM codes are code snippets that you can use to track all sorts of essential data with your newsletter URL. This data can be useful for testing your marketing campaigns’ effectiveness or identifying where traffic to your website comes from.
There are three main parameters you can track with UTM codes:
- UTM Source: This parameter allows you to specify the source of your web traffic. For example, since you’re adding the tracking link to a newsletter, you can set your UTM source as ‘newsletter.’
- UTM Campaign: If you have multiple campaigns that you need to track (like a weekly newsletter and a daily update), you can identify each one with this parameter.
- UTM Medium: The medium parameter tracks the channel that a visitor uses to reach your content. This could be via ‘email’ or ‘social.’
With Newsletter Glue, you can apply these parameters to all your newsletters or set different parameters for each newsletter you publish.
Note: If you have Google Analytics connected to your email service provider account, you have to disable it to use this Newsletter Glue feature. Leaving the connection enabled can cause conflicts and unexpected behavior for this feature.
Add UTM codes to all your newsletters
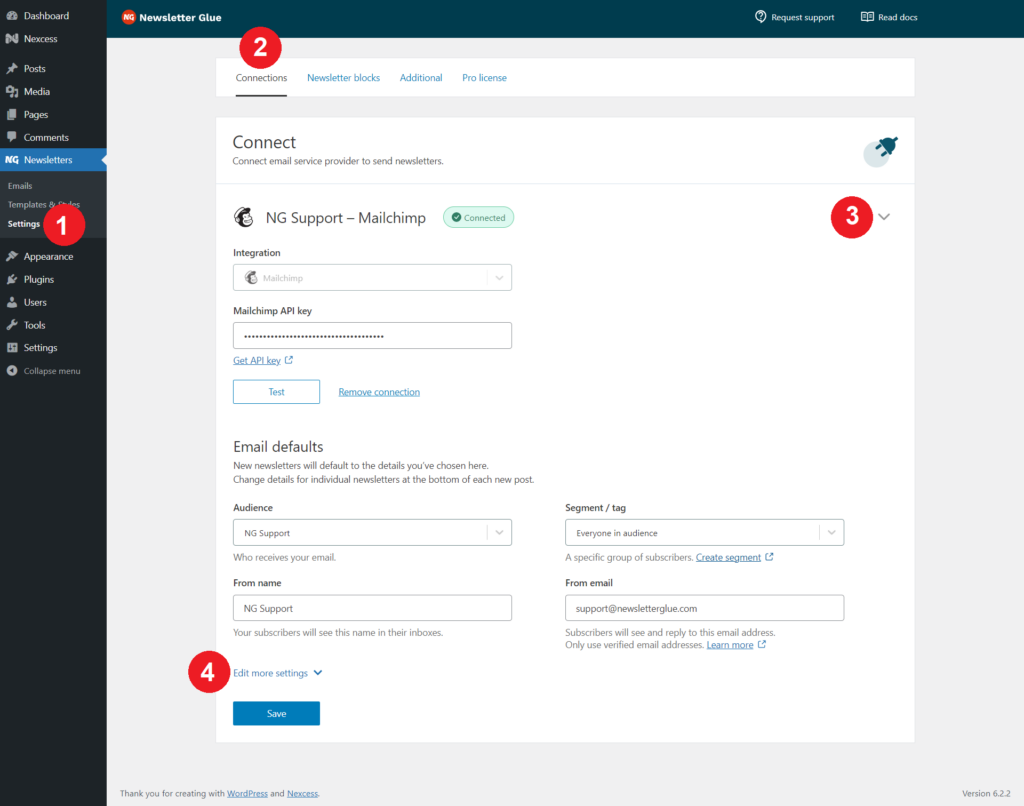
- From your WordPress admin dashboard, head to Newsletters > Settings.
- On the settings page, make sure you are on the Connections tab.
- Click on the dropdown arrow to the right of your configured email service provider to open up its settings.
- Scroll to the bottom of the page and click the Edit more settings link.

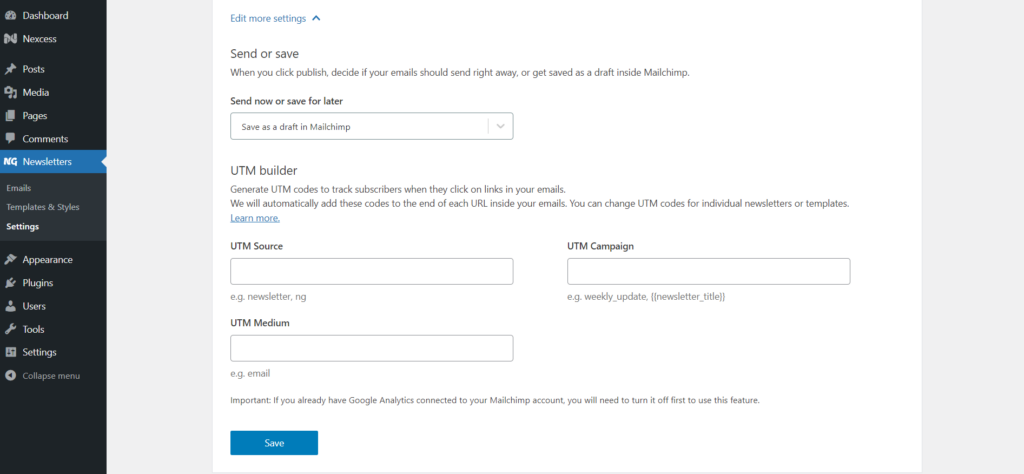
- This action will open up some additional settings, including the UTM builder. Here you can enter the UTM Source, Campaign, and Medium codes for tracking all the newsletters sent from Newsletter Glue to your Email Service Provider.

- Once you’ve entered the codes, click on the Save button.
Add UTM codes to individual newsletters
- To add UTM parameters for individual newsletters, go to Newsletters > Emails from the WordPress dashboard.
- Click the Add Campaign button to start creating a new newsletter and after you’ve added all your content, scroll down to Newsletter Glue: Send as Newsletter settings and click on the Edit more settings link.
- This will open up additional settings, including the UTM builder, which you can use to configure the tracking codes for the newsletter you create.
- After entering the codes, you can send your newsletter as a draft to your email service provider or publish it.