
Do you want to know how to create a Mailchimp newsletter and are not sure where to begin?
Creating a Mailchimp newsletter is easy and does not require you to have technical or coding knowledge.
In this post, we’ll walk you through the step-by-step process of creating a newsletter in Mailchimp. You’ll learn how to create a template, add content, and send the newsletter to your subscribers. Let’s get started with your own newsletter today.
How to create a Mailchimp newsletter
Mailchimp is the most popular email marketing tool that comes with a lot of features and offers a generous free plan. The best part about Mailchimp is that you don’t need any coding knowledge to set up a basic campaign.
Let’s look at the steps you need to follow to create your first campaign and send it to your mailing list.
1. Sign up for a Mailchimp account
Signing up for a Mailchimp account is easy and only takes a few minutes. Once you have an account, you can create a campaign and send newsletters to your subscribers. You can also use Mailchimp to manage your subscribers, create sign-up forms, and track your newsletter’s performance.
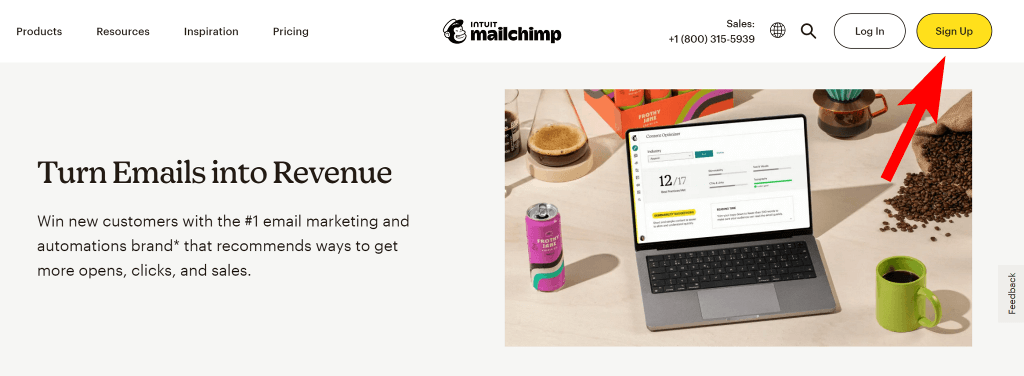
To create an account, go to the Mailchimp website and click on the Sign Up button in the header.
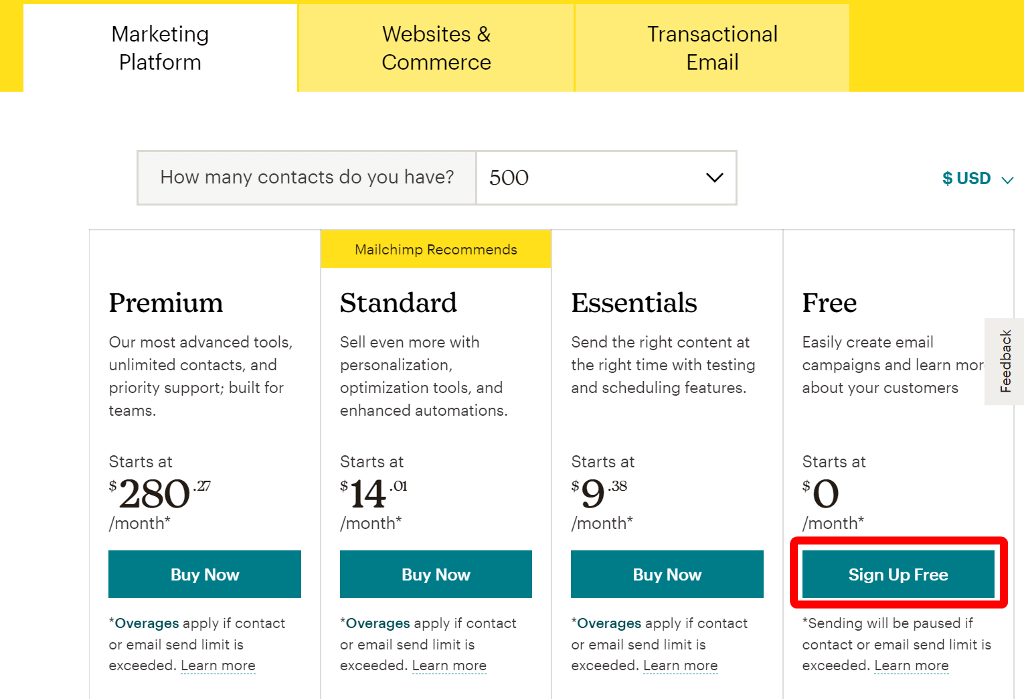
This will take you to the pricing page, where you can begin by choosing the free plan under the Marketing platform tab.
On the next page, enter your email address, a desired username, and password, and then click the Sign Up button to create your account.
Mailchimp will send you a confirmation email, in which you must click the Activate Account button to confirm your email address and prove you are not a robot :).
Next, Mailchimp will ask you to provide additional information such as your name, organization name, physical address, and more.
Once you’ve provided all the details, you’ll finally be taken to the Mailchimp dashboard.
2. Collect email subscribers
After you’ve created the Mailchimp account, the next thing we need is an email list to send out the newsletters. If you already have an email list, you can import it to your Mailchimp account. If you don’t have one, you can create a subscription form to collect email addresses from your website visitors.
Import email list to Mailchimp
Mailchimp makes it easy to manage your email list with features such as segmentation, personalization, and automation.
Simply follow these steps to import the email list into Mailchimp:
- On the left navigation panel, expand the Audience section and then click Audience Dashboard.
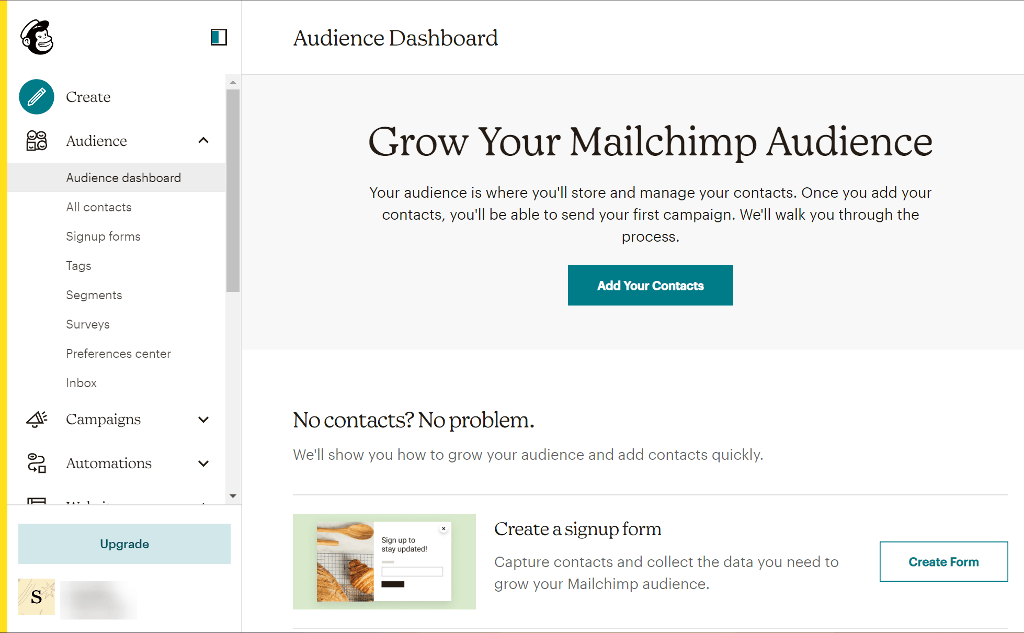
- Next, click the Add Your Contacts button and then select how you’d like to import the list.
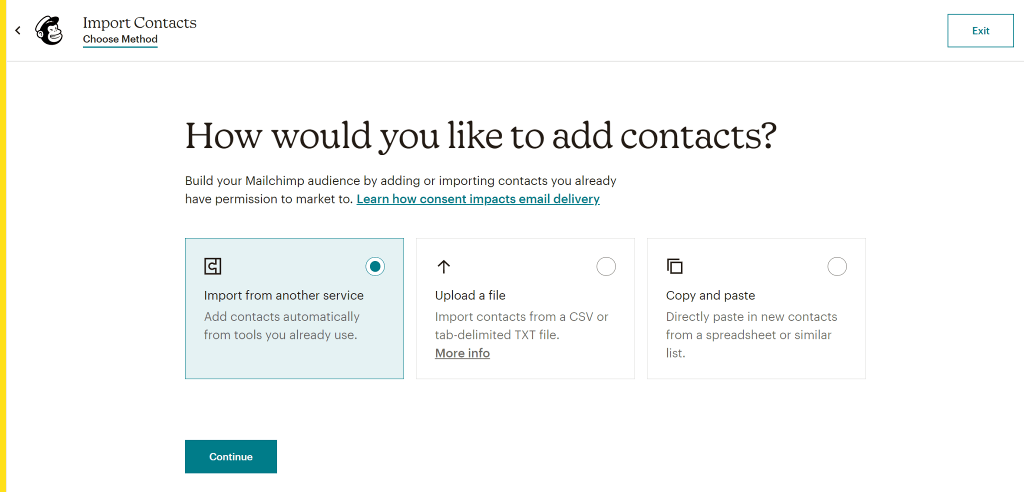
- Next, organize your list by assigning the correct audience, status, groups, and tags. After that, you need to match the columns in your import file to the fields in your Mailchimp audience.
- Finalize your import by reviewing the settings and if everything looks good, click the Complete Import button to finish the process.
If you don’t have an email list ready, you can start collecting emails from your website by creating an email sign up form.
Create an email sign up form
If you’ve a WordPress website, plugins such as Gravity Forms, Newsletter Glue, and MC4WP: Mailchimp for WordPress make it simple to create a signup form.
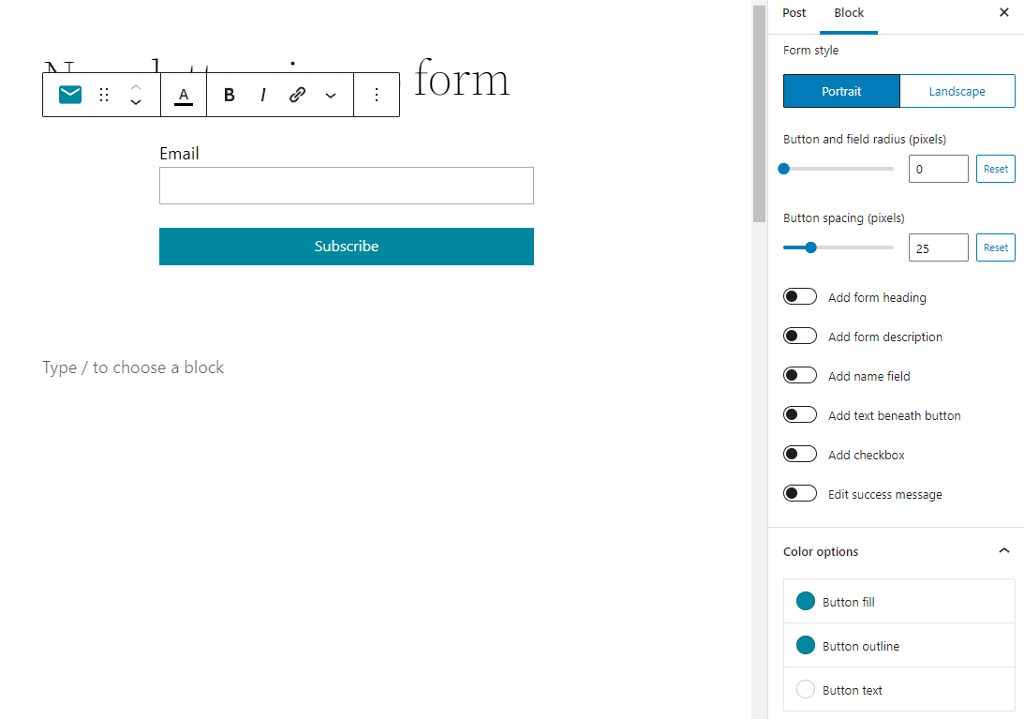
You can read our guide to learn about simple ways to add a signup form to your WordPress website using the Gutenberg block.
Once you’ve got the mailing list subscribers, the next step is to design and create an email campaign.
3. Design and send your first email newsletter
You have two options when it comes to creating and designing your email newsletter in Mailchimp. You can use the Mailchimp editor or, if you’re familiar with WordPress, you can use Newsletter Glue.
How to decide between Mailchimp editor and Newsletter Glue?
Mailchimp builder is a built-in newsletter editor that uses a drag-and-drop editor to help you create beautiful emails. It includes different content blocks that you can add to the editor.
On the other hand, Newsletter Glue is a WordPress plugin that uses the block editor to help you design emails. It uses all of the core Gutenberg blocks as well as comes with a few custom blocks.
Use Mailchimp editor if:
- You ha’ve an e-commerce website and need features like automation and A/B testing to better target your customers.
Use Newsletter Glue if:
- You have a WordPress blog and want to have an archive of your past newsletter issues on the website.
- You use the WordPress block editor on a daily basis and have made yourself familiar with it.
As both cater to different use cases, we’ll show you how to use both to send newsletters to your subscribers.
Use Mailchimp editor to design and send your first newsletter
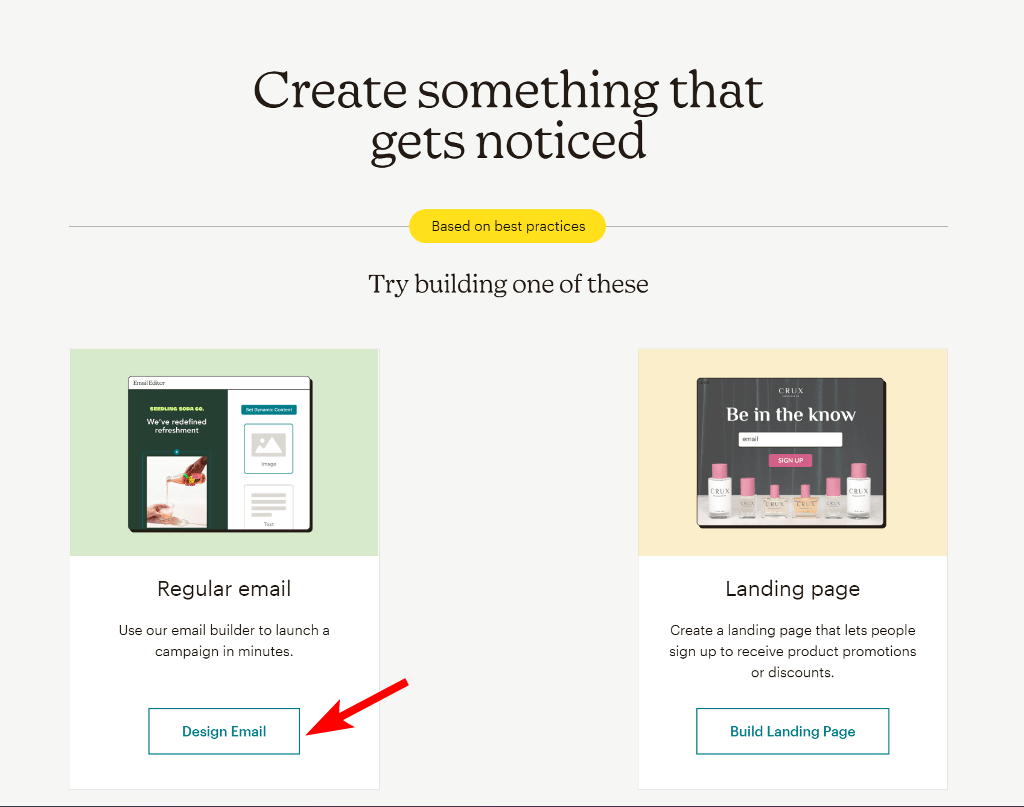
Once you’re into the Mailchimp dashboard, navigate to Campaigns > All campaigns and click the Create Campaign button on the top right.
On the new page, select Regular email and click the Design Email button.
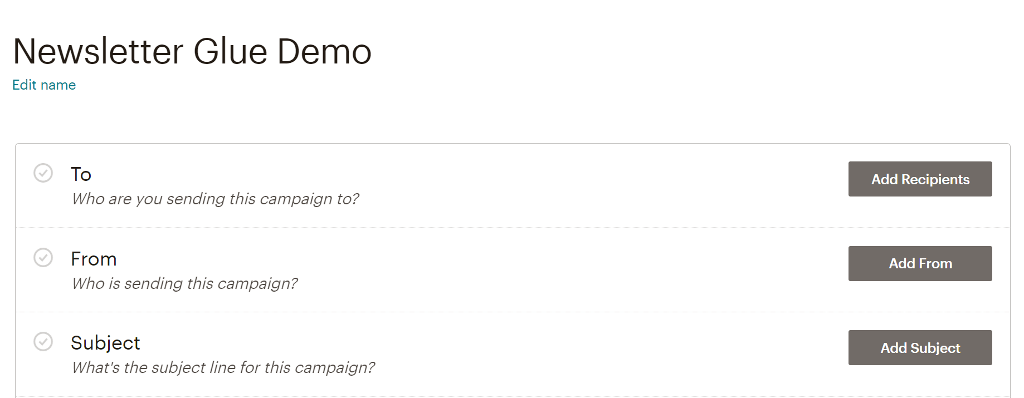
Next, give your campaign a name, choose recipients from your audience, enter a from name, and write the email subject line.
Once that’s completed, the most important step, which is designing the email content, comes next.
Design your email using Mailchimp builder
Click on the Design Email button and you’ll get a popup to choose the email builder of your choice.
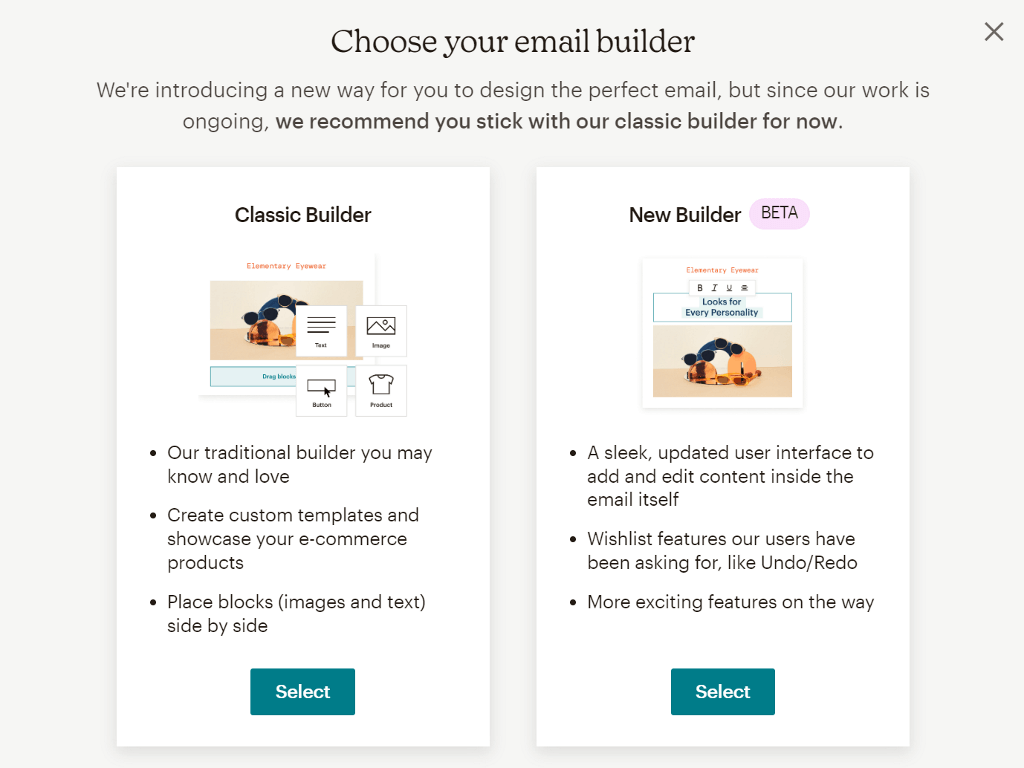
We’ll go with the Classic builder since that’s what Mailchimp suggests for most of its users.
Next, Mailchimp will let you select an email template or a predesigned layout so that we don’t have to design the newsletter from scratch. Since we’re on the free plan, only a selected few templates will be available.
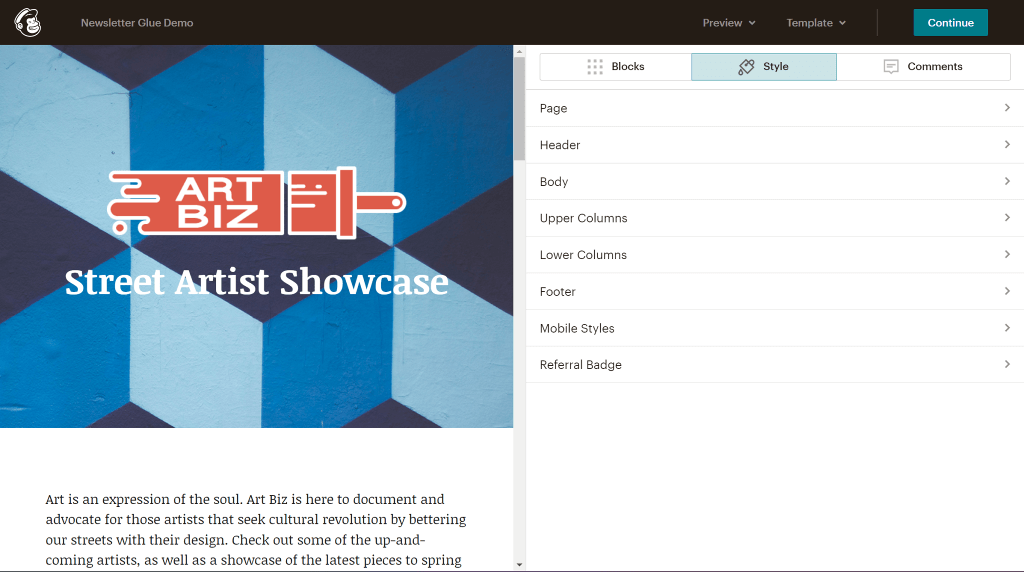
After you’ve selected a template of your choice, the email builder will load it containing all the content of the template.
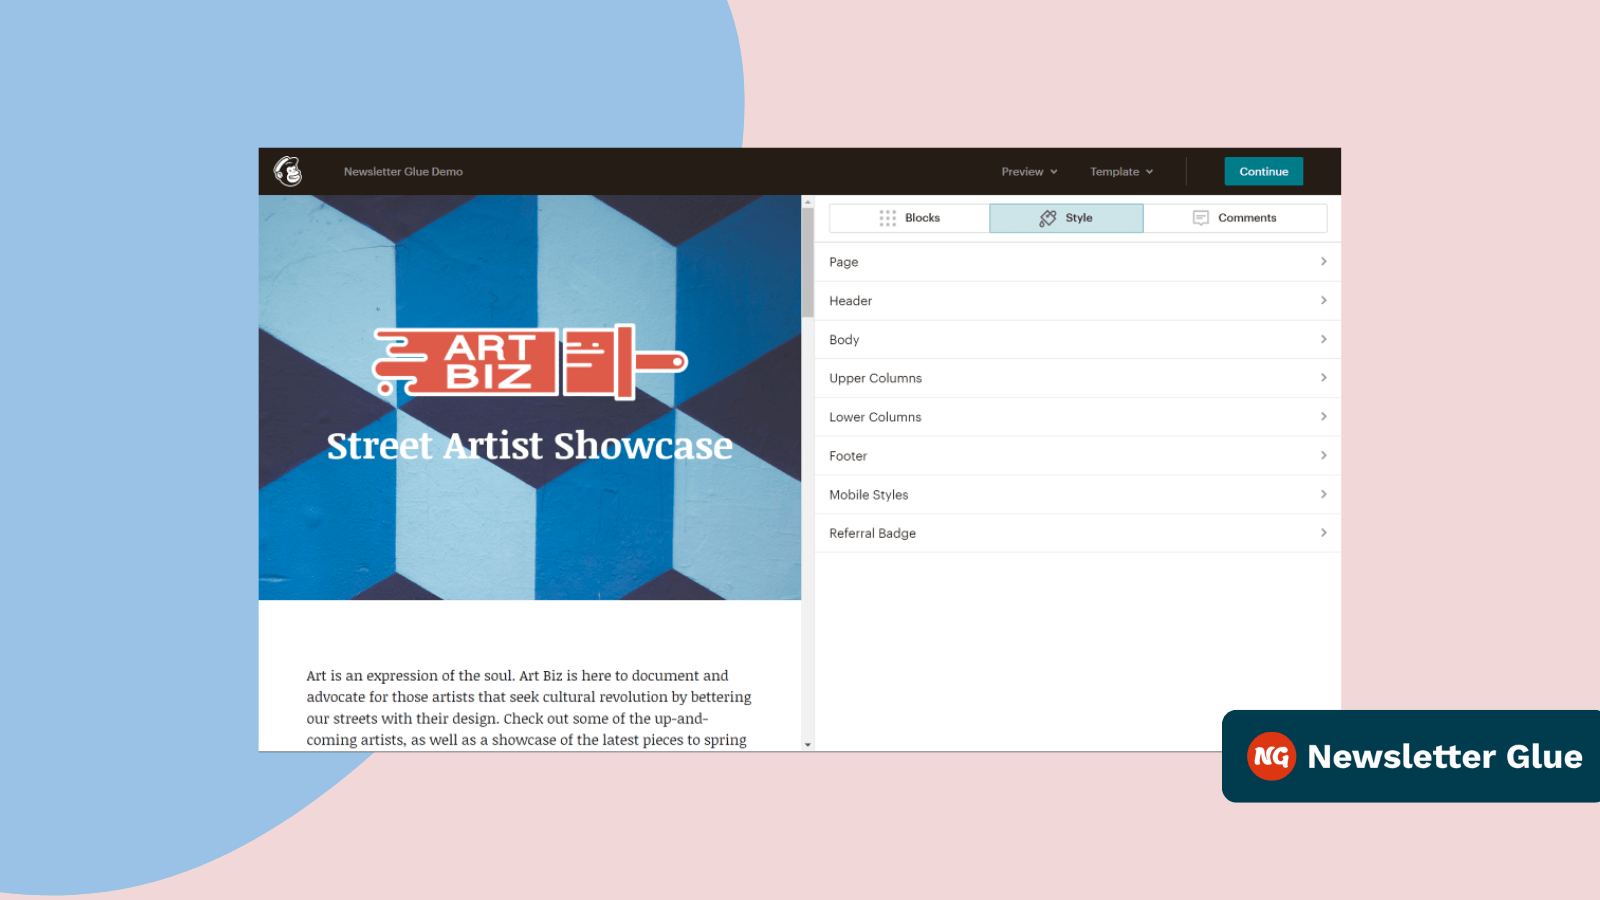
Edit the content or add new blocks to the layout by dragging them from the right sidebar. You can also edit the style of the email such as the font size, font style, color, and more by switching to the Style tab on the right sidebar.
Once your design is ready, click on Continue at the top to return back to the campaigns dashboard.
Do one final check of everything and click on the Send button at the top header to send it to your selected subscribers.

That’s it! Your newsletter created using the Mailchimp builder is on its way to the subscriber’s inboxes. Let’s now look at how to create a Mailchimp newsletter using Newsletter Glue.
Use Newsletter Glue to design and send your first newsletter
Newsletter Glue is a WordPress plugin that connects to Mailchimp via an API and allows you to design newsletters inside the WordPress editor.
The Mailchimp builder is great, but it takes some time to get used to it. If you’re already familiar with the WordPress editor, using it to create newsletters will result in a more efficient workflow and save you time.
Let’s look at how we can use the Newsletter Glue and send Mailchimp newsletter from WordPress.
Install the Newsletter Glue plugin
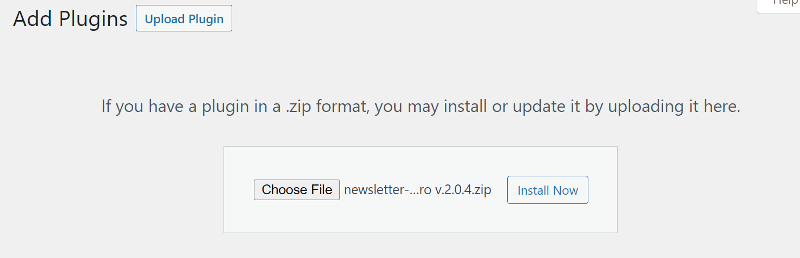
Newsletter Glue is a premium plugin, and you must purchase one of its plans to use it on your website. Go to the Newsletter Glue website and purchase a plan of your choice. Once you are in your account dashboard, download the plugin file to your computer.
Go to your website’s dashboard and navigate to Plugins > Add New to upload, install and activate the plugin.
Once activated, the plugin will launch the onboarding wizard to help you configure it. You can read the documentation, which will walk you through the onboarding wizard and help you in connecting the Mailchimp API to Newsletter Glue.

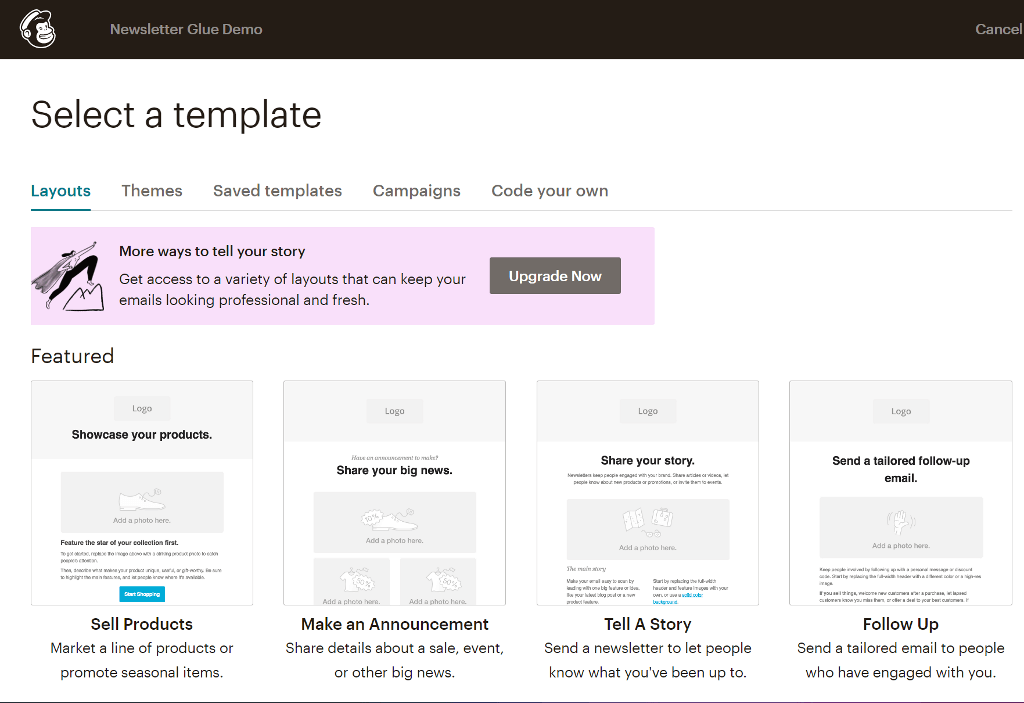
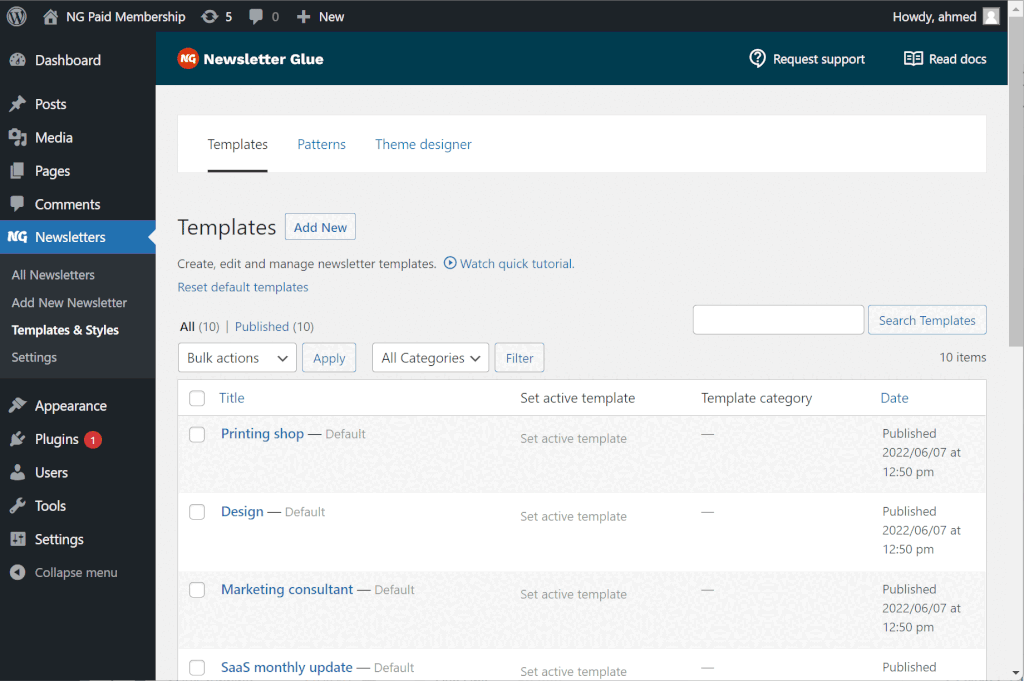
After completing the onboarding wizard, go to Newsletters > Templates and Styles and under the Templates section, set one of the pre-made templates as your default template. You can see a preview of these templates in the Newsletter Glue Template Library.
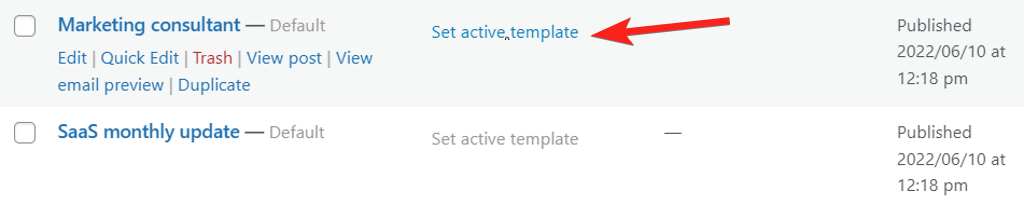
You can also design a custom template in the block editor and set it as your default template.
When you create a new newsletter, the templates you set here will be loaded automatically.
Design your newsletter using Newsletter Glue
After you’ve set a default template, go to Newsletters > Add New Newsletter. This will load the default template you specified. Fill out the template with content, then scroll down to the bottom.
Most of the fields in the settings panel will be pre-filled based on the information you entered in the onboarding wizard. You only need to add a subject and a preview text.
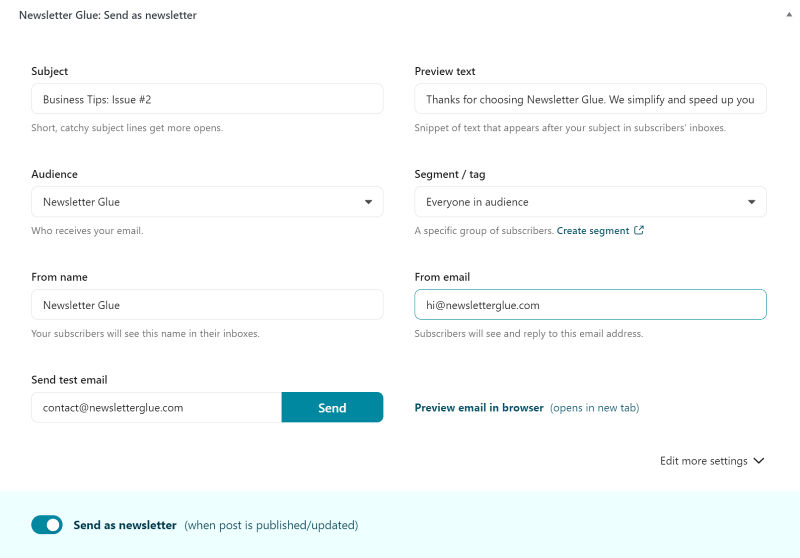
Before publishing your newsletter, Newsletter Glue lets you send a test email to ensure that everything looks as it should. For a safer side, change your segment/tag/list to a test version to avoid accidentally sending it to your entire mailing list.
Next, change the email for the test or keep it as the admin email address, and then click the Send button. Check your inbox for a test email of your Newsletter.

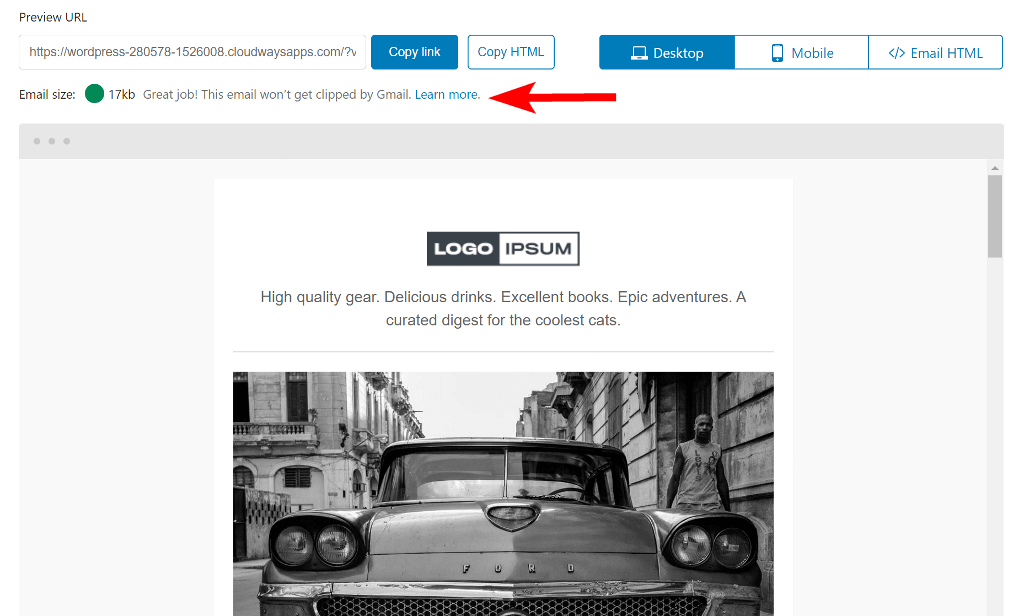
Alternatively, to check how the newsletter will look in real, you can preview and see it on both mobile and desktop devices. Click the Preview email in browser link next to the Send button to open the preview in a new tab.
The preview tab also displays the email size and tells you whether or not it will be clipped in Gmail. This is a very useful feature if your Mailchimp email is not displaying correctly in Gmail.
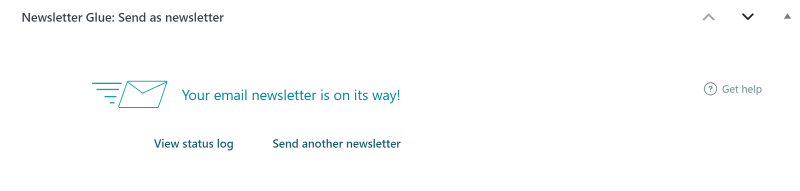
Once you are ready to publish the newsletter, toggle the Send as newsletter button and hit the Publish button at the top.

At the bottom of your post, you should see a notification that says, ‘Your newsletter is on its way!’
If you go to your Mailchimp dashboard, you should see the newsletter we just sent there.
Wrapping up: How to create a Mailchimp newsletter
Creating a newsletter with Mailchimp is simple and does not require any technical knowledge. You can create and design the newsletter using either the native email builder or Newsletter Glue.
If you’re already familiar with WordPress and don’t want to spend time learning a new interface, using Newsletter Glue makes more sense. It will help you in creating a more efficient workflow and will save you valuable time.
